Kombucha has been a staple drink in our house for years and I’m so happy to be sharing my method with you guys. I know it can seem intimidating at first (I was terrified of trying to make this when I first started) but it really is so simple!
Long before I started making kombucha, I was drinking it. I would buy at least a couple a week, at upwards of $3-$4 each. My kids would drink it too and I continued to buy it because I knew how healthy it was for us. Finally, I bit the bullet and decided to try my hand at it and I’m so glad I did. It’s way easier than I thought and also saves me money making it myself. I know there are probably other methods people use and this is not the only way but it’s my way, it works for us and it produces yummy, bubbly kombucha.
Here’s how I make it…
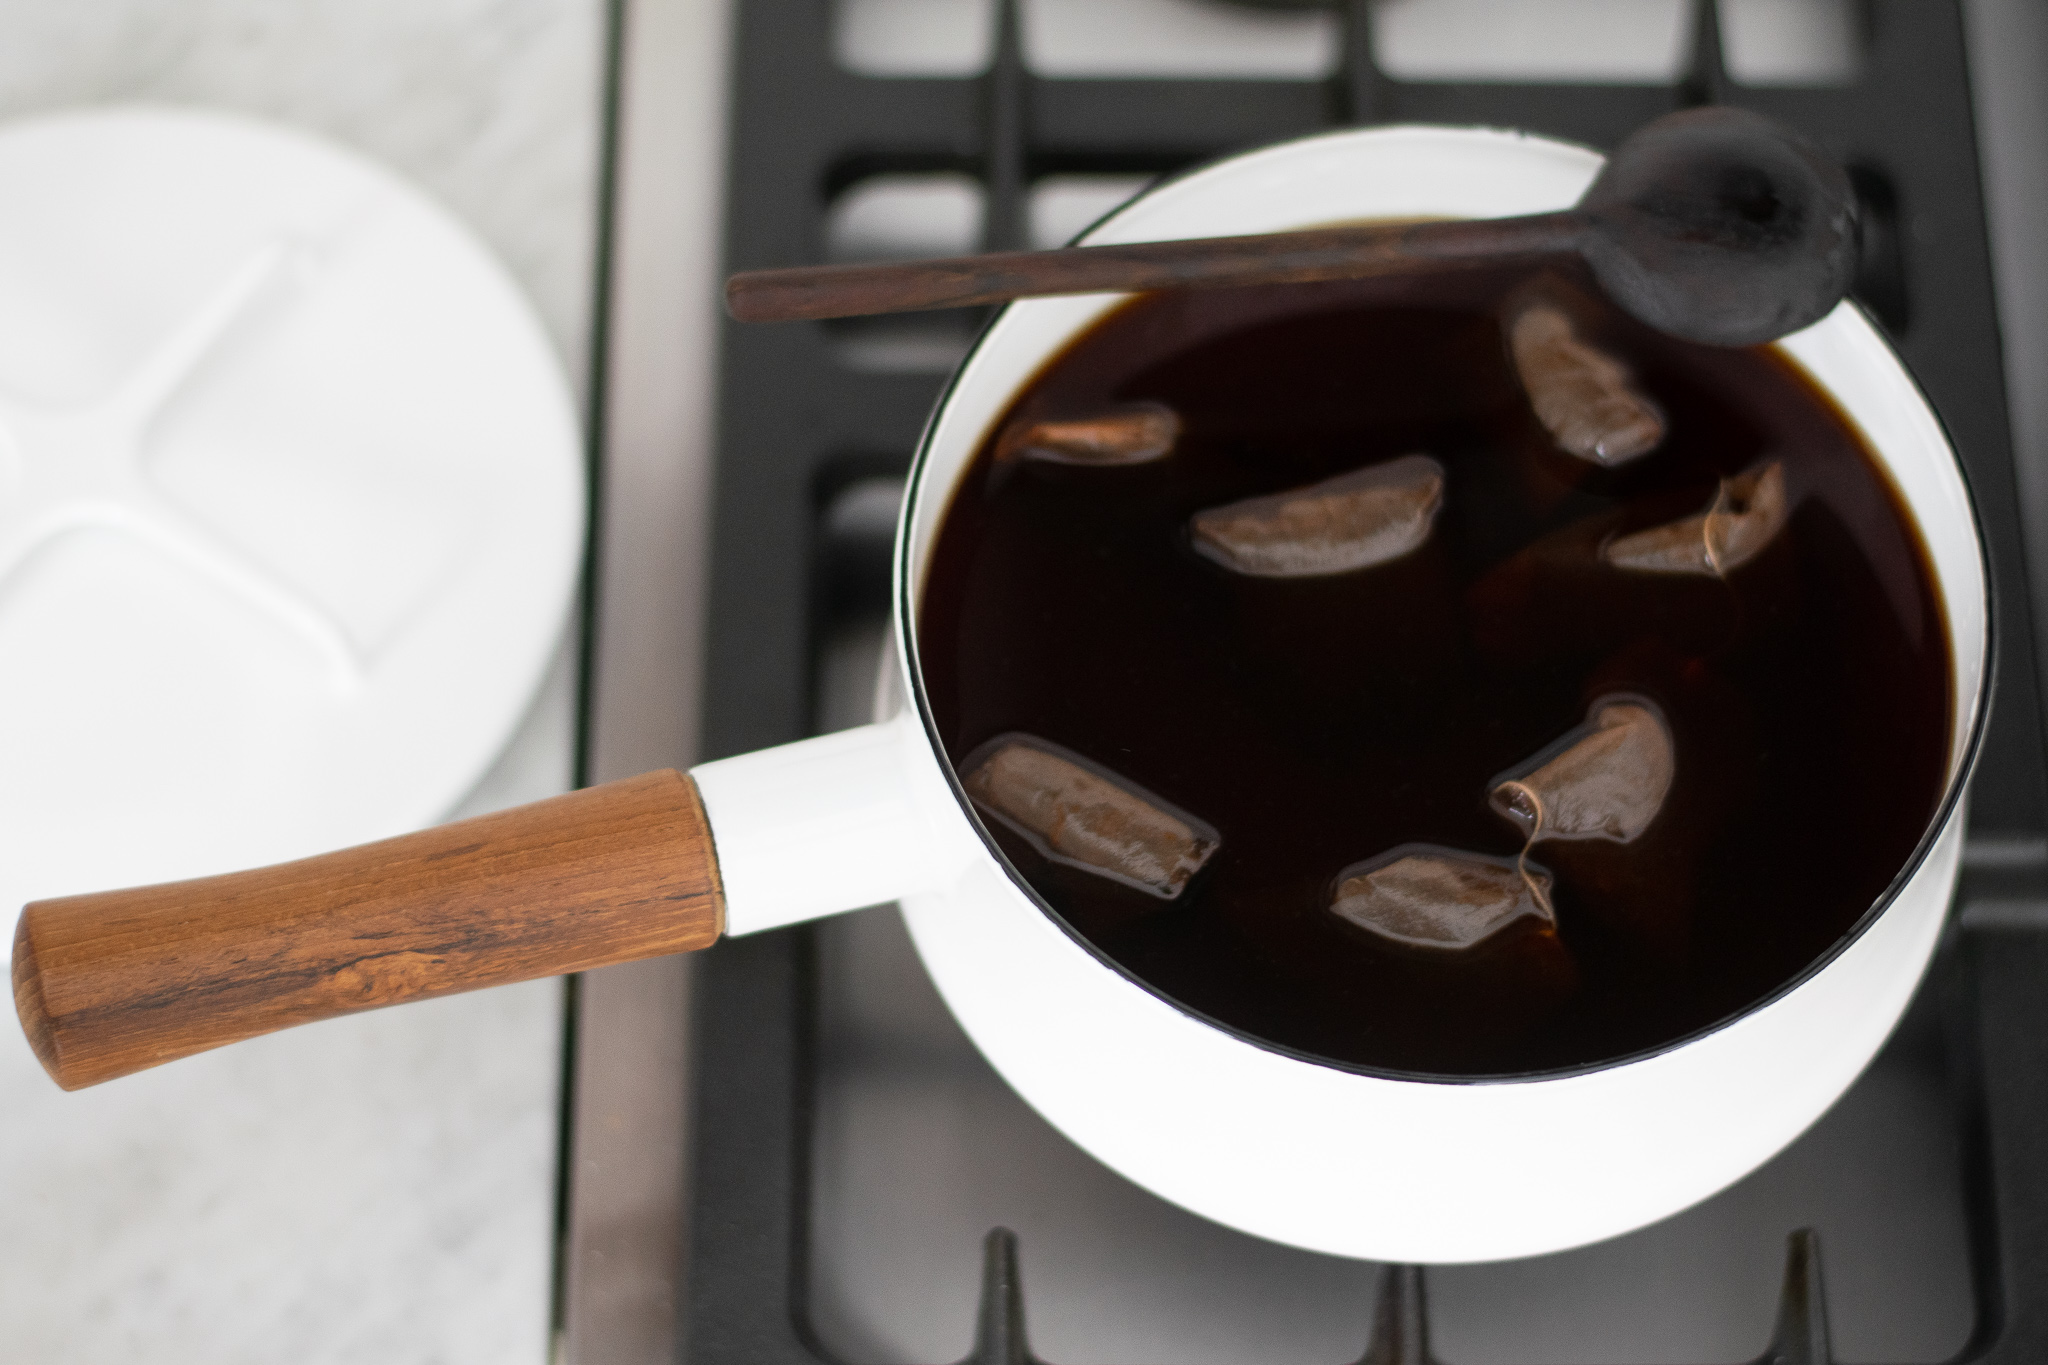
The first thing I do is brew some black tea. I use 8 bags of an organic black tea and steep it in a pot with some water. Just before it starts to boil, I add in 1 1/2 sugar and stir until it’s dissolved. Then I let it sit on the stove until it’s completely cooled with the tea bags still inside.
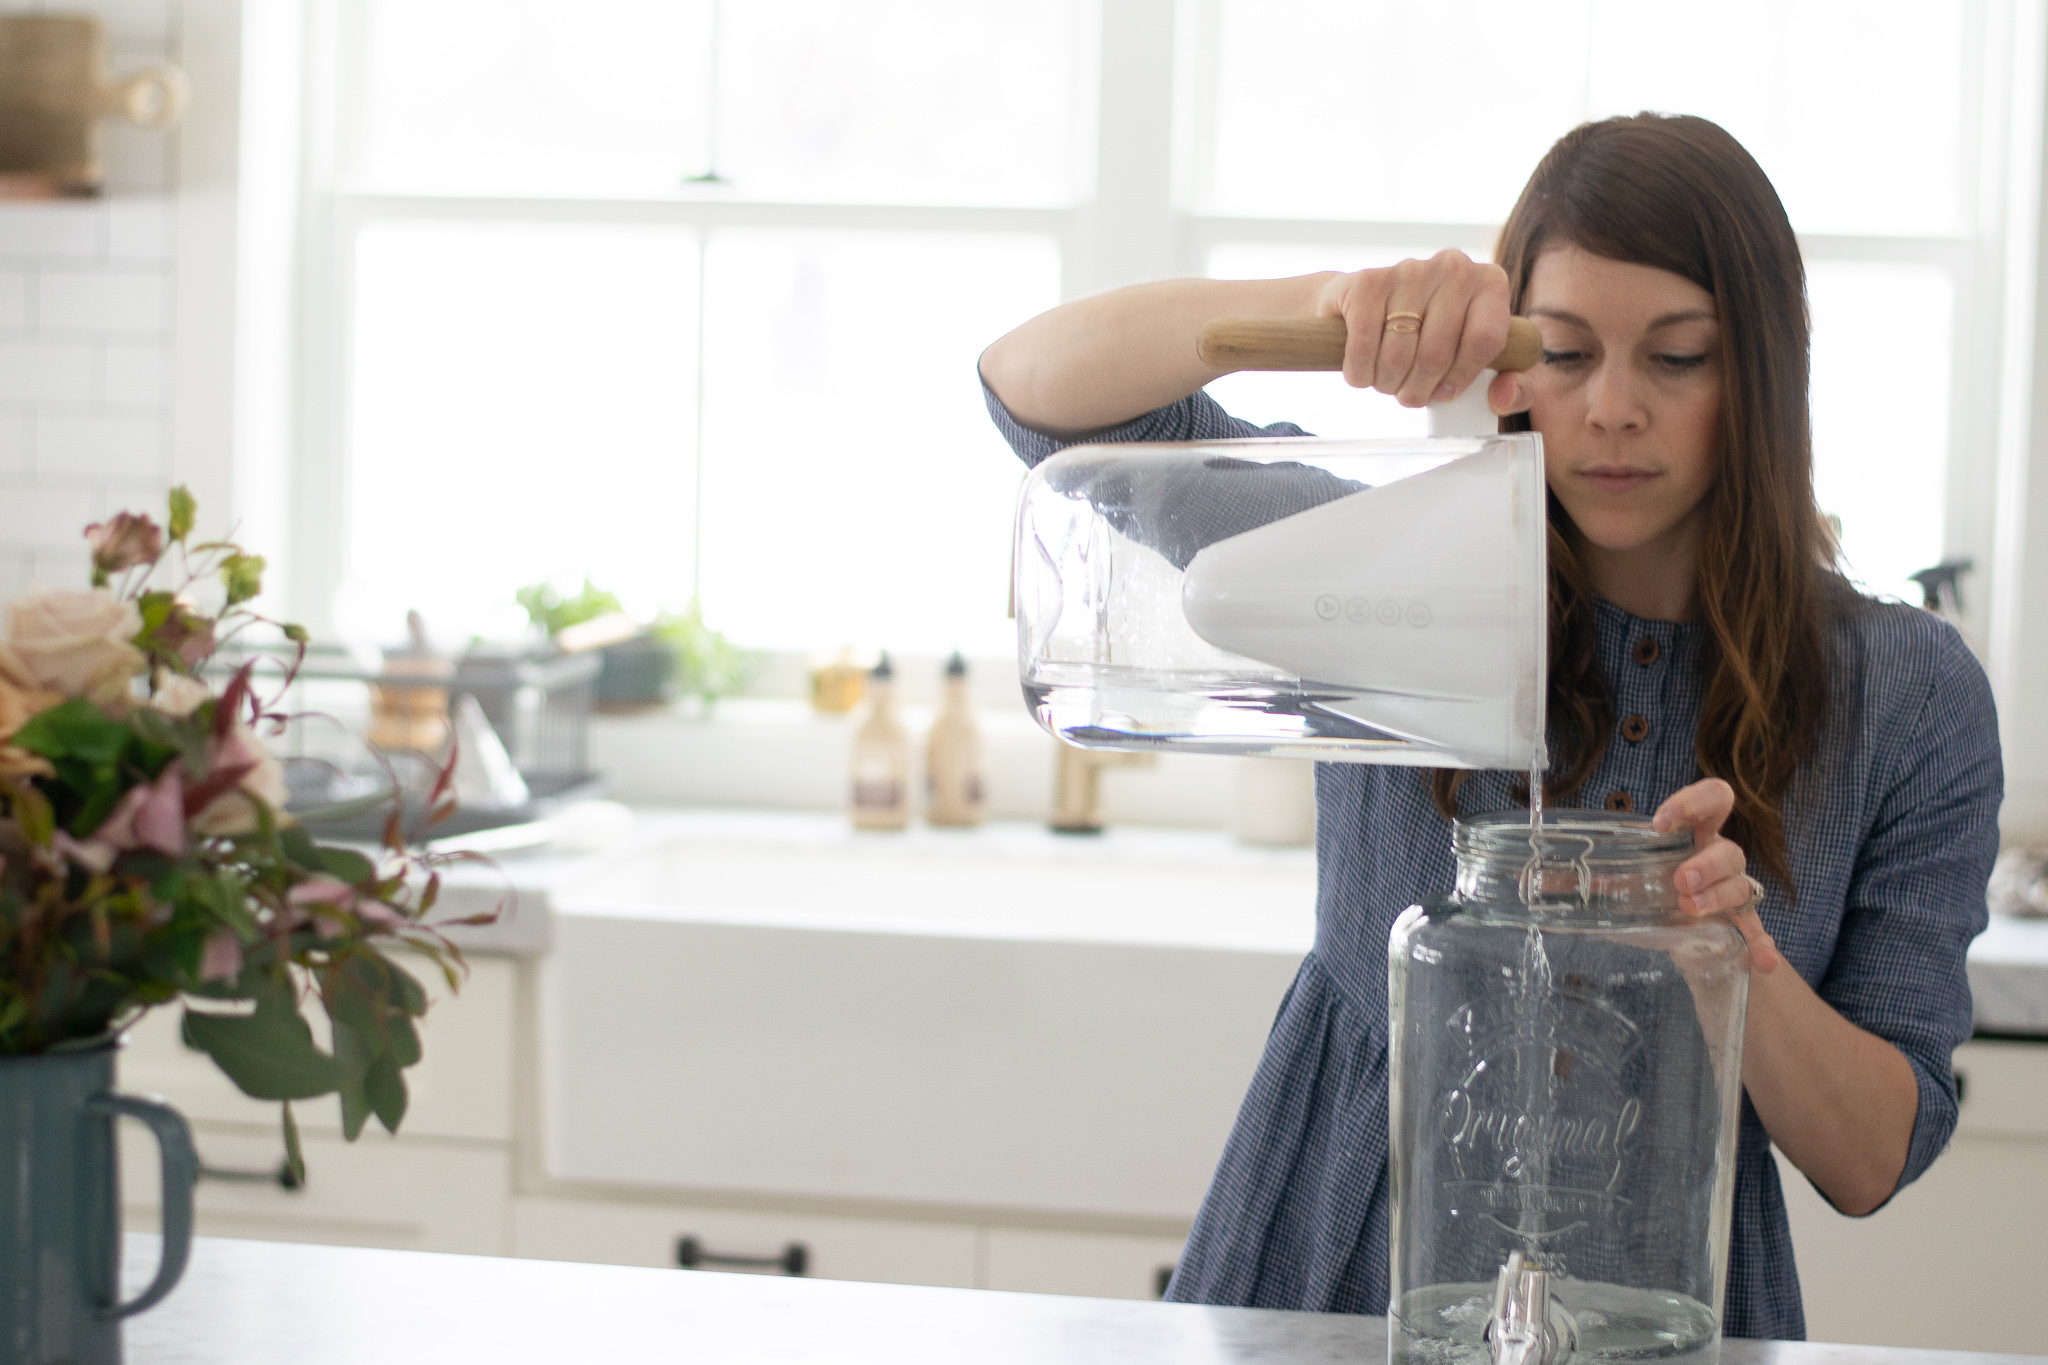
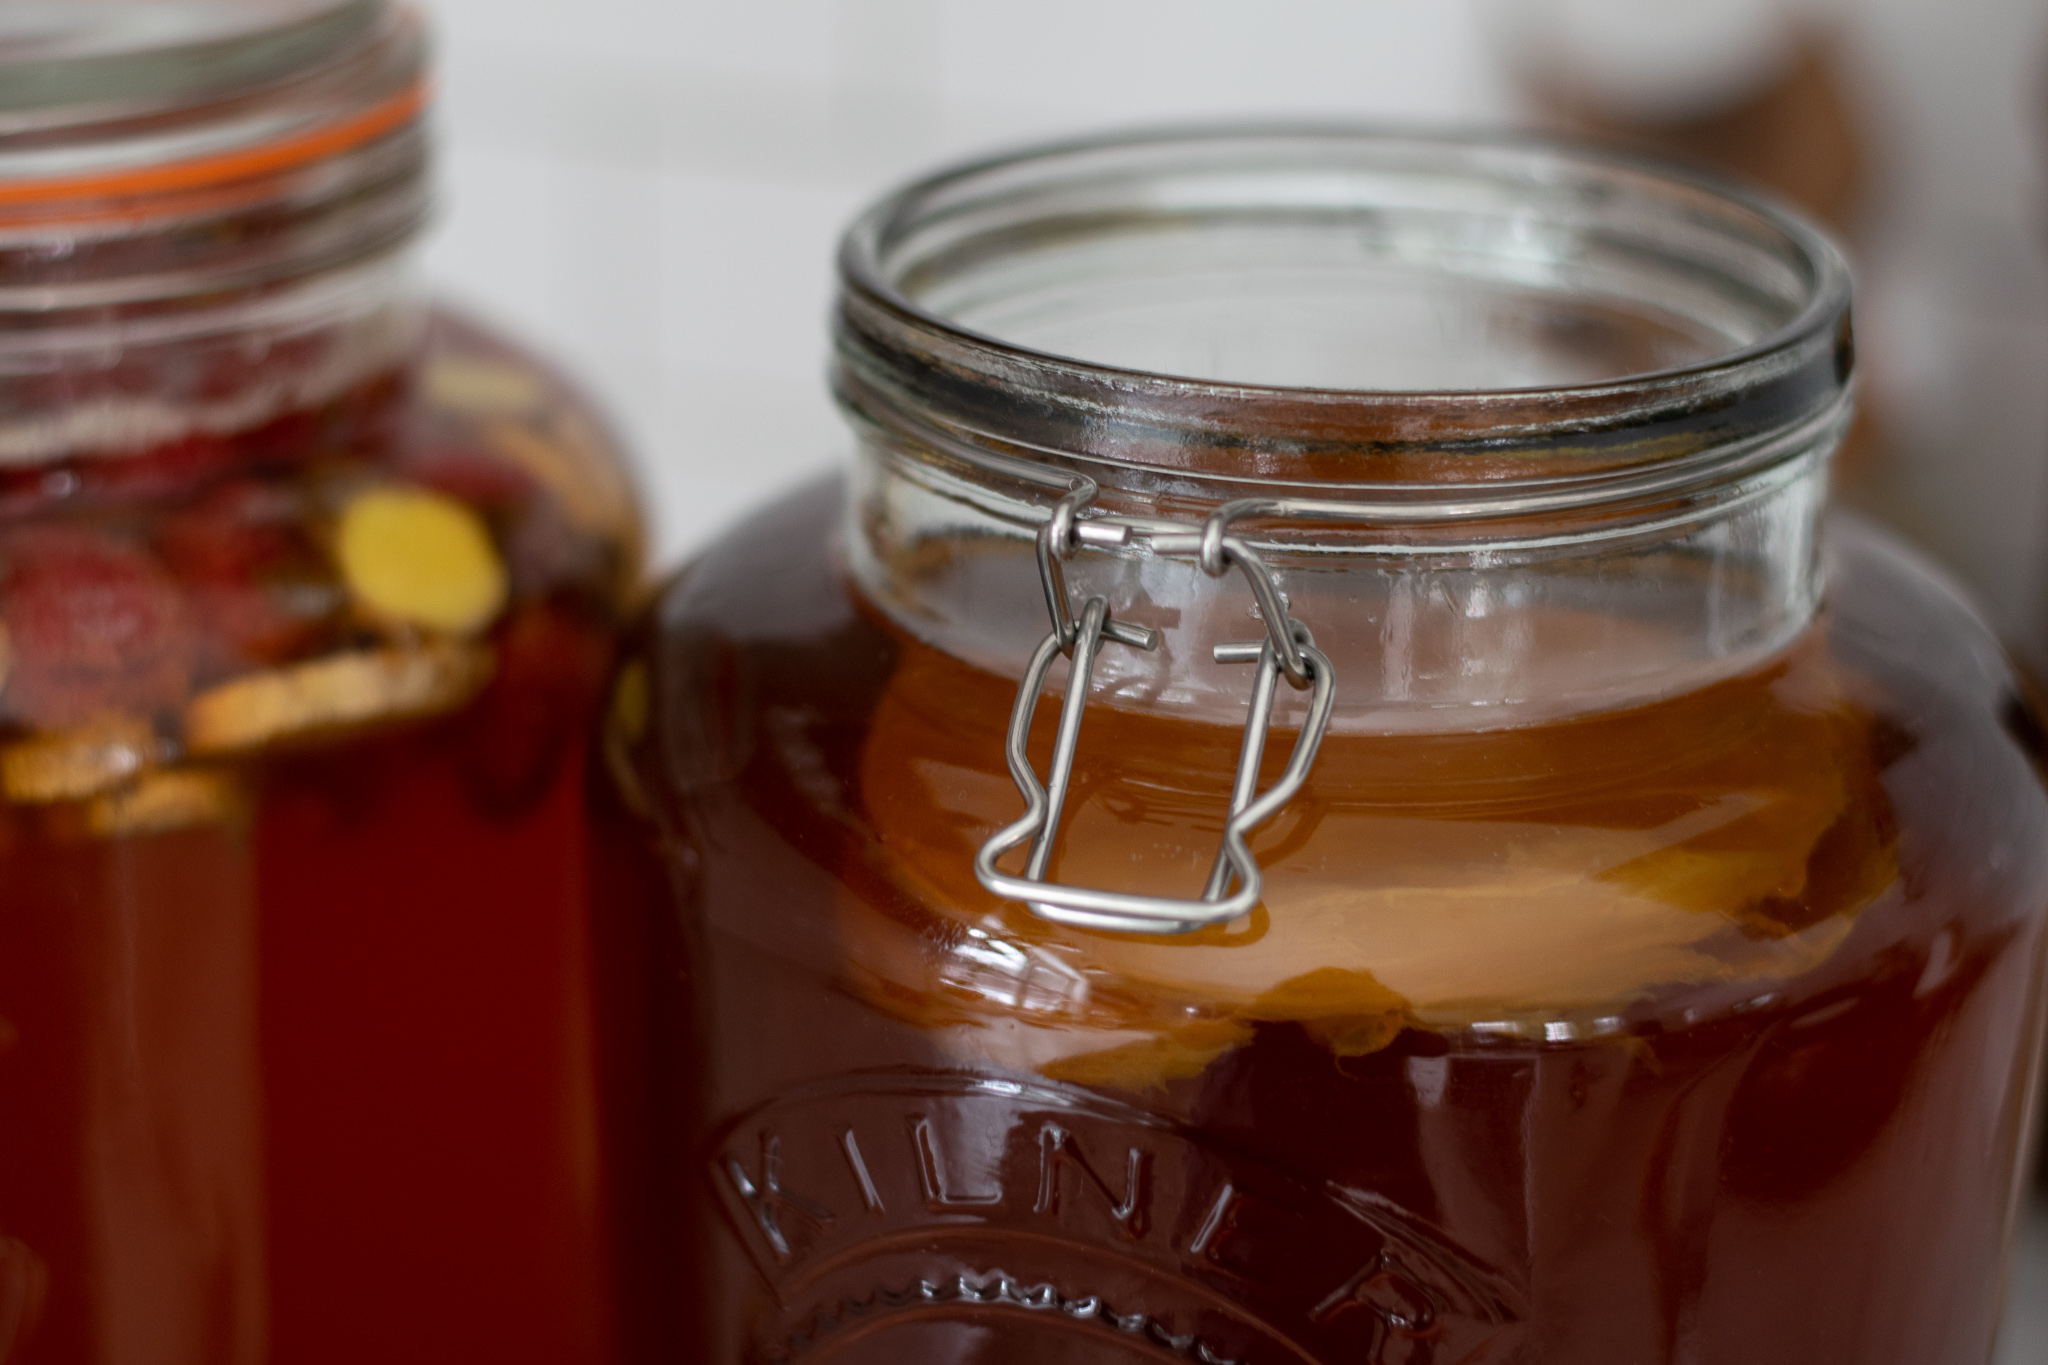
Once the tea is cooled, I fill up a 5 liter pitcher with filtered water, leaving room for the tea. Then, I pour the tea into the jar. If there is still room in the pitcher, I always top it off with water until it reaches the smaller brim on top. This is because my scoby will take the form of whatever container it is in and since it is usually floating at the top, this is as big as I want mine to get.
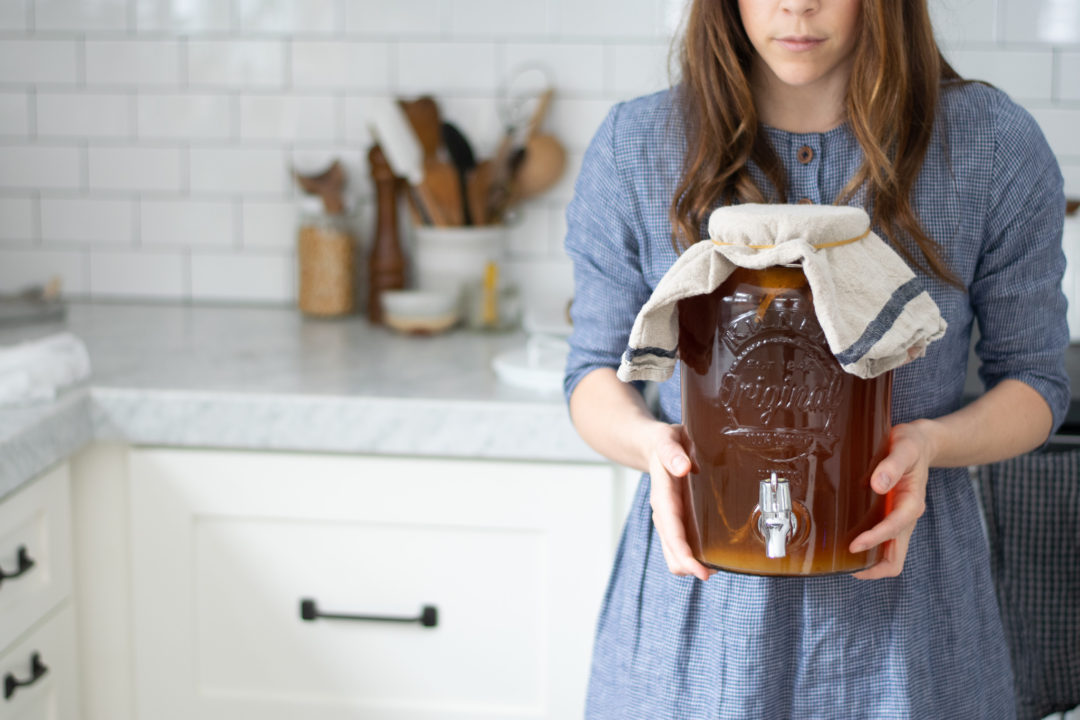
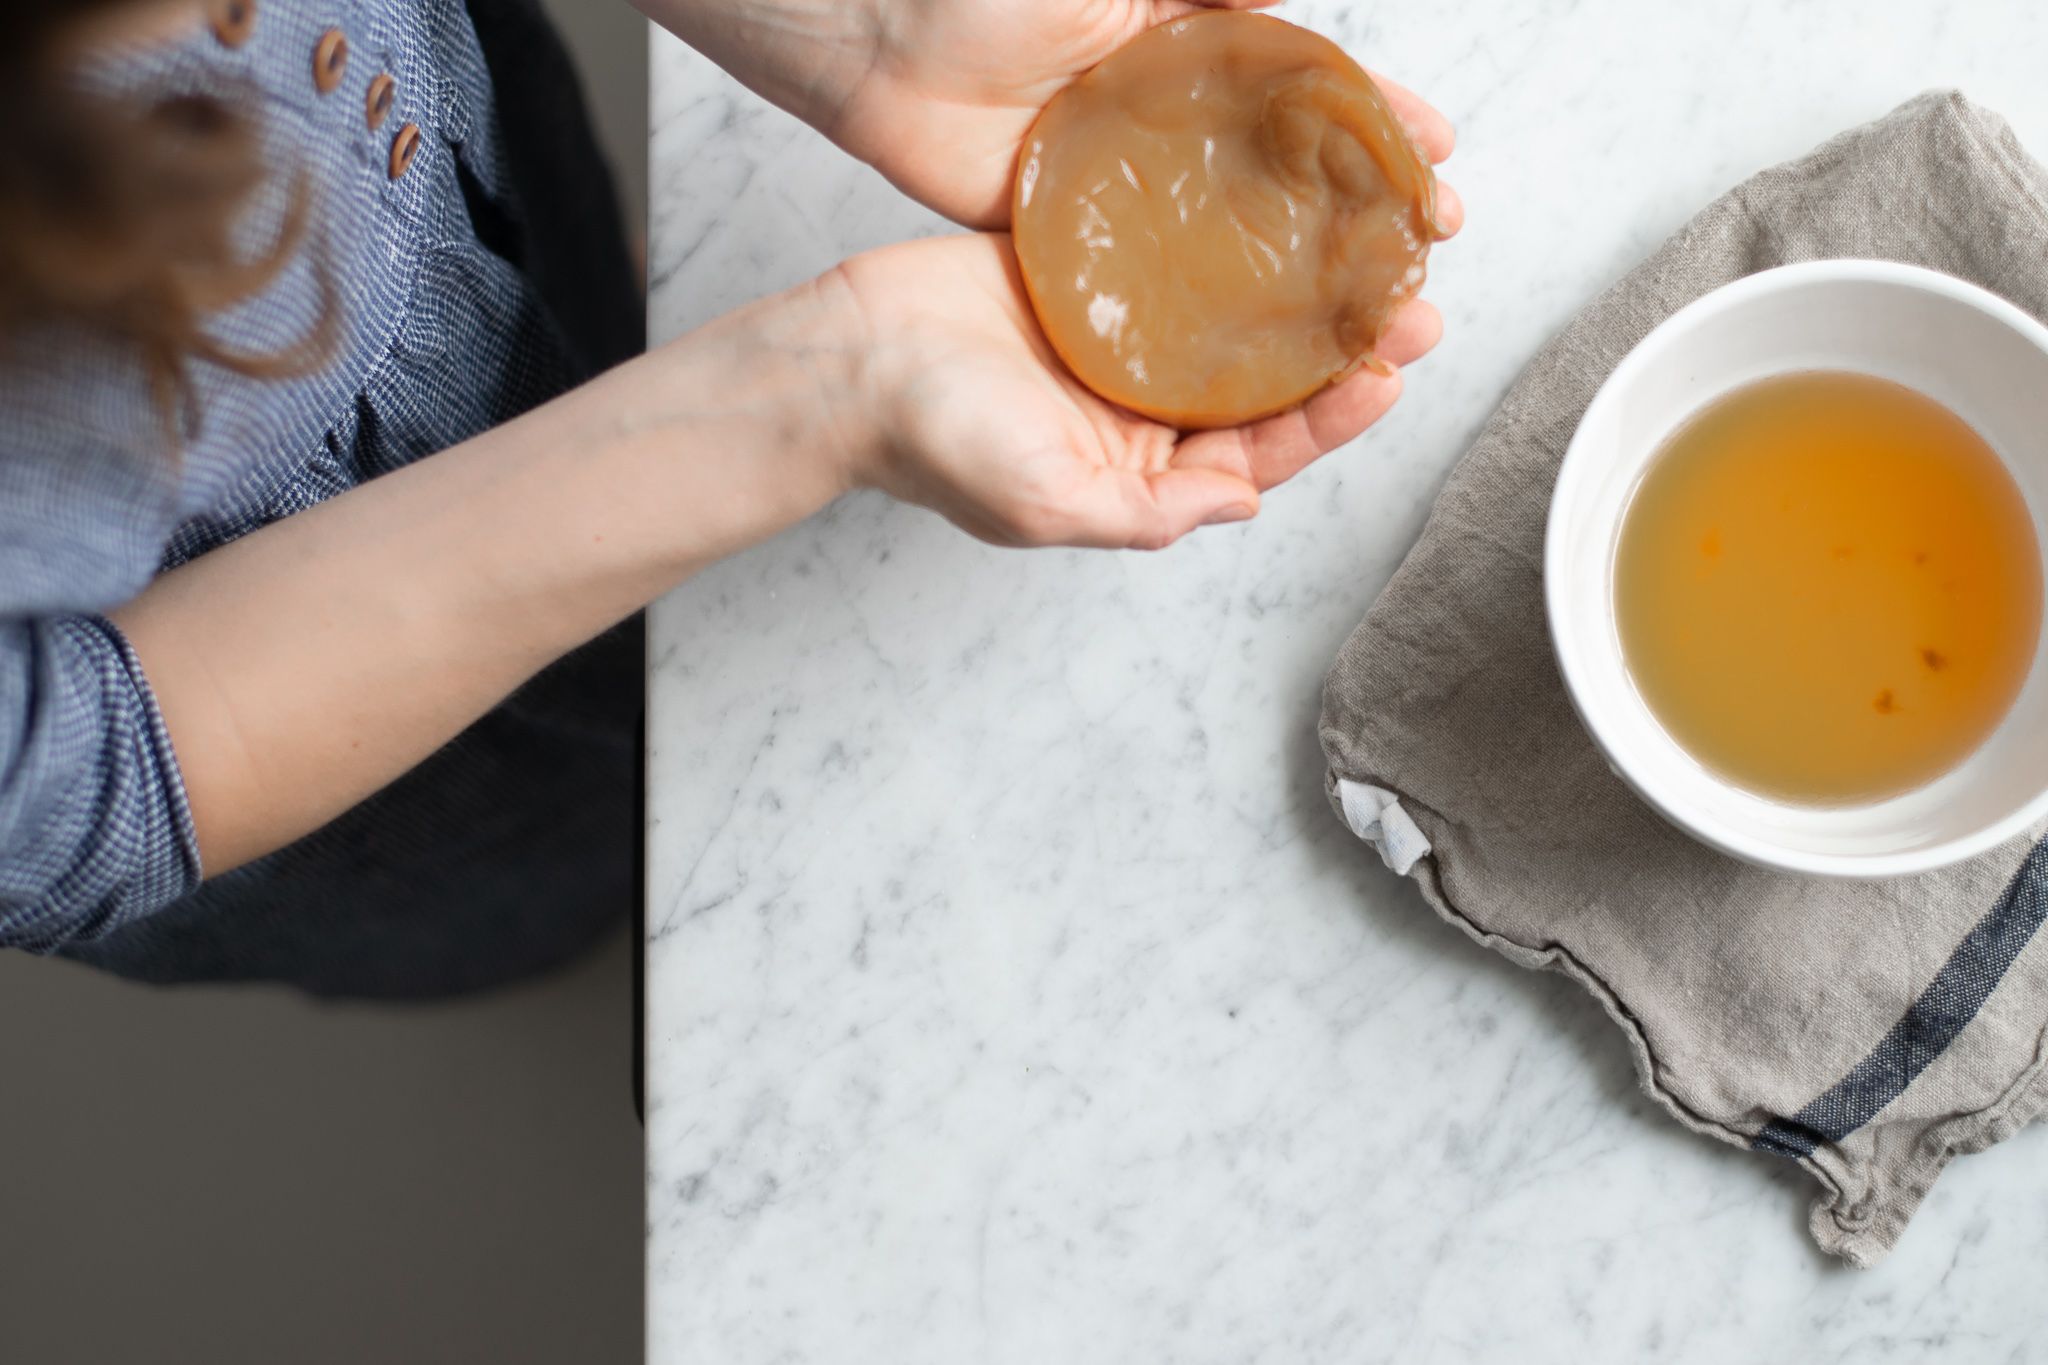
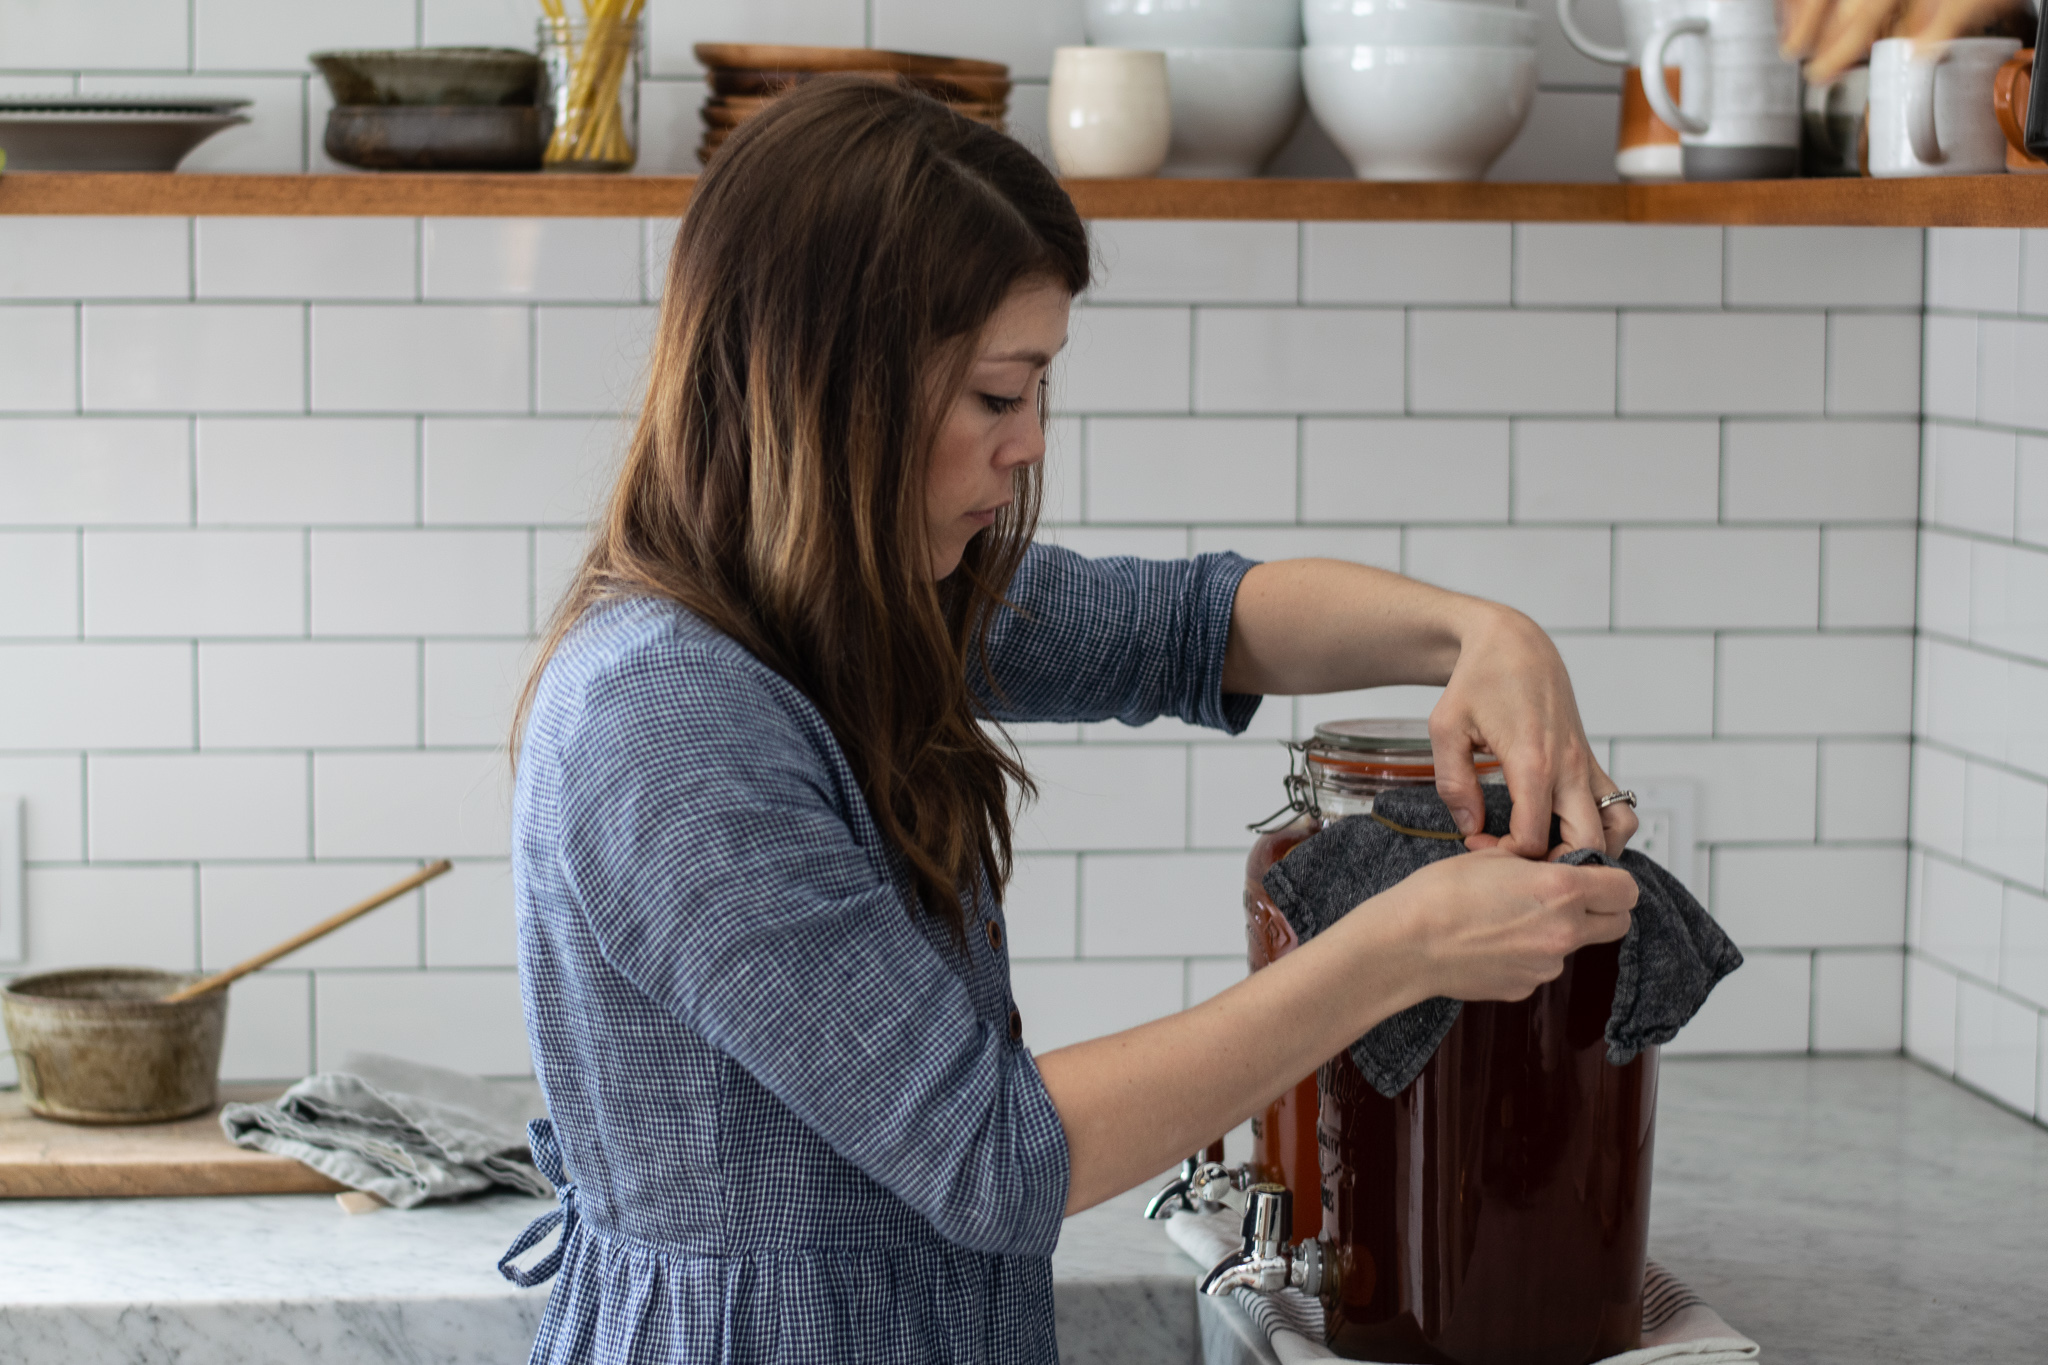
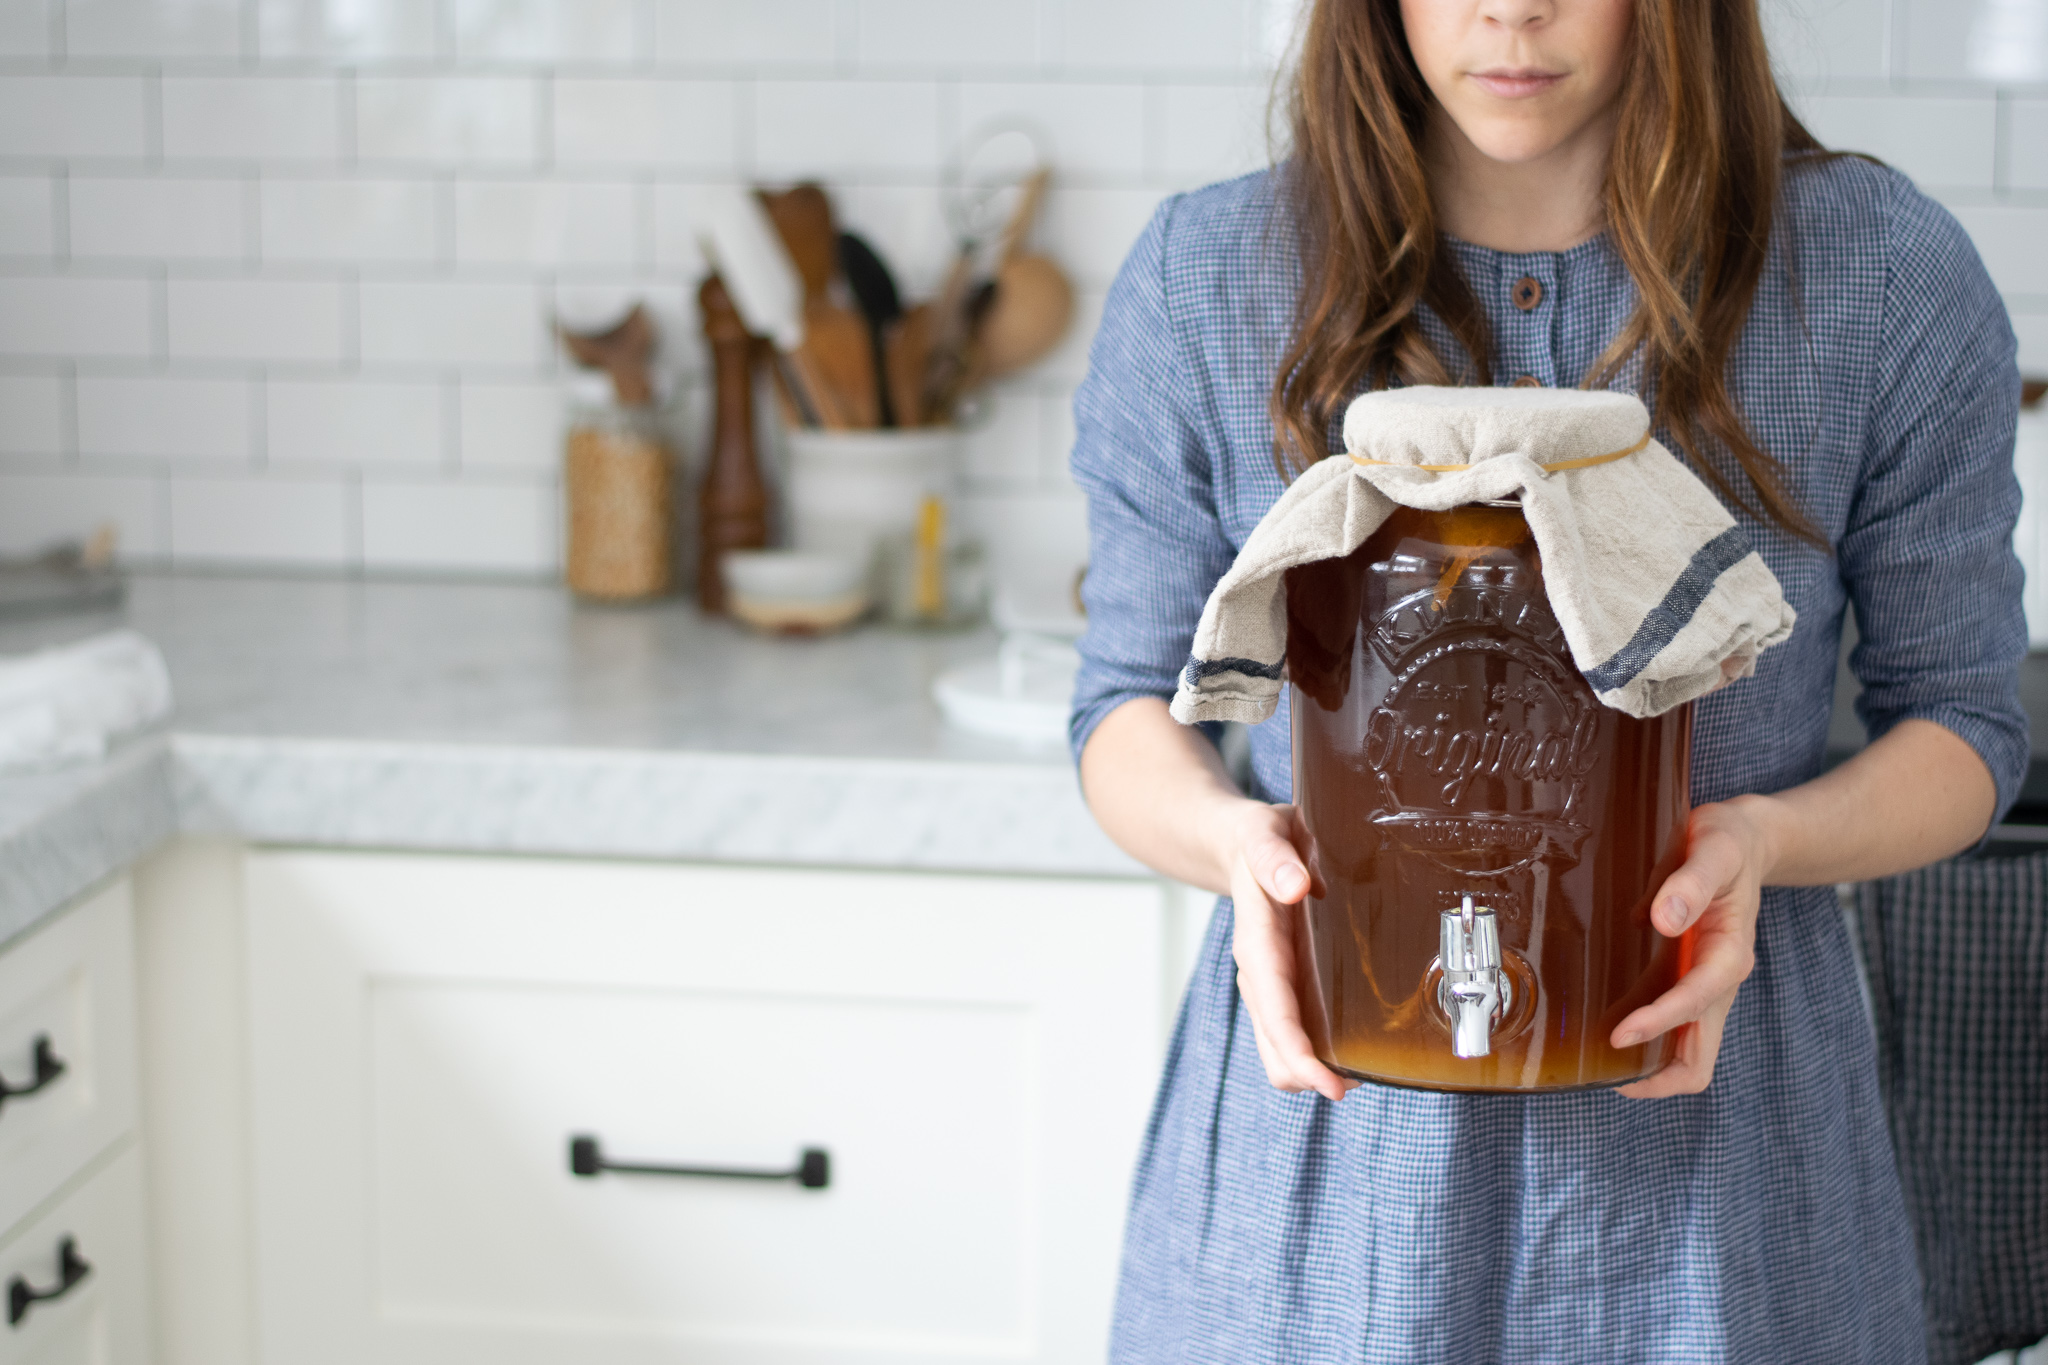
When the pitcher is filled with the tea and water, I just simply place my scoby inside and cover the pitcher with a linen towel or cloth napkin and tie it with a large rubber band. This allows the kombucha to breathe while it’s fermenting. I got my scoby from my mom who got it from a friend locally. I would suggest going to your local co-op or finding a friend in your area who can give you one. Each time you brew your kombucha, it grows a “baby” that attaches to the “mother” (the original scoby) so you will always have scoby to share with others! You can simply peel off a layer and keep some for yourself while giving some away.
If someone you know makes kombucha, chances are they have scoby to share. Here is a link to some that you can purchase online if you don’t have a source locally.
After the scoby has been added, I let it sit on the counter for one week for the first ferment to take place. Make sure you don’t leave it to ferment too much longer than this since it can become very vinegary tasting. Leave it in a dark place (not by a window) or put a towel over it while it is going through this phase.
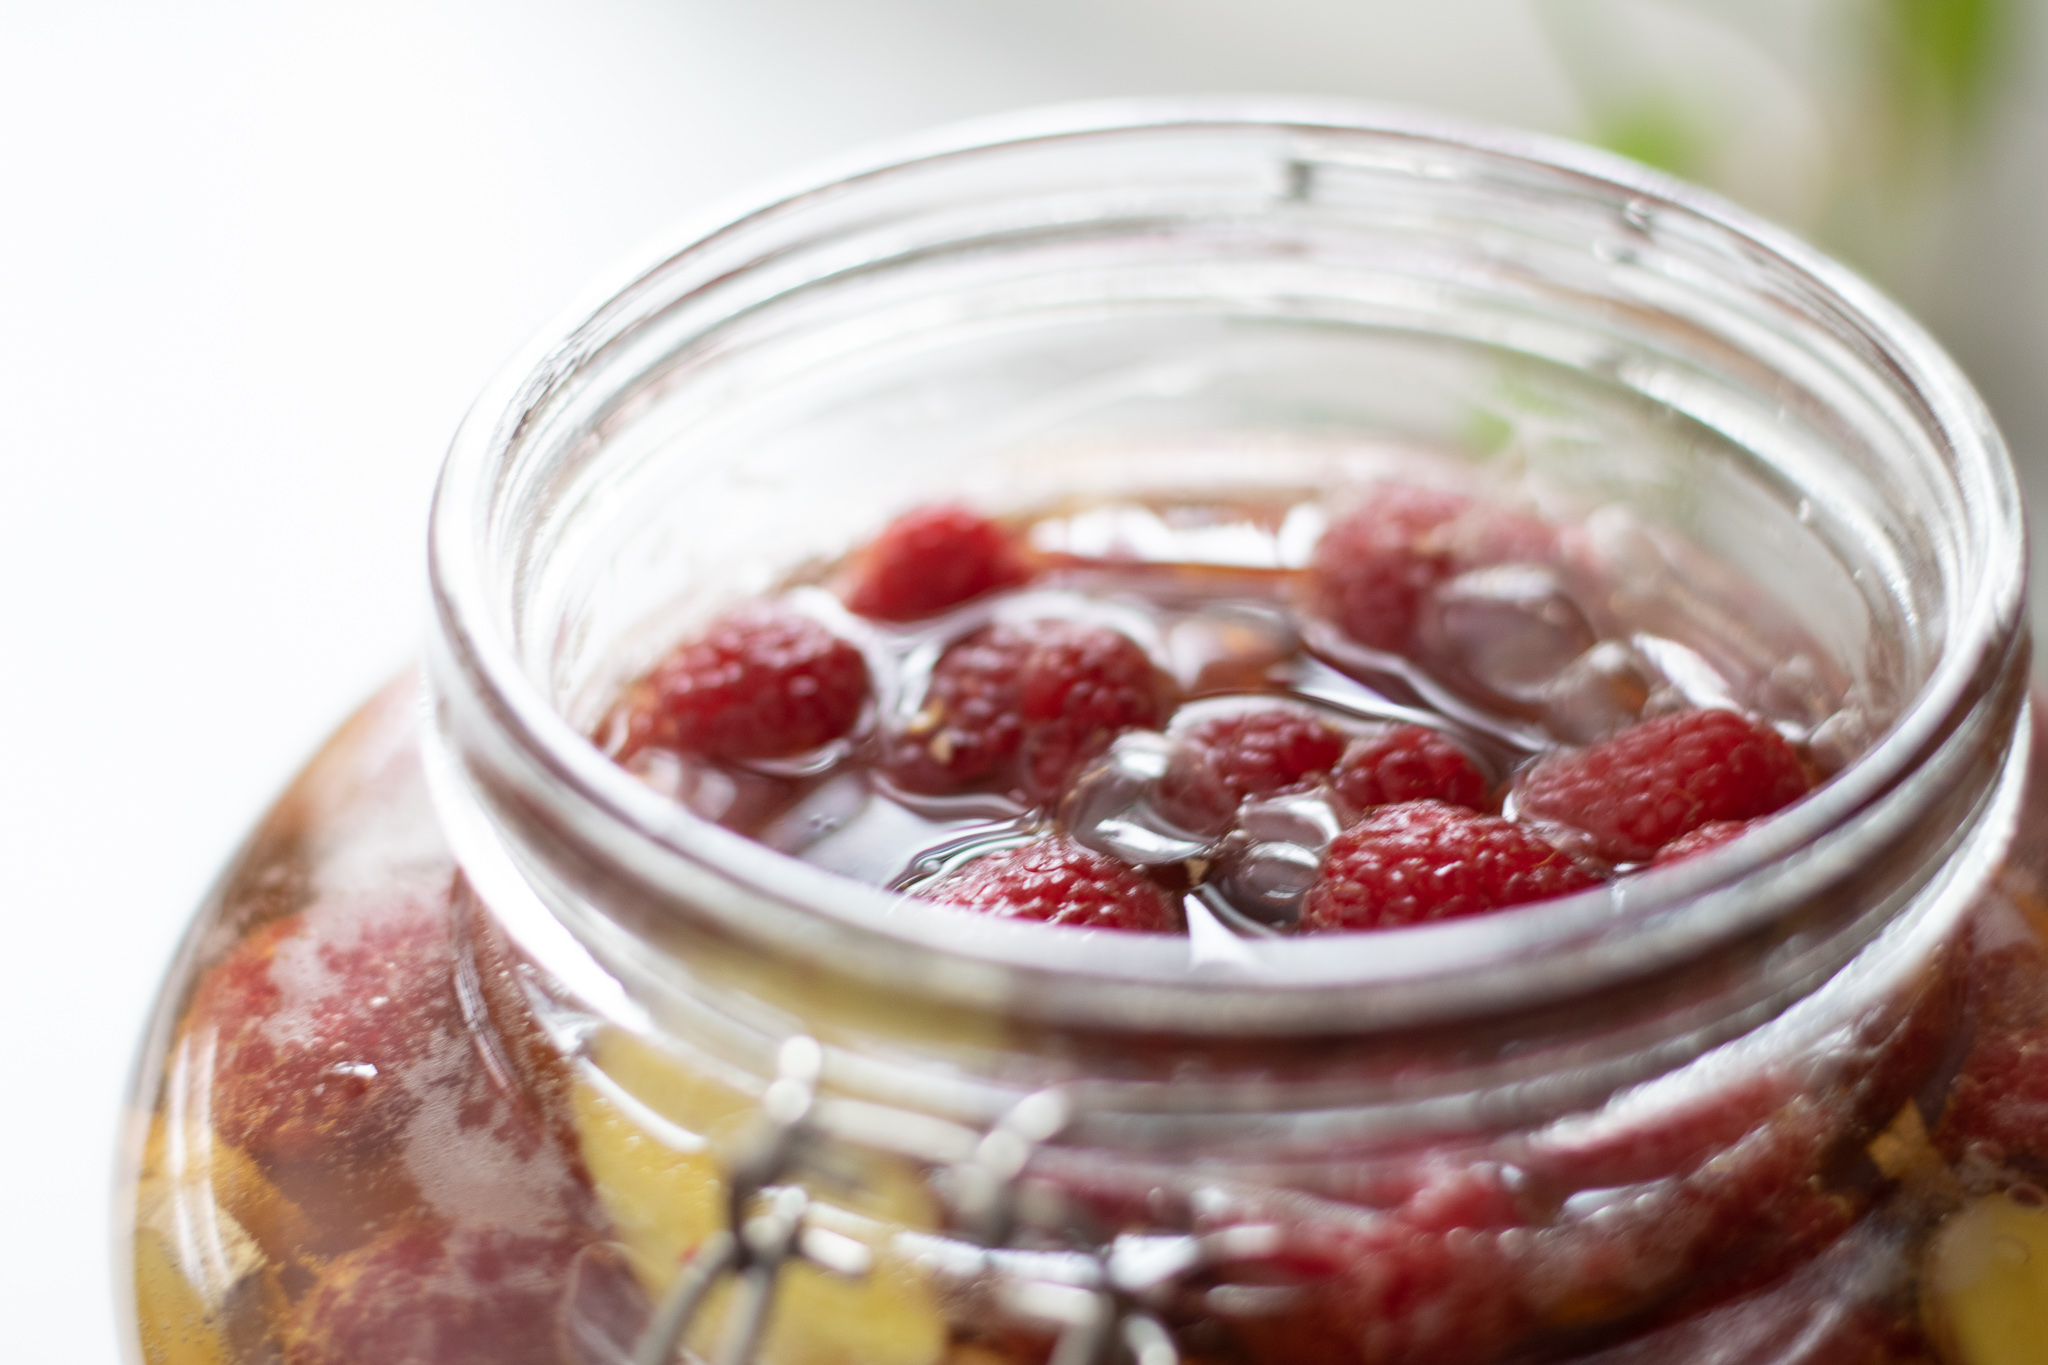
Then you are ready for the fun part. After the first week of fermenting, you get to add in the fruit to flavor your kombucha. Many recipes call for varied amounts of fruit juice or whole fruit but I have found that whole fruit adds the most flavor. The sky is the limit as to what you can flavor it with but I tend to lean more towards berries or citrus. There is also no exact amount that you need to use. It all depends on how sweet or how much of the flavor you want. Before adding the fruit, make sure you take the scoby out as well as a cup or so of the fermented tea. This will leave room for you to add the fruit as well as give you some of the tea to add to your next brew batch.
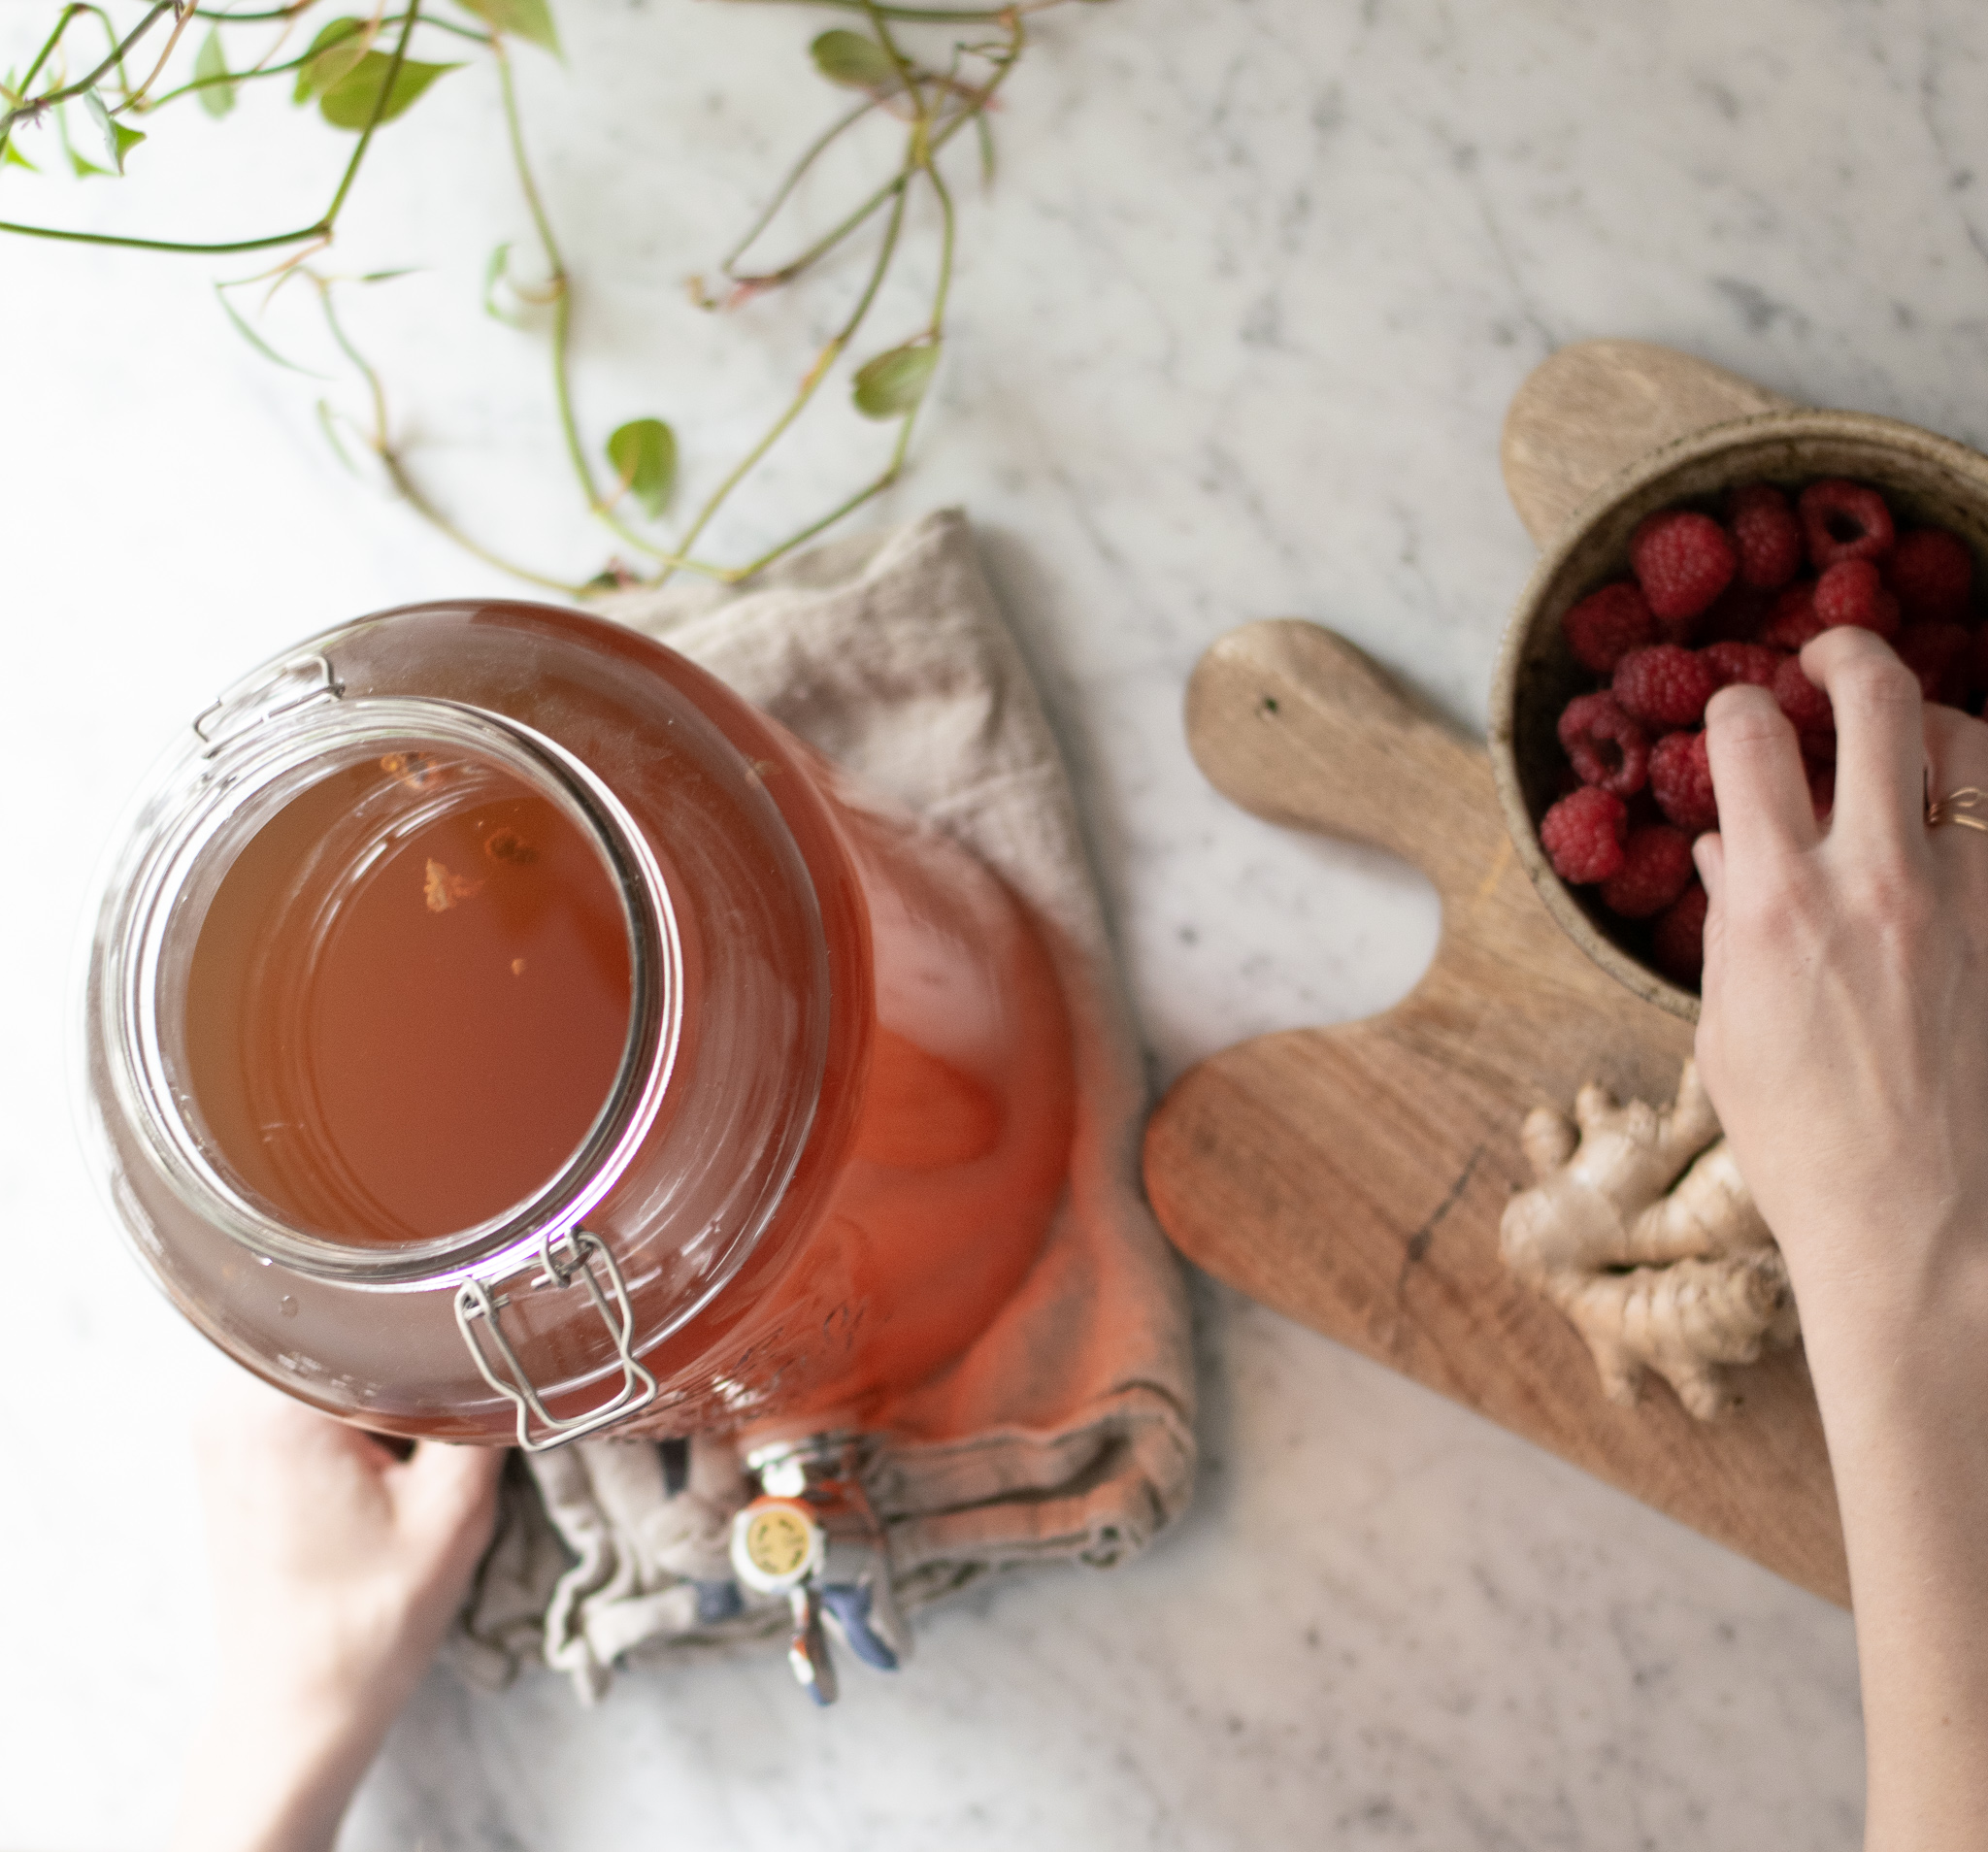
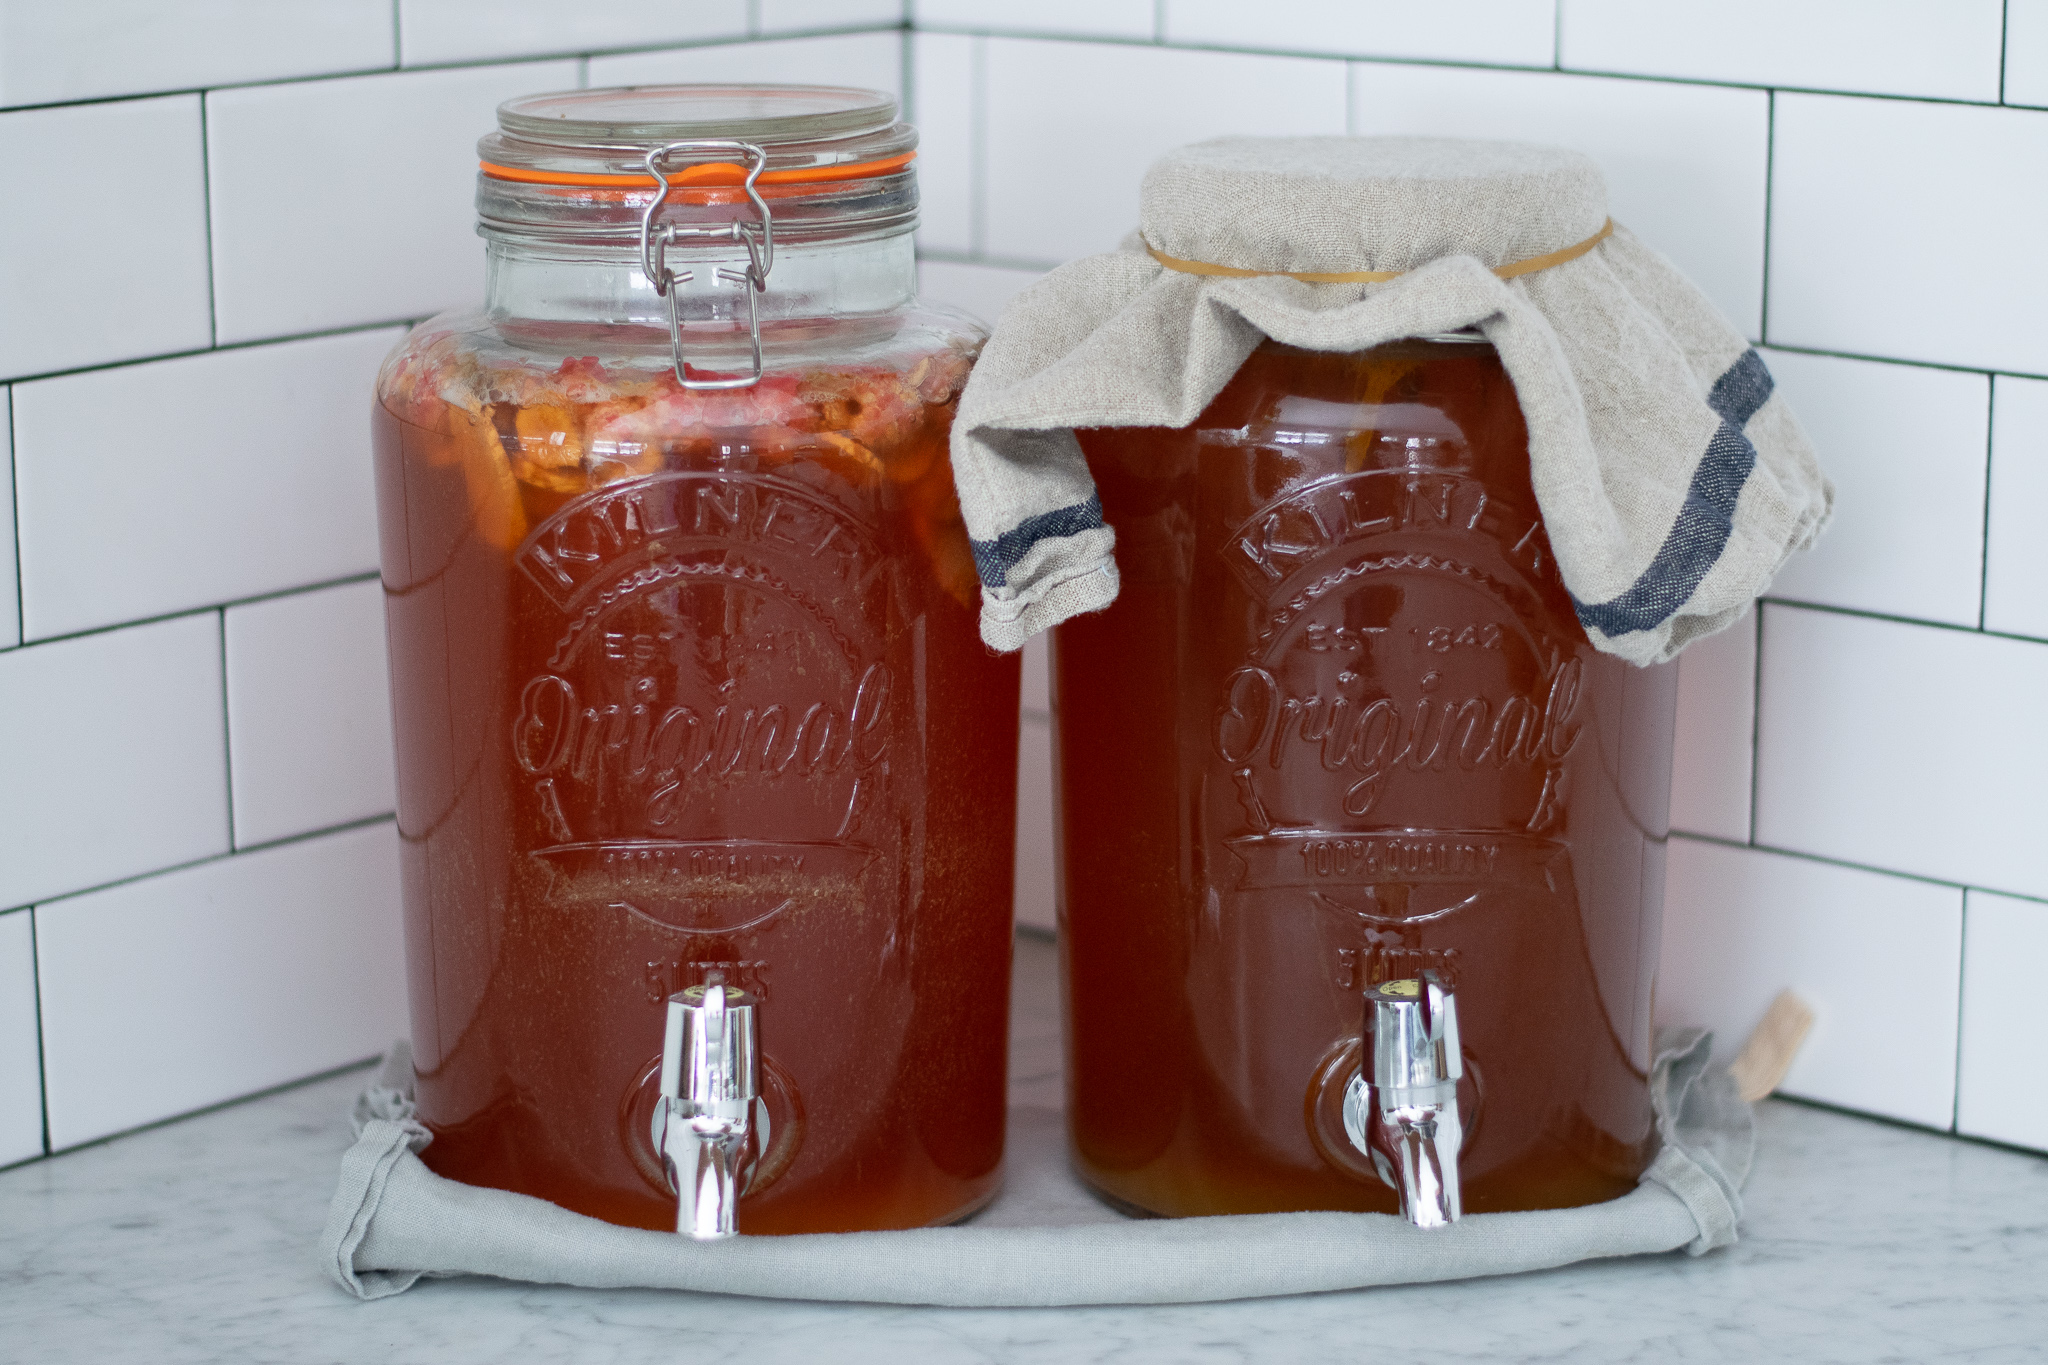
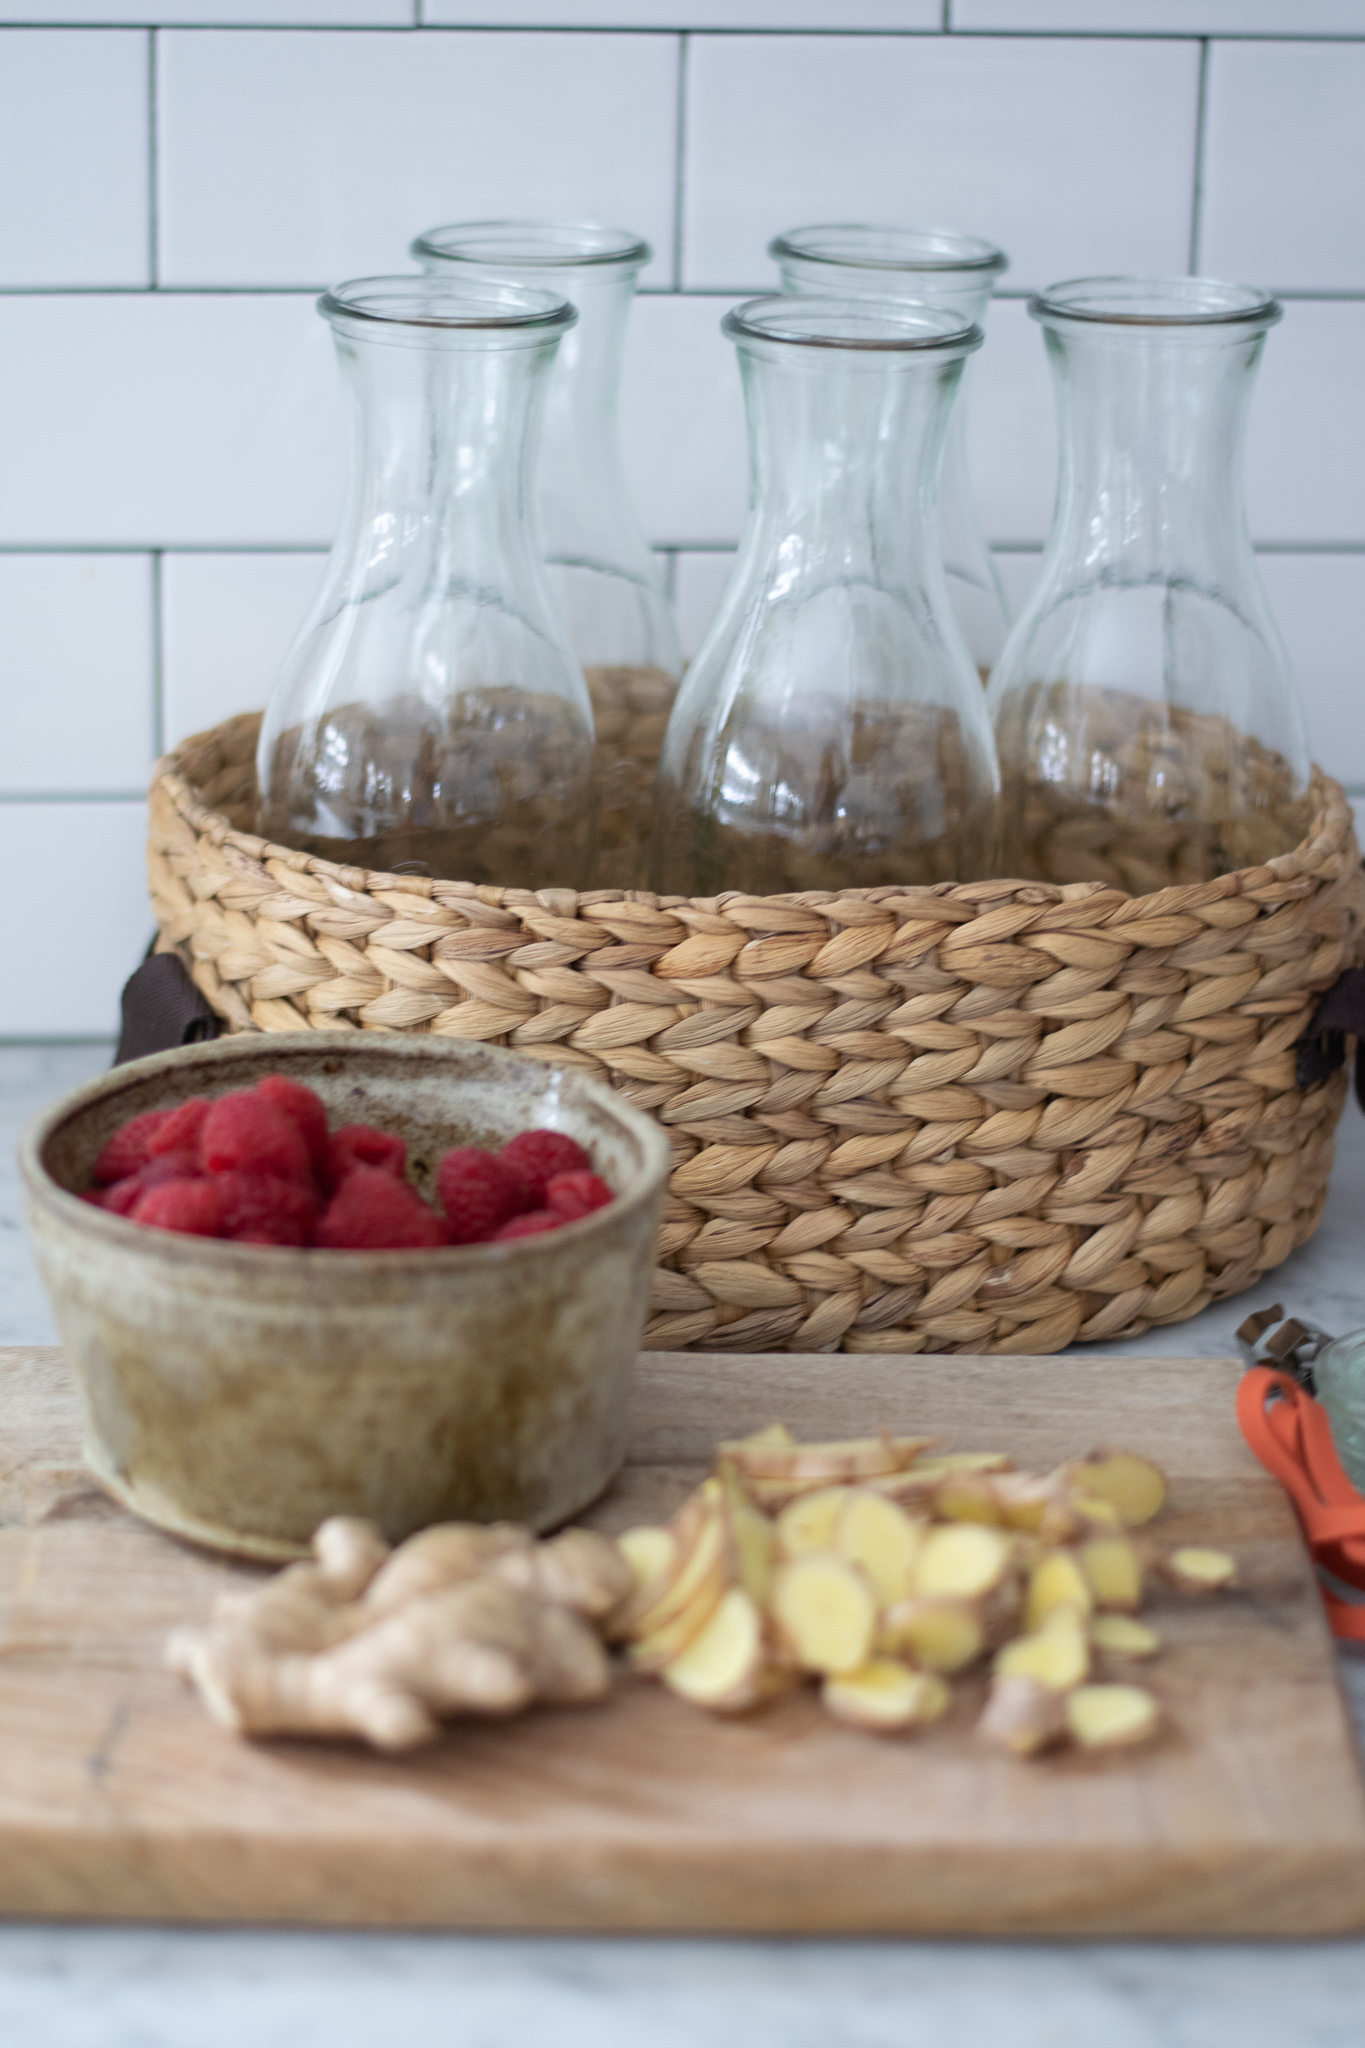
Lately my kids have been enjoying my raspberry ginger kombucha so here is what I use for that. I take about 10 ounces of fresh, whole raspberries (minus a few that my kids have stollen in the process, lol) and add them to the tea. Then I take a large piece of fresh ginger and cut it into thin slices, no need to peel it. I put the berries and sliced ginger into the tea and stir together. Then I put the sealed lid on top and it’s ready to sit another week in a dark corner of your kitchen for the second ferment.
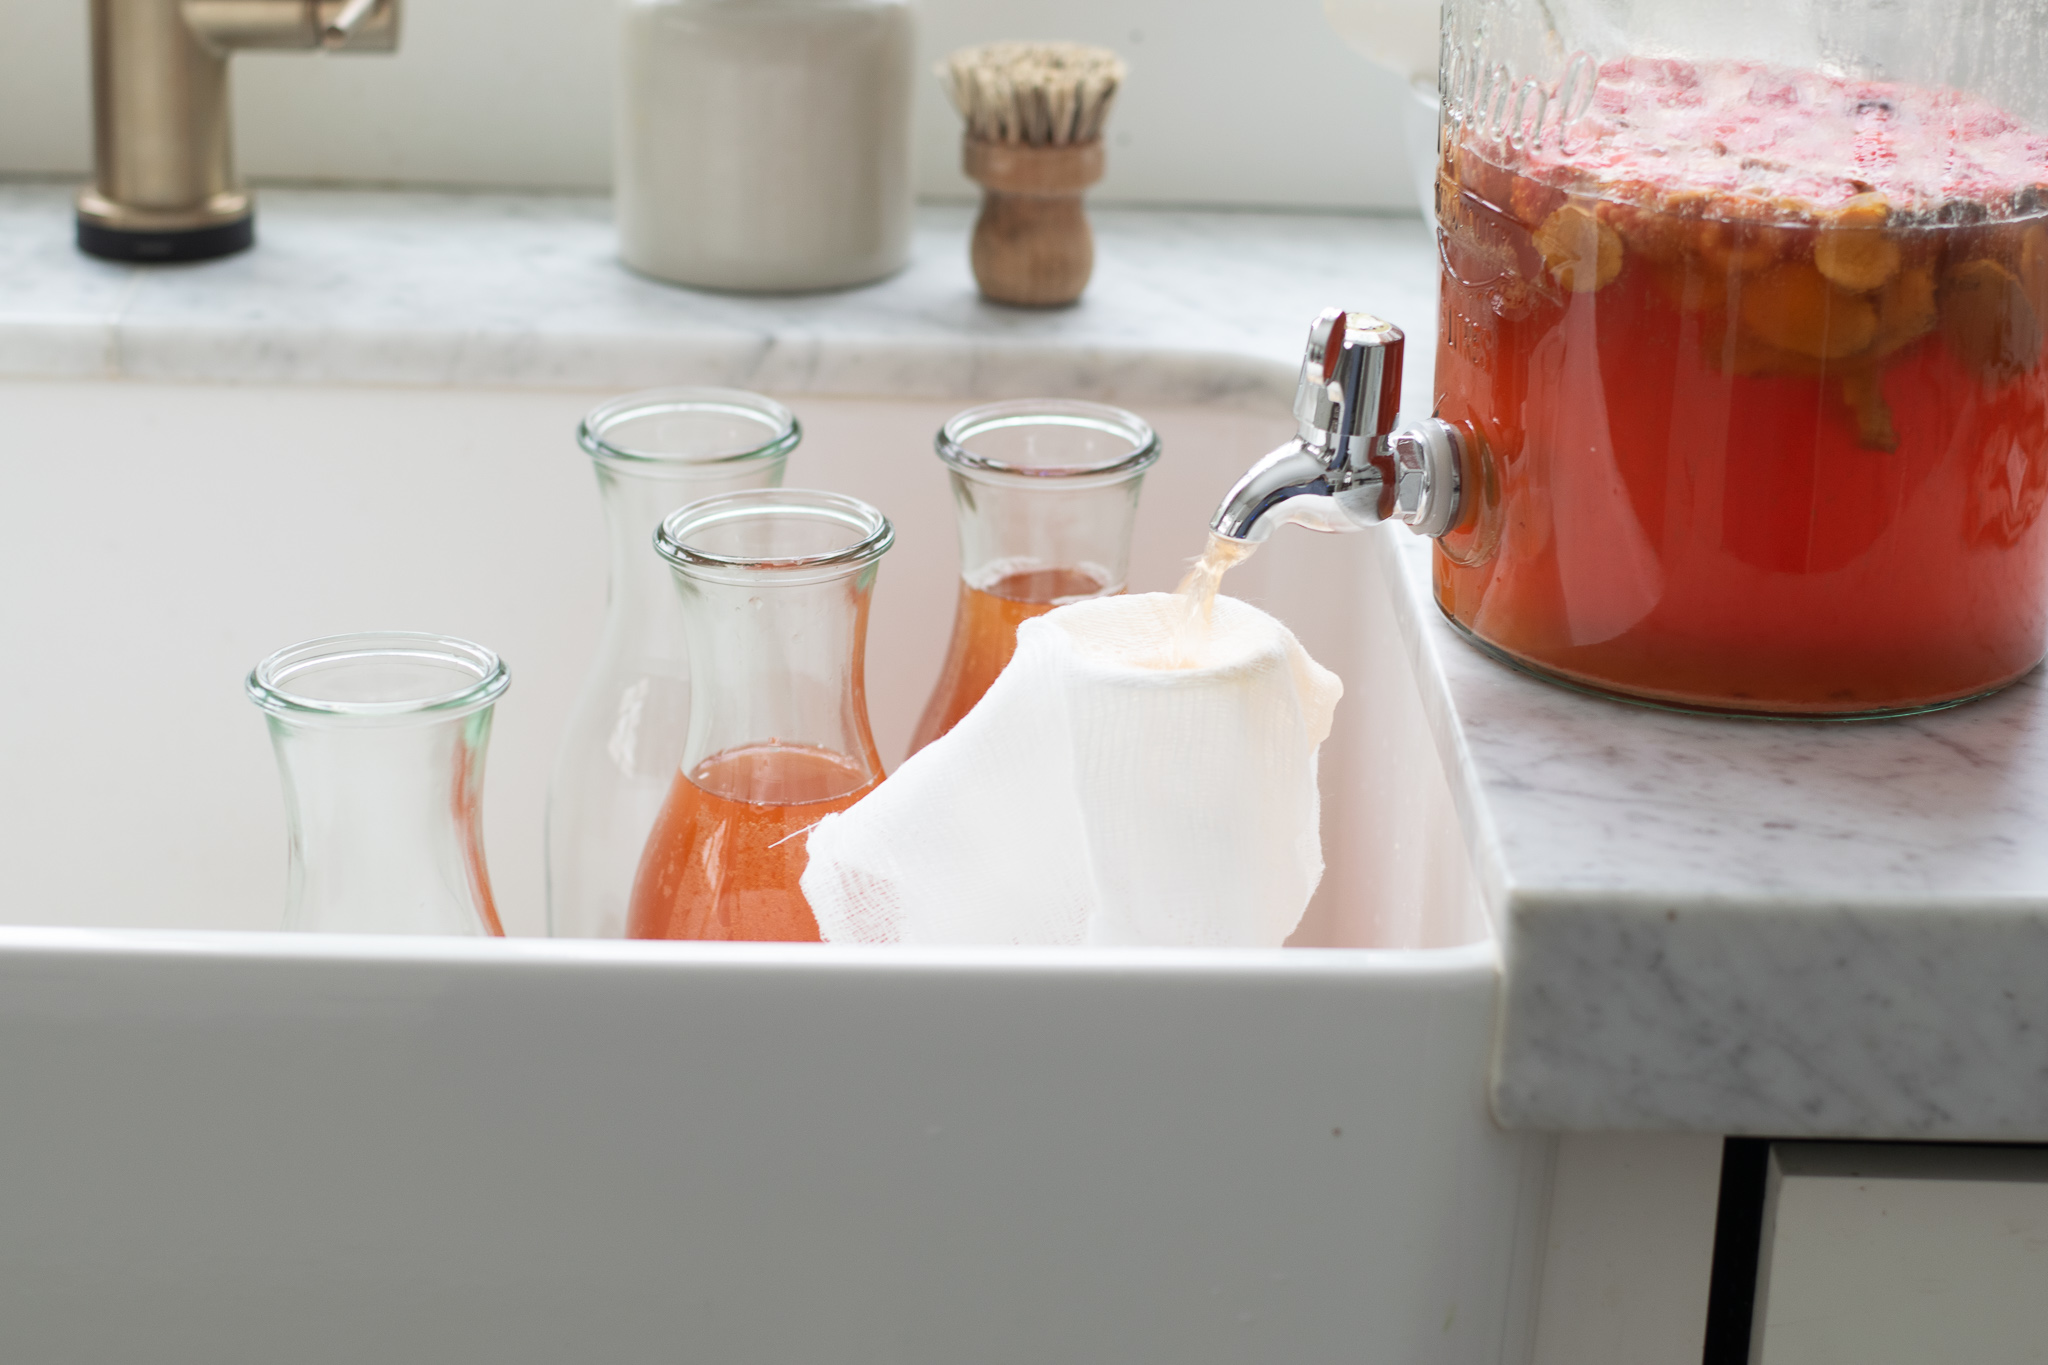
After sitting for one week with the fruit or whatever flavoring you used, it is time to drink it! I like to use some cheesecloth to strain the kombucha into jars. This keeps any chunks of fruit, peel from the ginger or straggling pieces of scoby from getting in. Before I strain it, I stir all the fruit around once more. I love these weck juice jars for storing the kombucha in my fridge and they also seal shut which will help keep it bubbly!
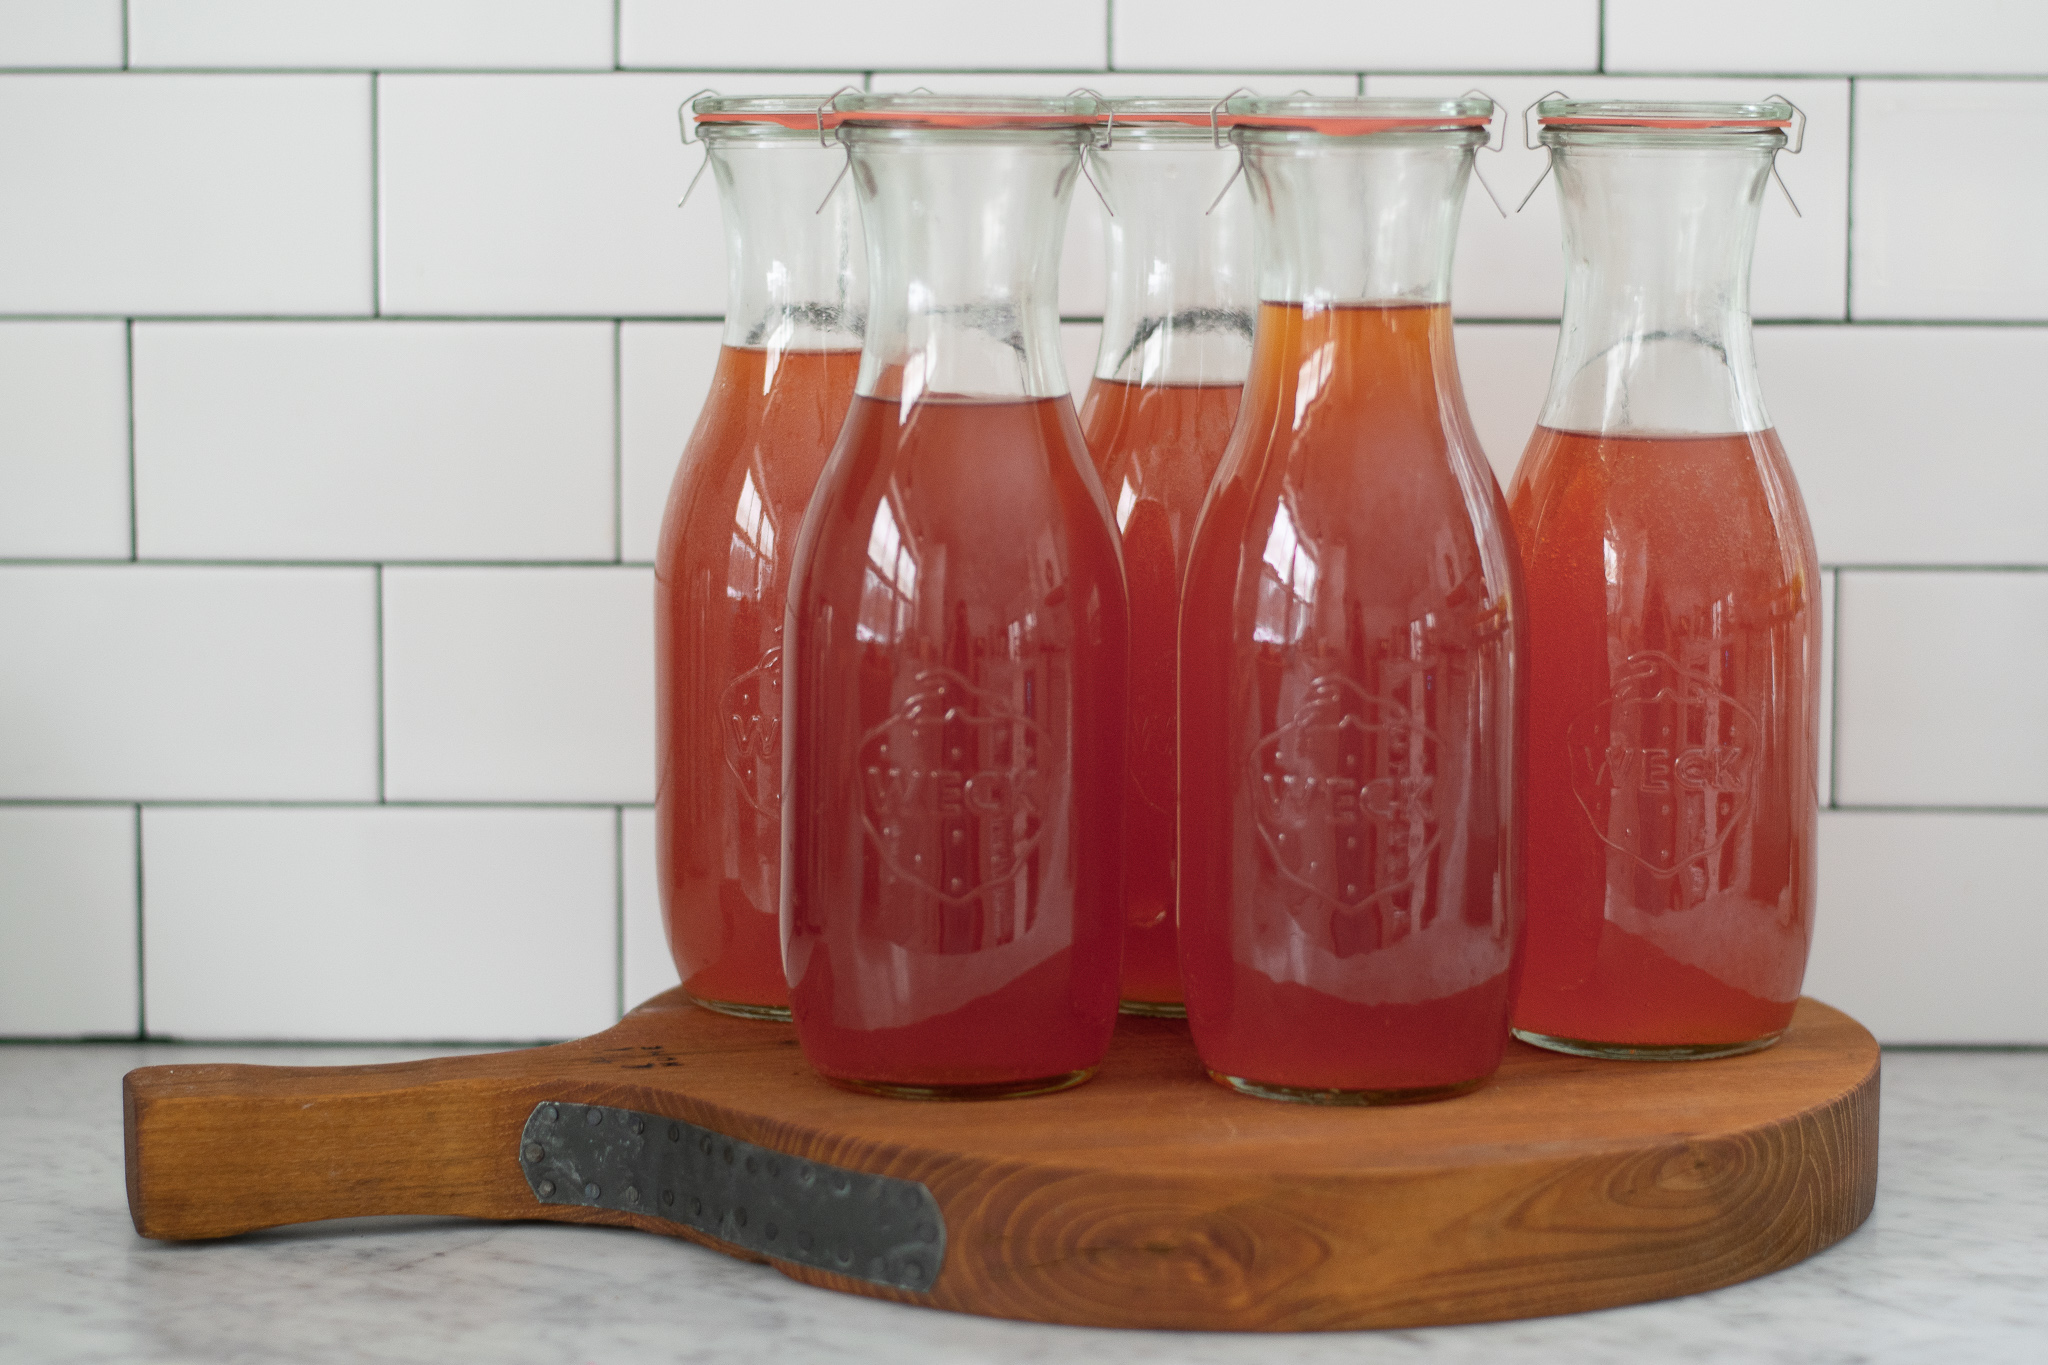
Don’t these jars look pretty?! When my jars are all filled up, I keep them in the fridge, ready to drink!
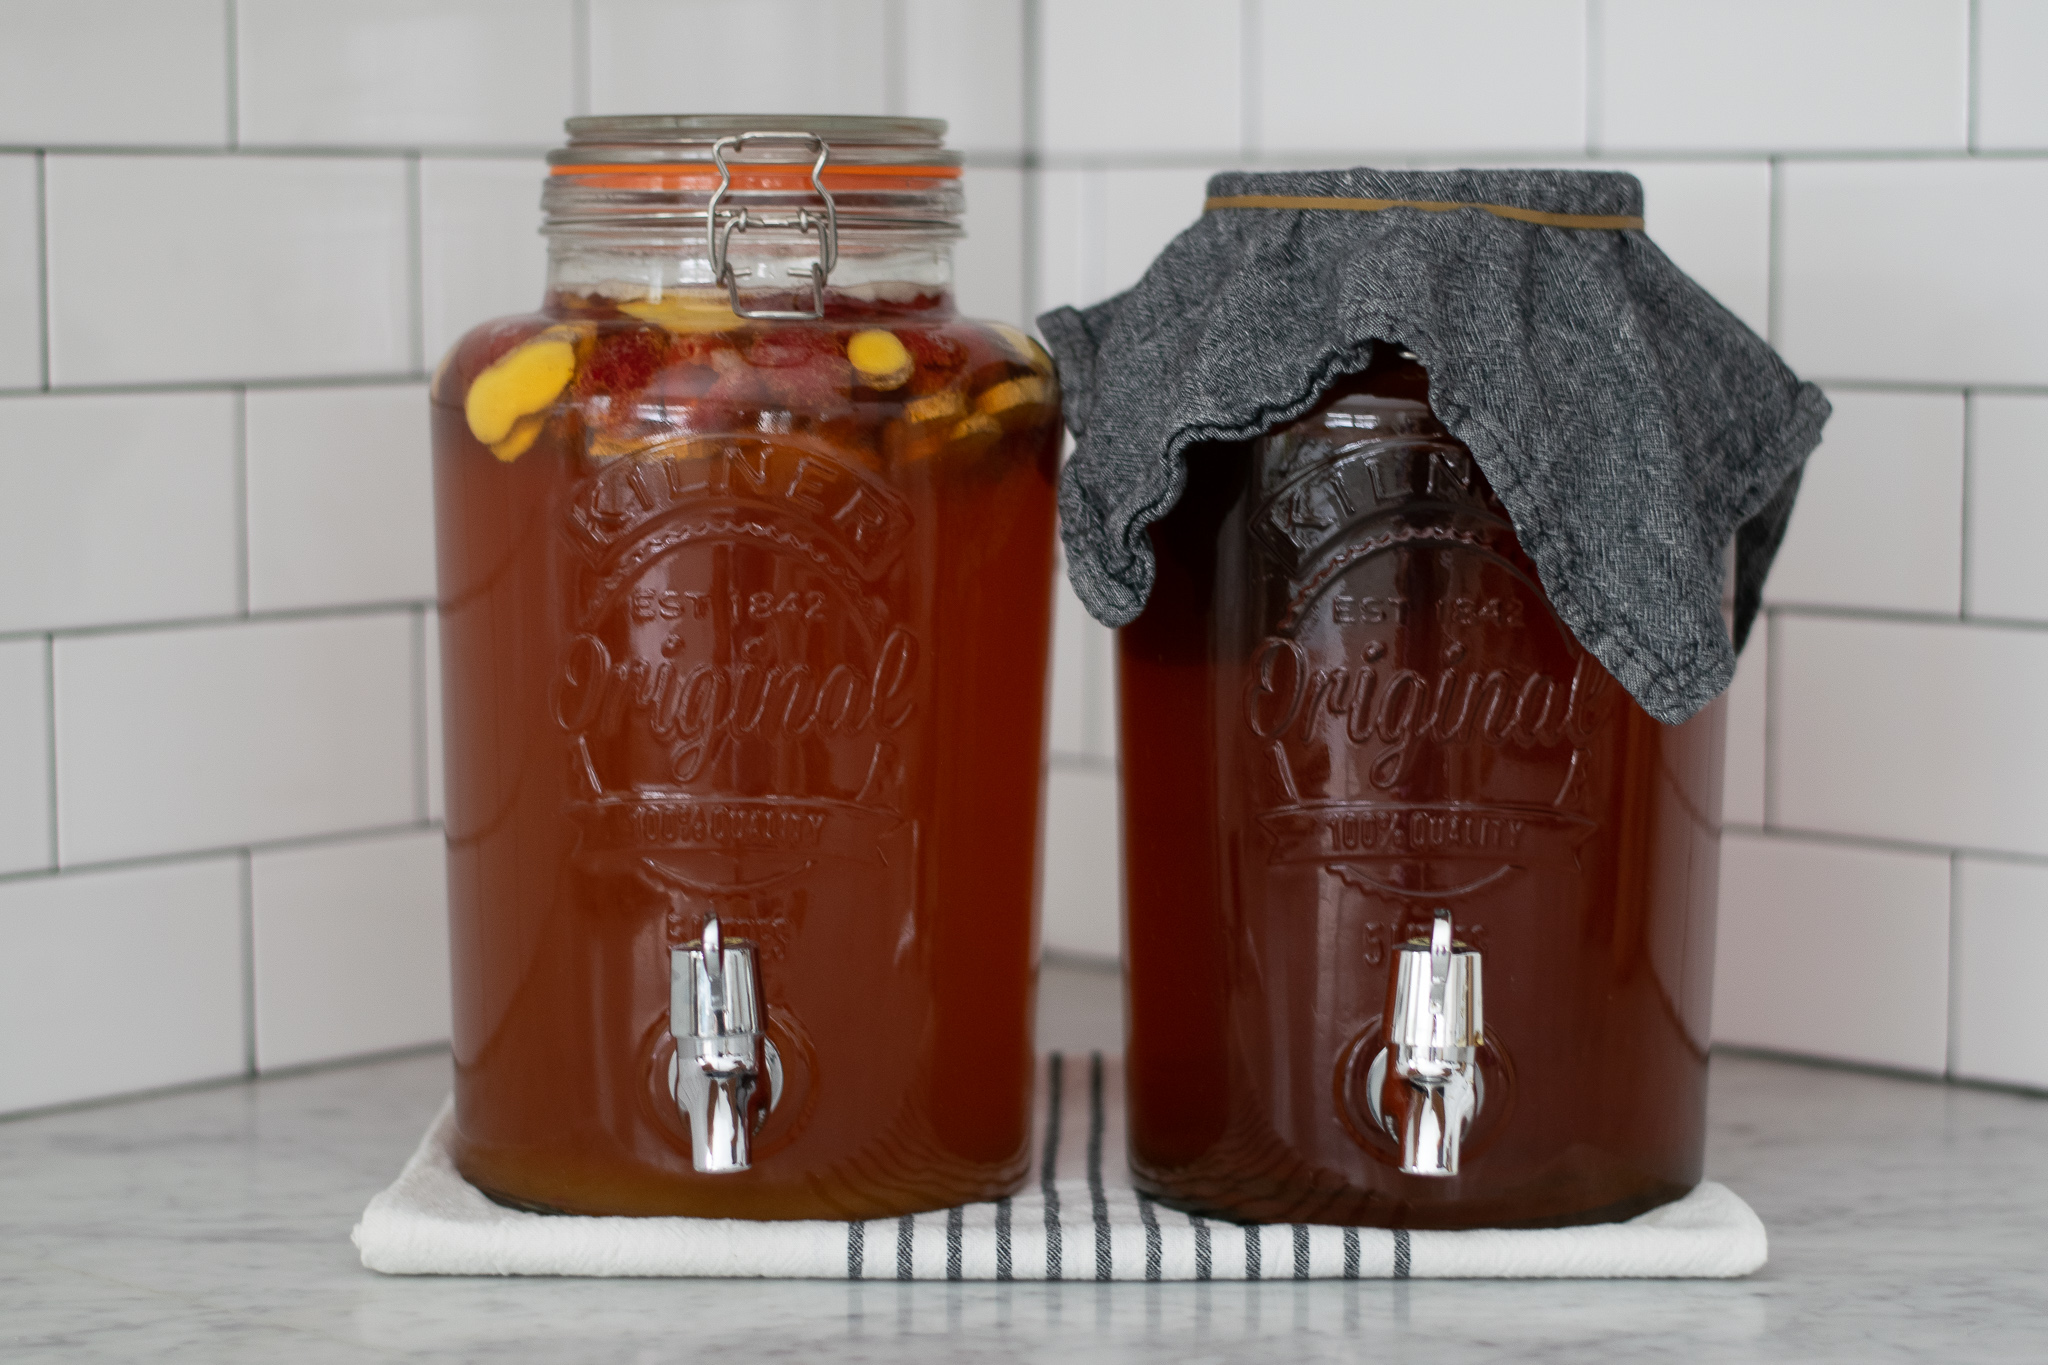
My kombucha is always brewing. I have two of these 5 liter pitchers and I always have a first and second brew going at once. That way I don’t have to wait a whole two weeks for fresh kombucha. We usually drink the 5 juice jars in about a week so it works out that the timing is perfect. I have a batch ready each weekend. On Saturday’s, I make a new tea brew, transfer the scoby to that and then add fruit to the first jar for the second brew. It only takes about ten minutes (minus the time I let the tea cool) for the whole process. Super easy and so worth it! I hope you try to make it yourself and if you have any questions, please leave them in the comments below. Happy fermenting!
Ingredients:
1 scoby
1 1/2 cups organic cane sugar
10 ounces raspberries
1 large piece of ginger
Tools:
cheesecloth
clean linen or cotton napkin or towel
large rubber band
How to:
- Begin by brewing 8 tea bags in some water on a pot. Just before boiling, remove from heat and add in the sugar and stir until dissolved. Let tea sit with tea bags still in until it is completely cooled.
- Once cooled, pour tea into your 5 liter pitcher and fill it to the top with water and stir together. Place scoby on top, cover with a clean linen cloth and secure it with a large rubber band. Let it sit in a dark place or cover with a towel for one week for the first ferment.
- After one week, remove the scoby and a cup or so of the fermented tea into a bowl and set aside. Add the raspberries and ginger into the tea and stir. Seal the pitcher with the lid and orange seal that attach to it. Let it sit on the counter in a dark place for another week.
- After a week, place the cheesecloth on top of your juice jars and strain the kombucha into the jars. Seal each jar and place in the fridge or add some ice and drink right away!
Comments