• House Plans
  • Recipes
  • About Us
  • Contact

The Homegrown Apple

Homesteading Our Apple Orchard and Life Along the Way

Blog

Candle Dipping

April 2, 2020

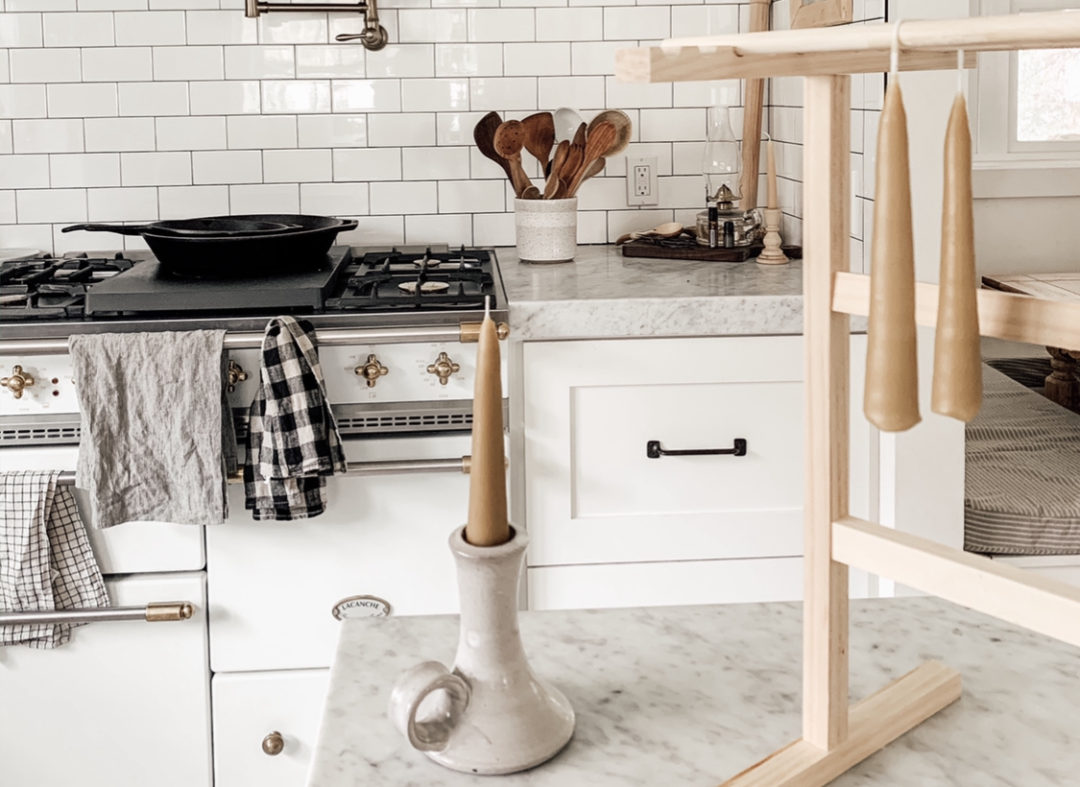
We usually have a stash of beeswax candles in a drawer in the kitchen and some hanging in our laundry room too. I just love having them on hand! During our homeschool day, we usually have at least one candle burning in the house wherever we are working. It brings such a sweet feel of home and I love that beeswax helps cleanse the air in our home too. We’ve been dipping our own for years and I hope this becomes a fun tradition for you and your family as well.

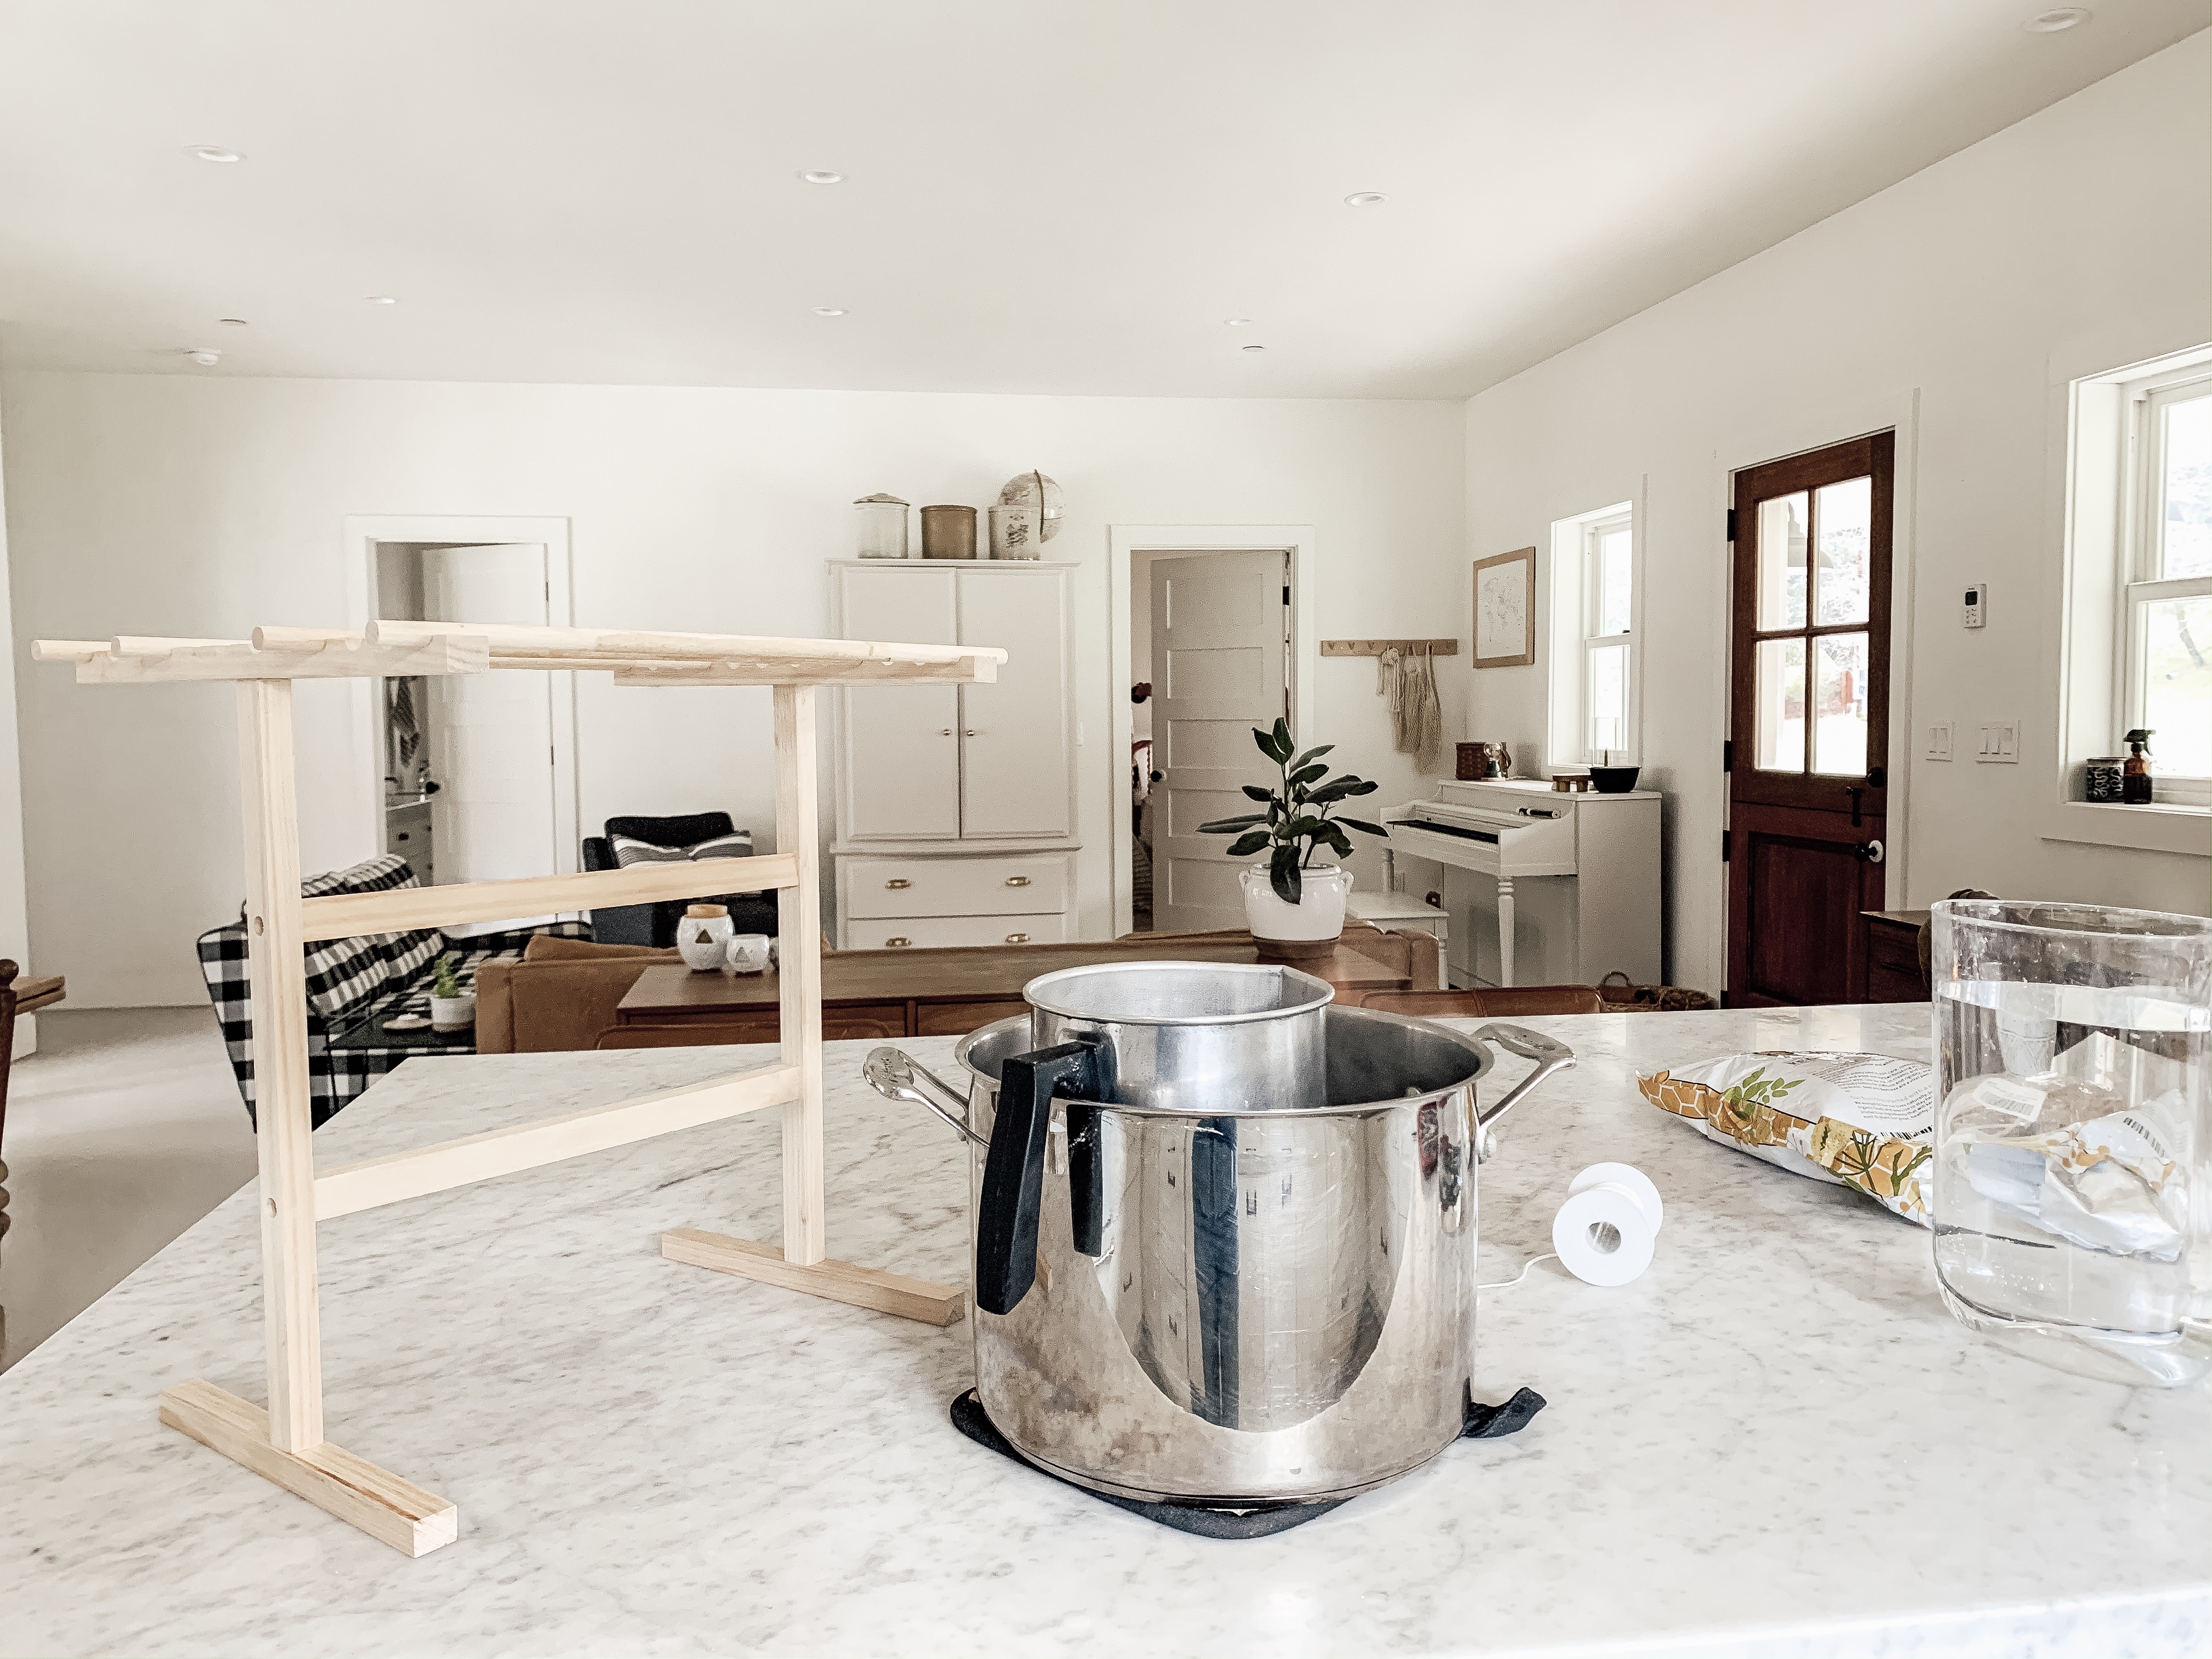
Dipping your own candles is super easy but it’s taken me a few tries to get them just right. Click here for a link to my amazon storefront where you can find links to all the supplies you need to make these! You’ll need:

  • beeswax (about 3 pounds or more)
  • candle wicks
  • wax warming pot
  • larger pot to use as a double boiler
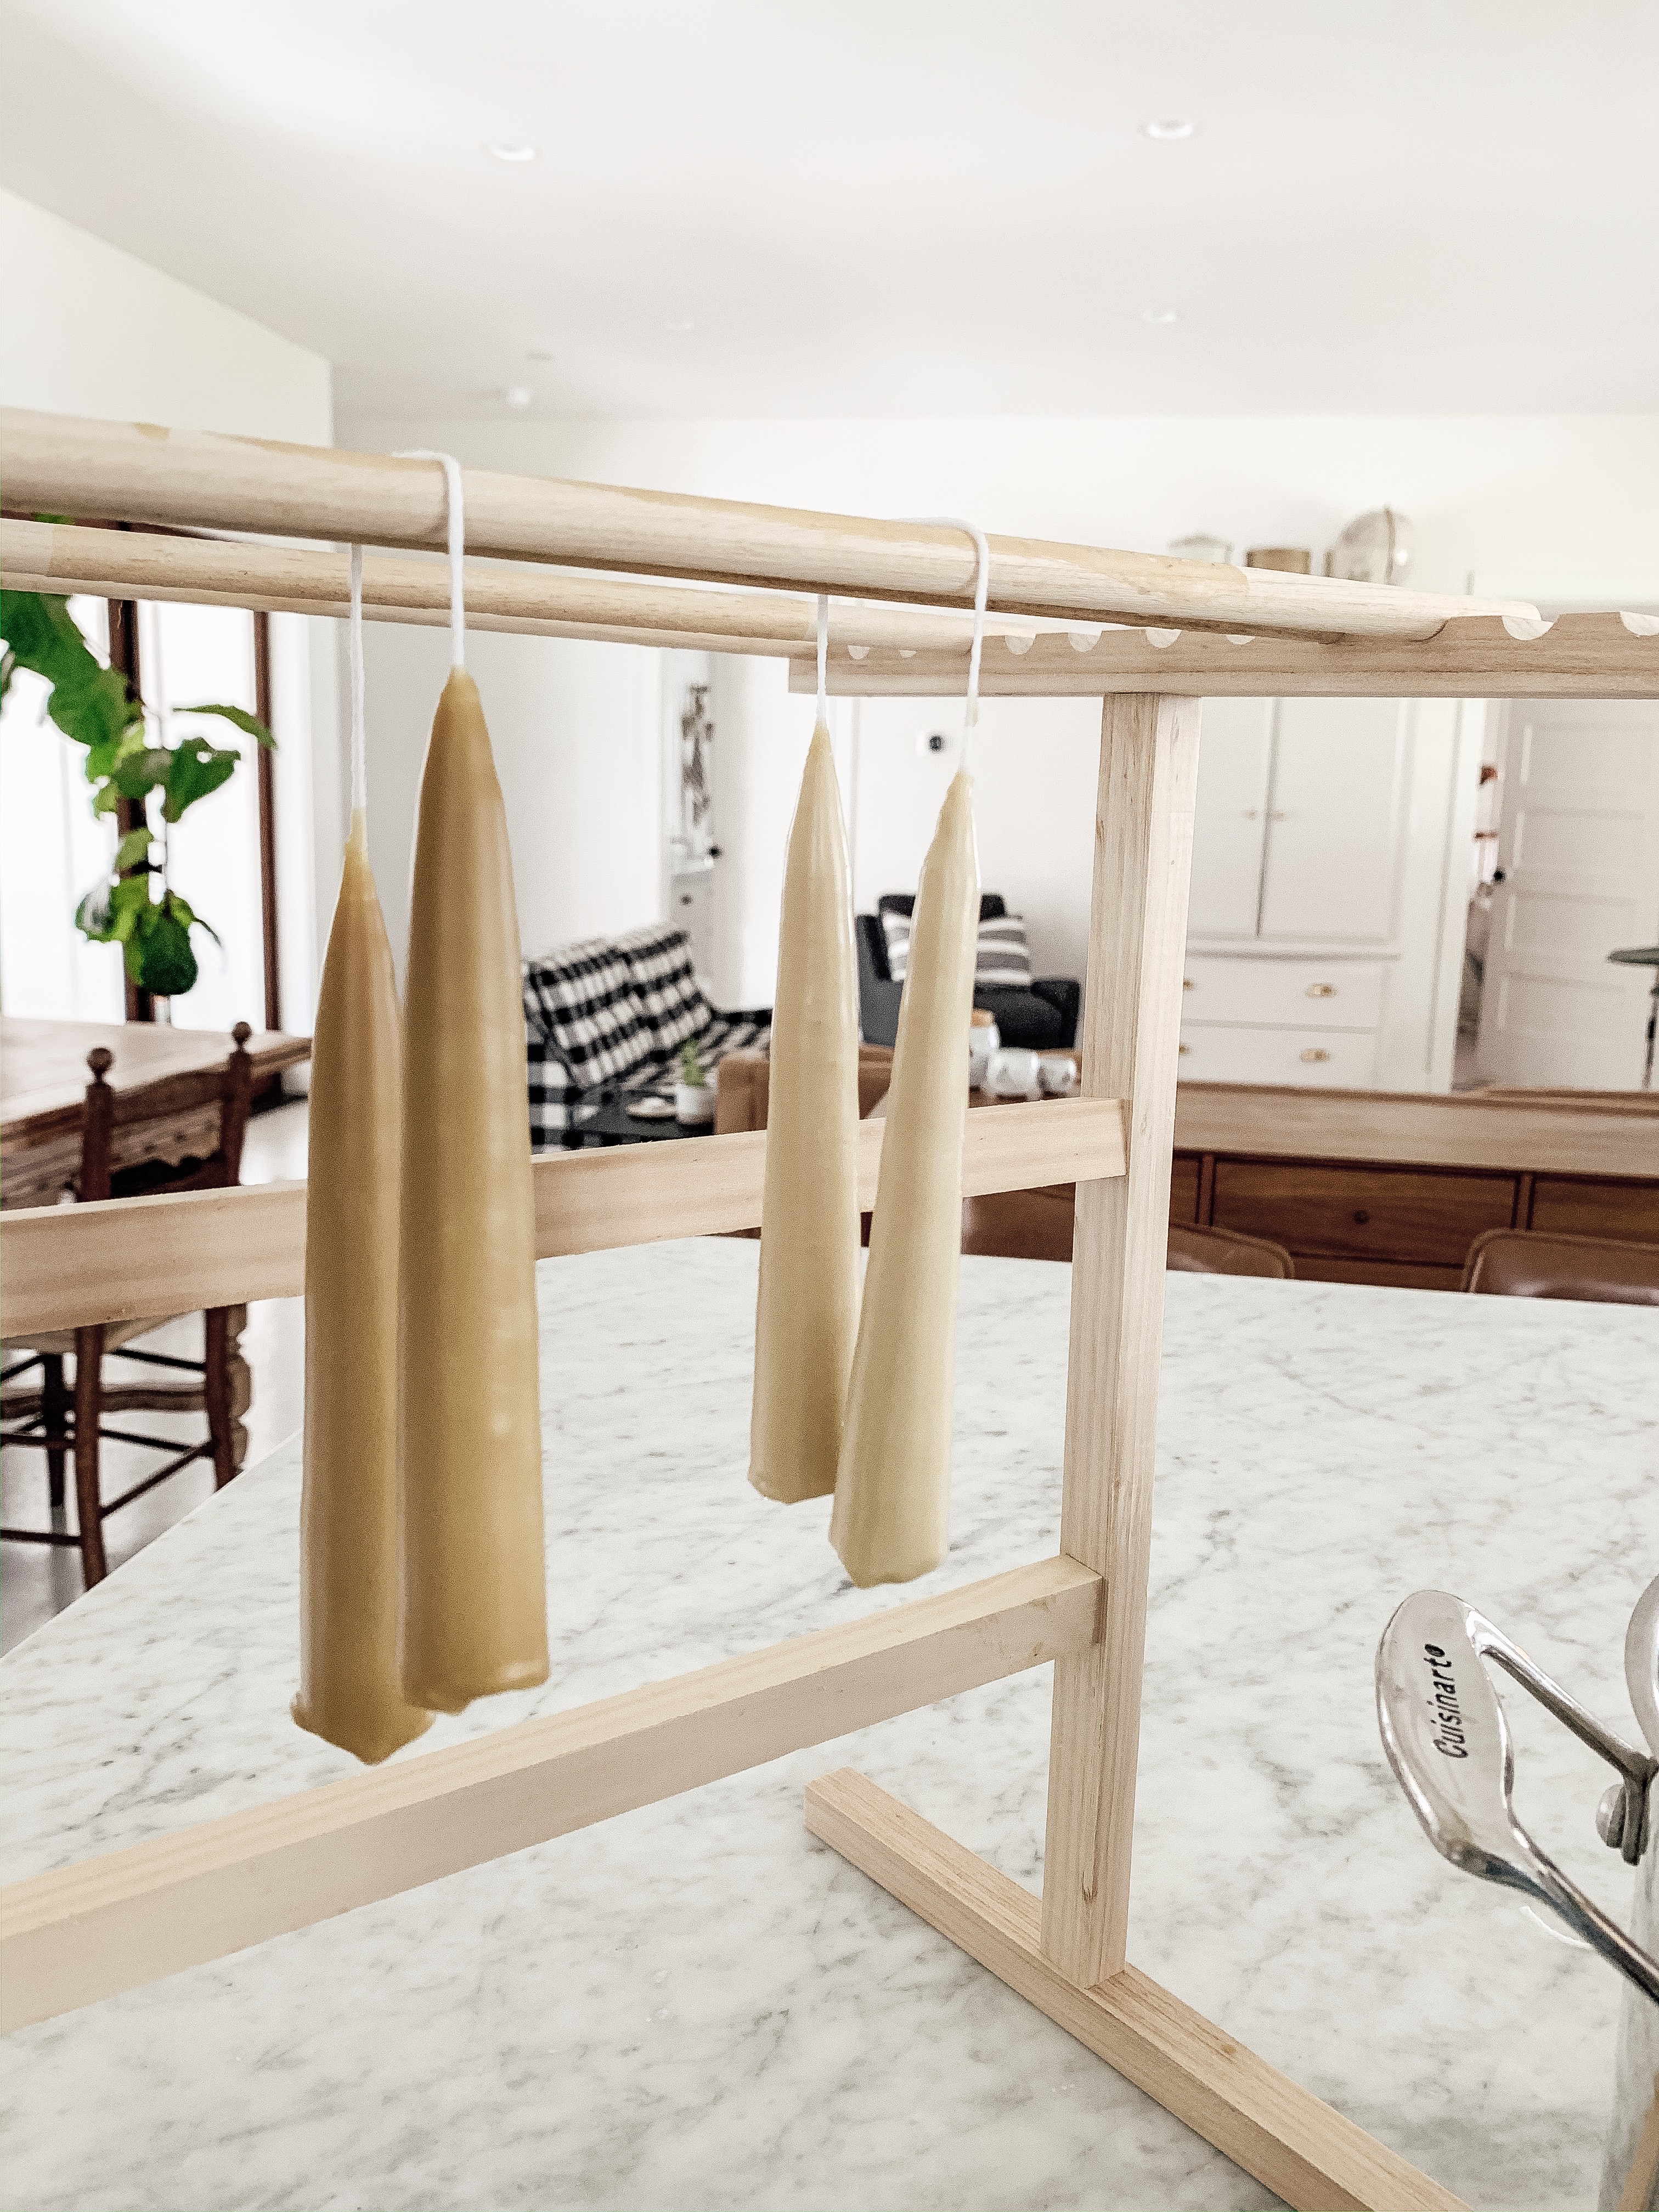
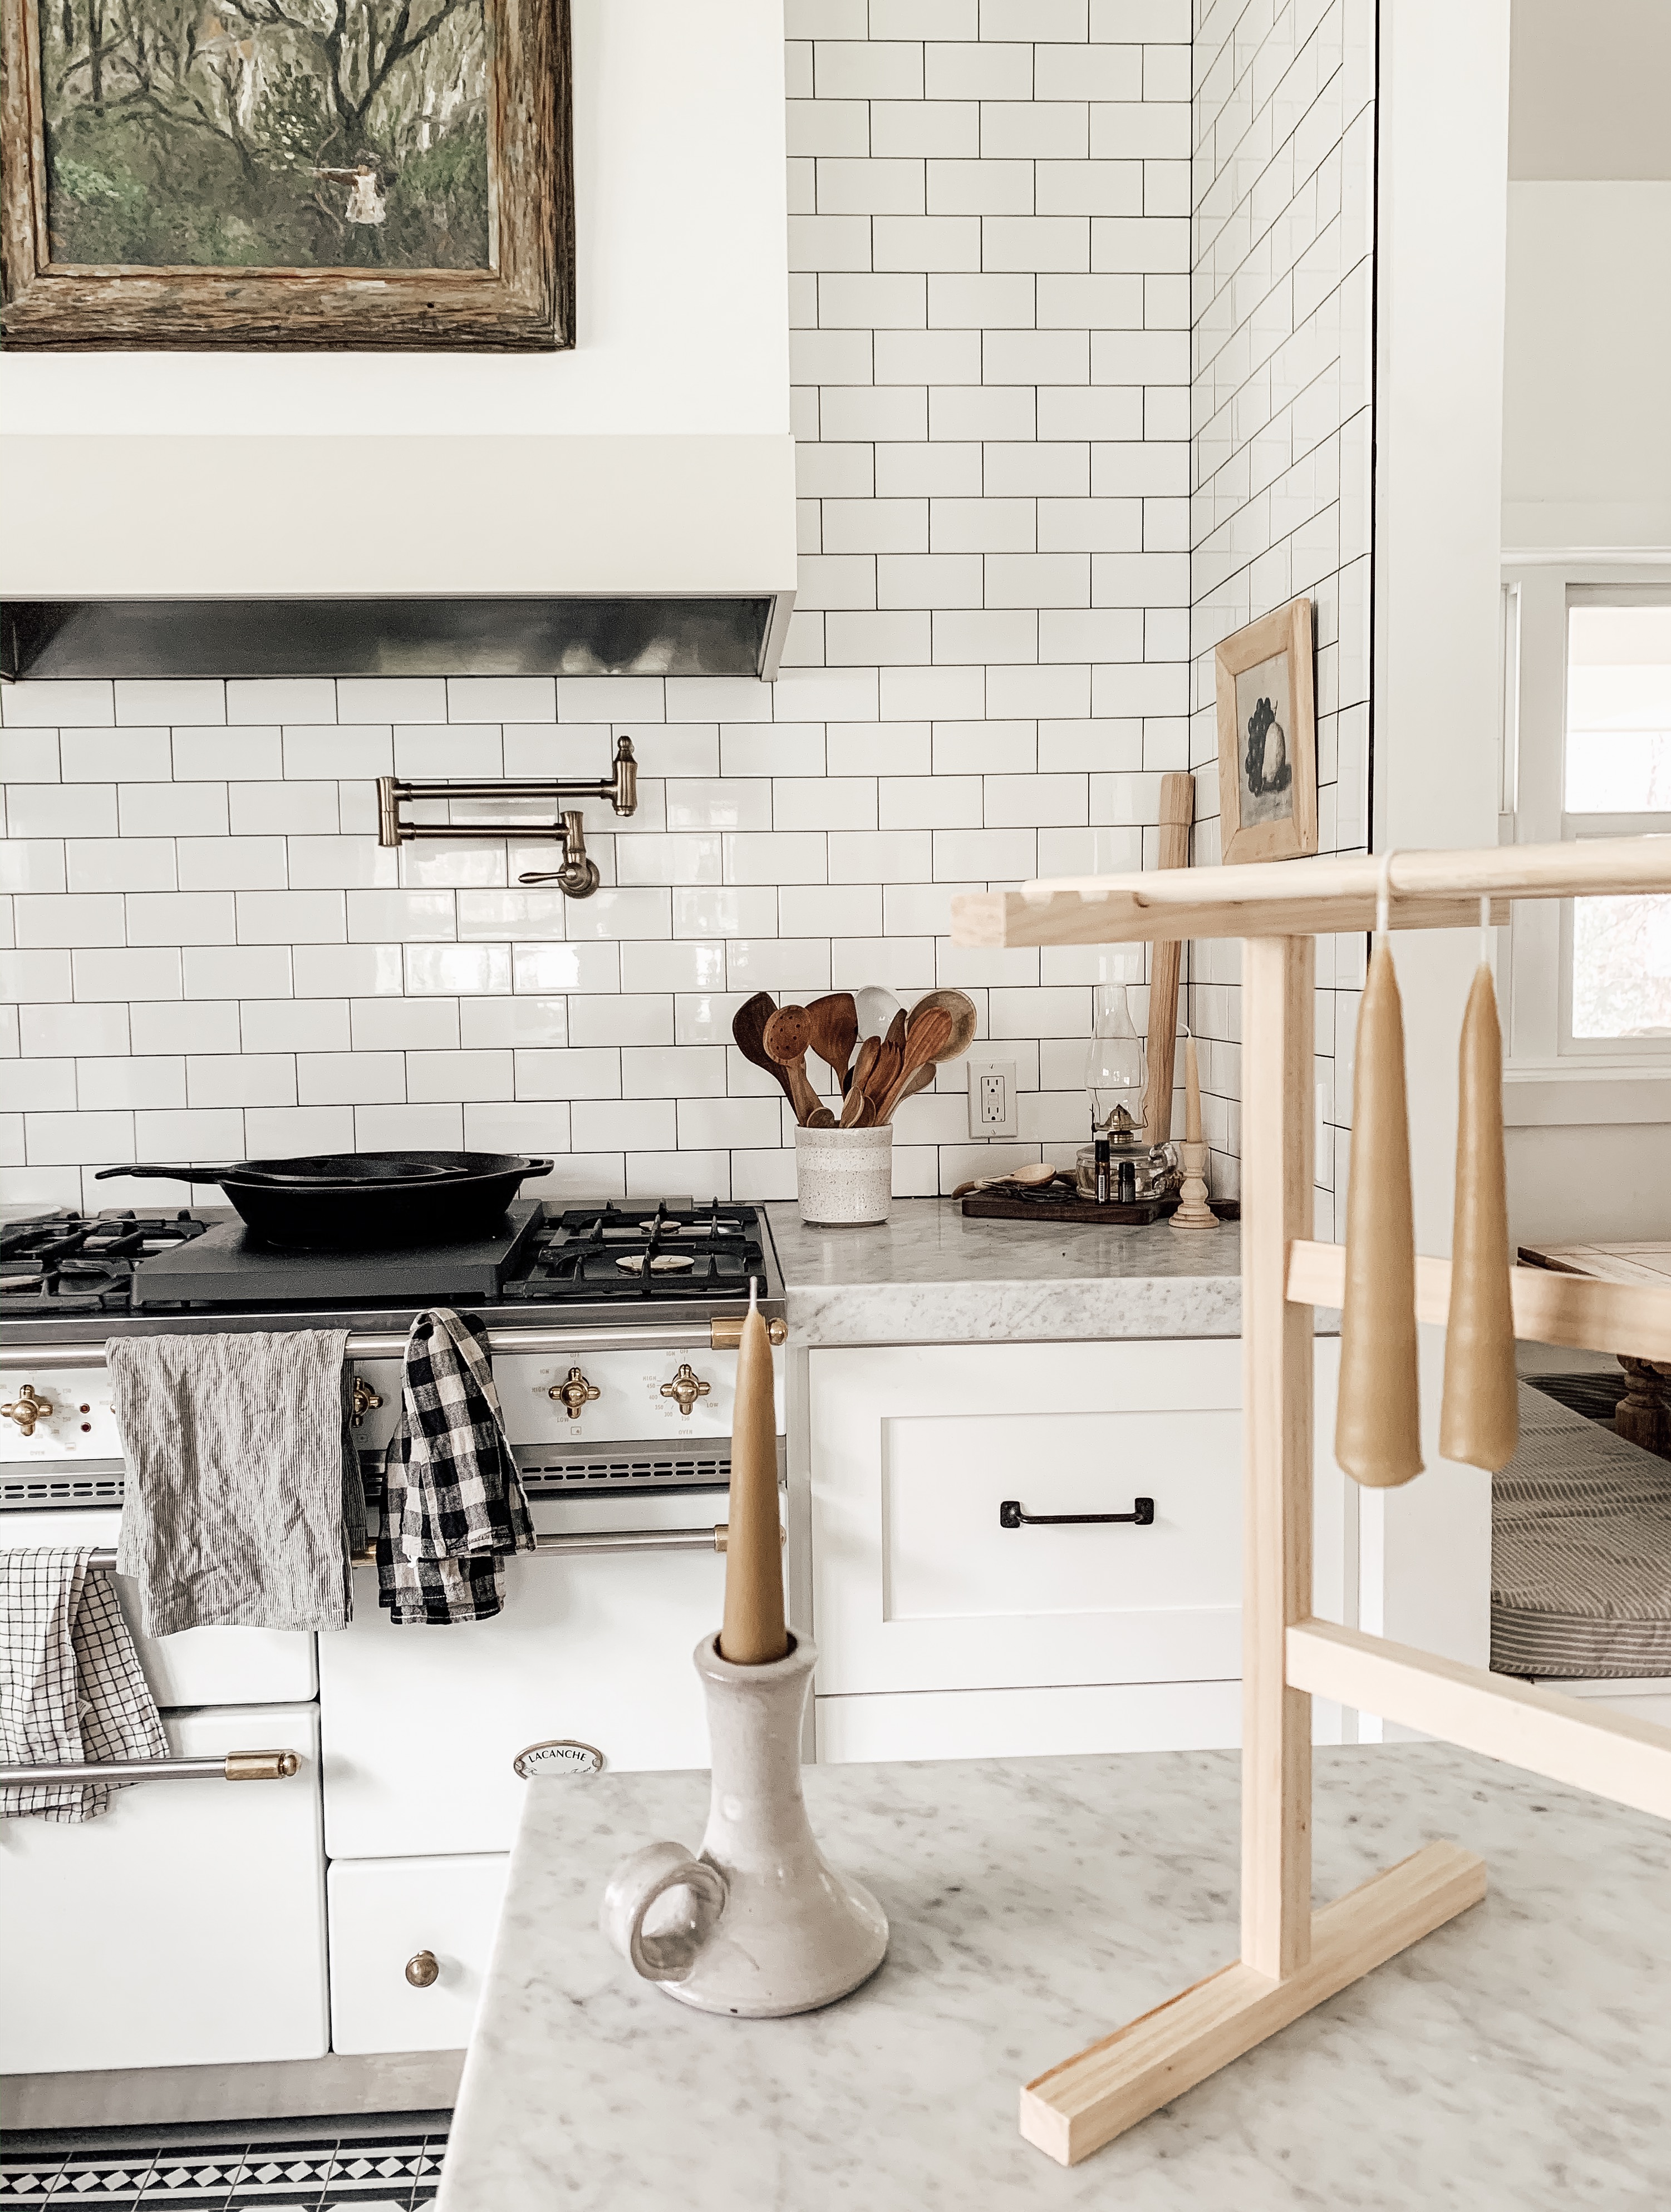
  • pasta dryer (or other rack to hang them)
  • pitcher for water
  • Something heavy to use as a weight to tie at the end of the wick (I use these large hex nuts I found in my husband tools.

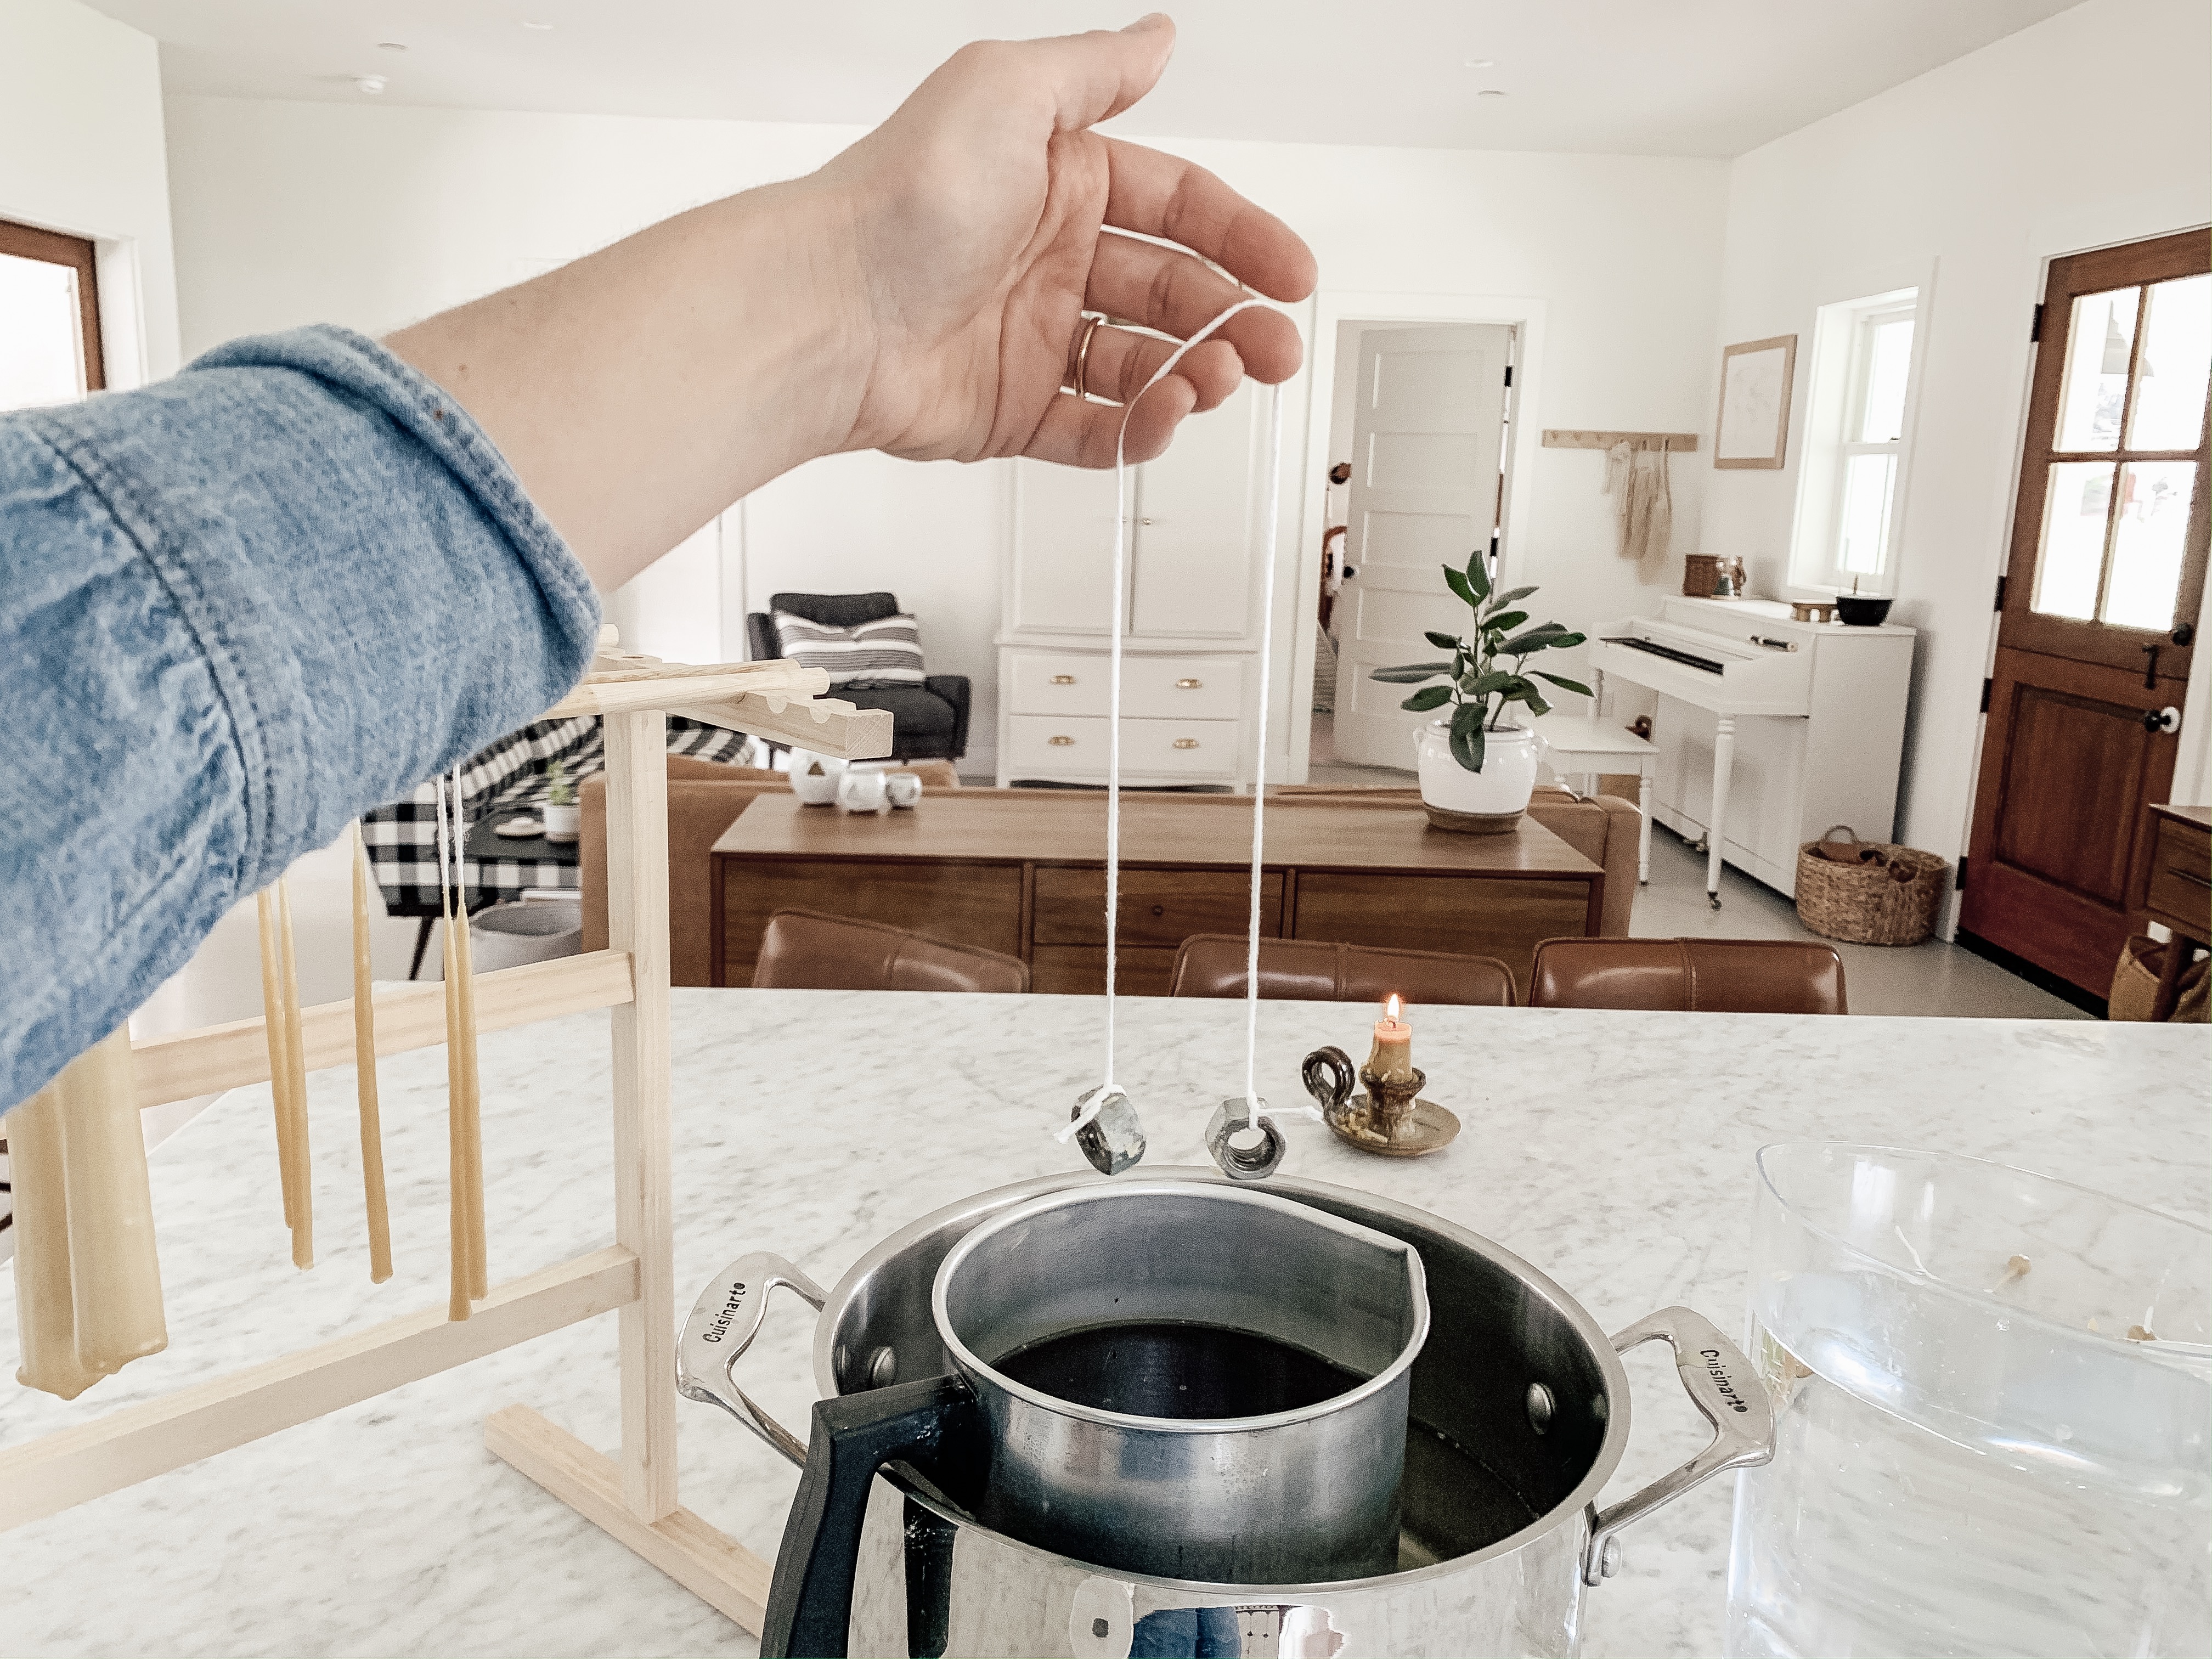
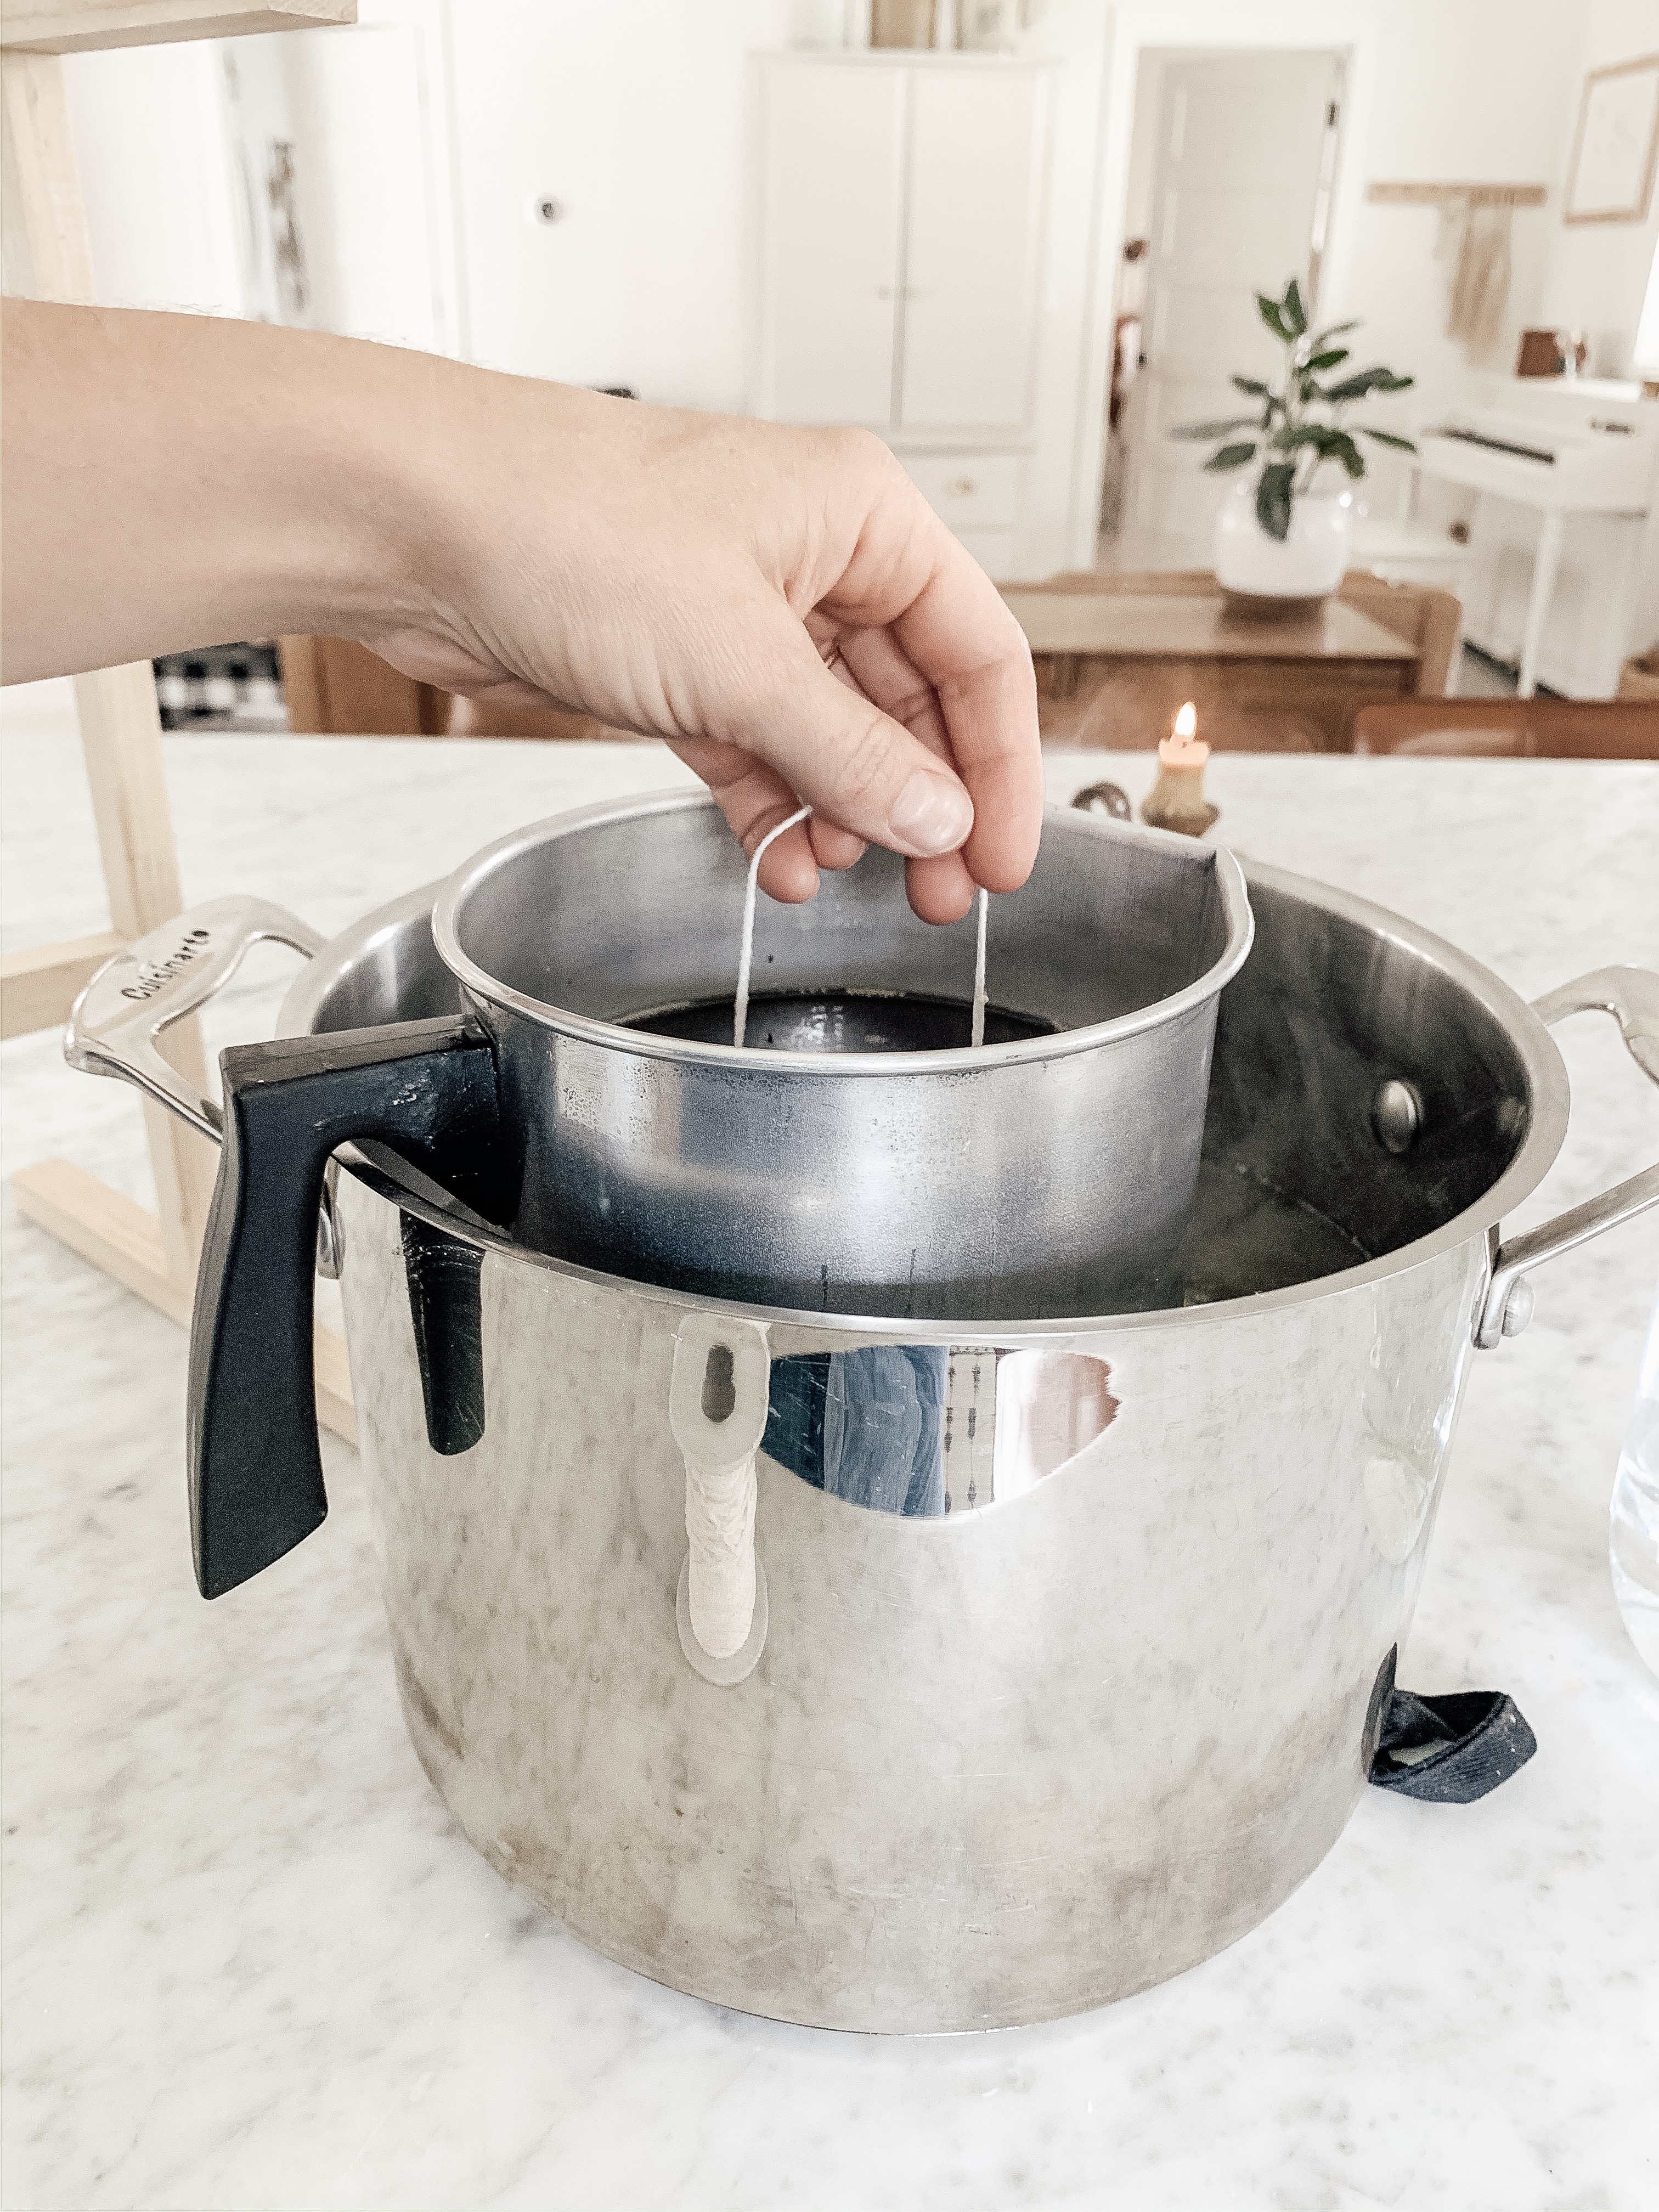
Once you have all the tools you need, start by putting your wax into the wax pot and then putting that into a large pot of water on the stove. It will take quite a while for the wax to melt completely so do this about an hour or so before you want to dip them. When the wax is melted, start by cutting some wicks to about 18inches, then tie the nuts (or whatever weights you have) to each end of the wick. You will be dipping two candles at once. If you don’t want to do two candles at once, just cut the wick about 9 inches long and dip one at a time. It’s just easier to dry then when you have two. If you only do one, you’ll have to tie them onto the dryer.

Now you’re ready to dip! Hold the middle of the wick and let the weights pull them down until you hit the bottom of the wax pot. Take the wick out of the hot wax right away and dip into the water. This will harden the wax immediately so that you can continue to dip more layers on top of each other.

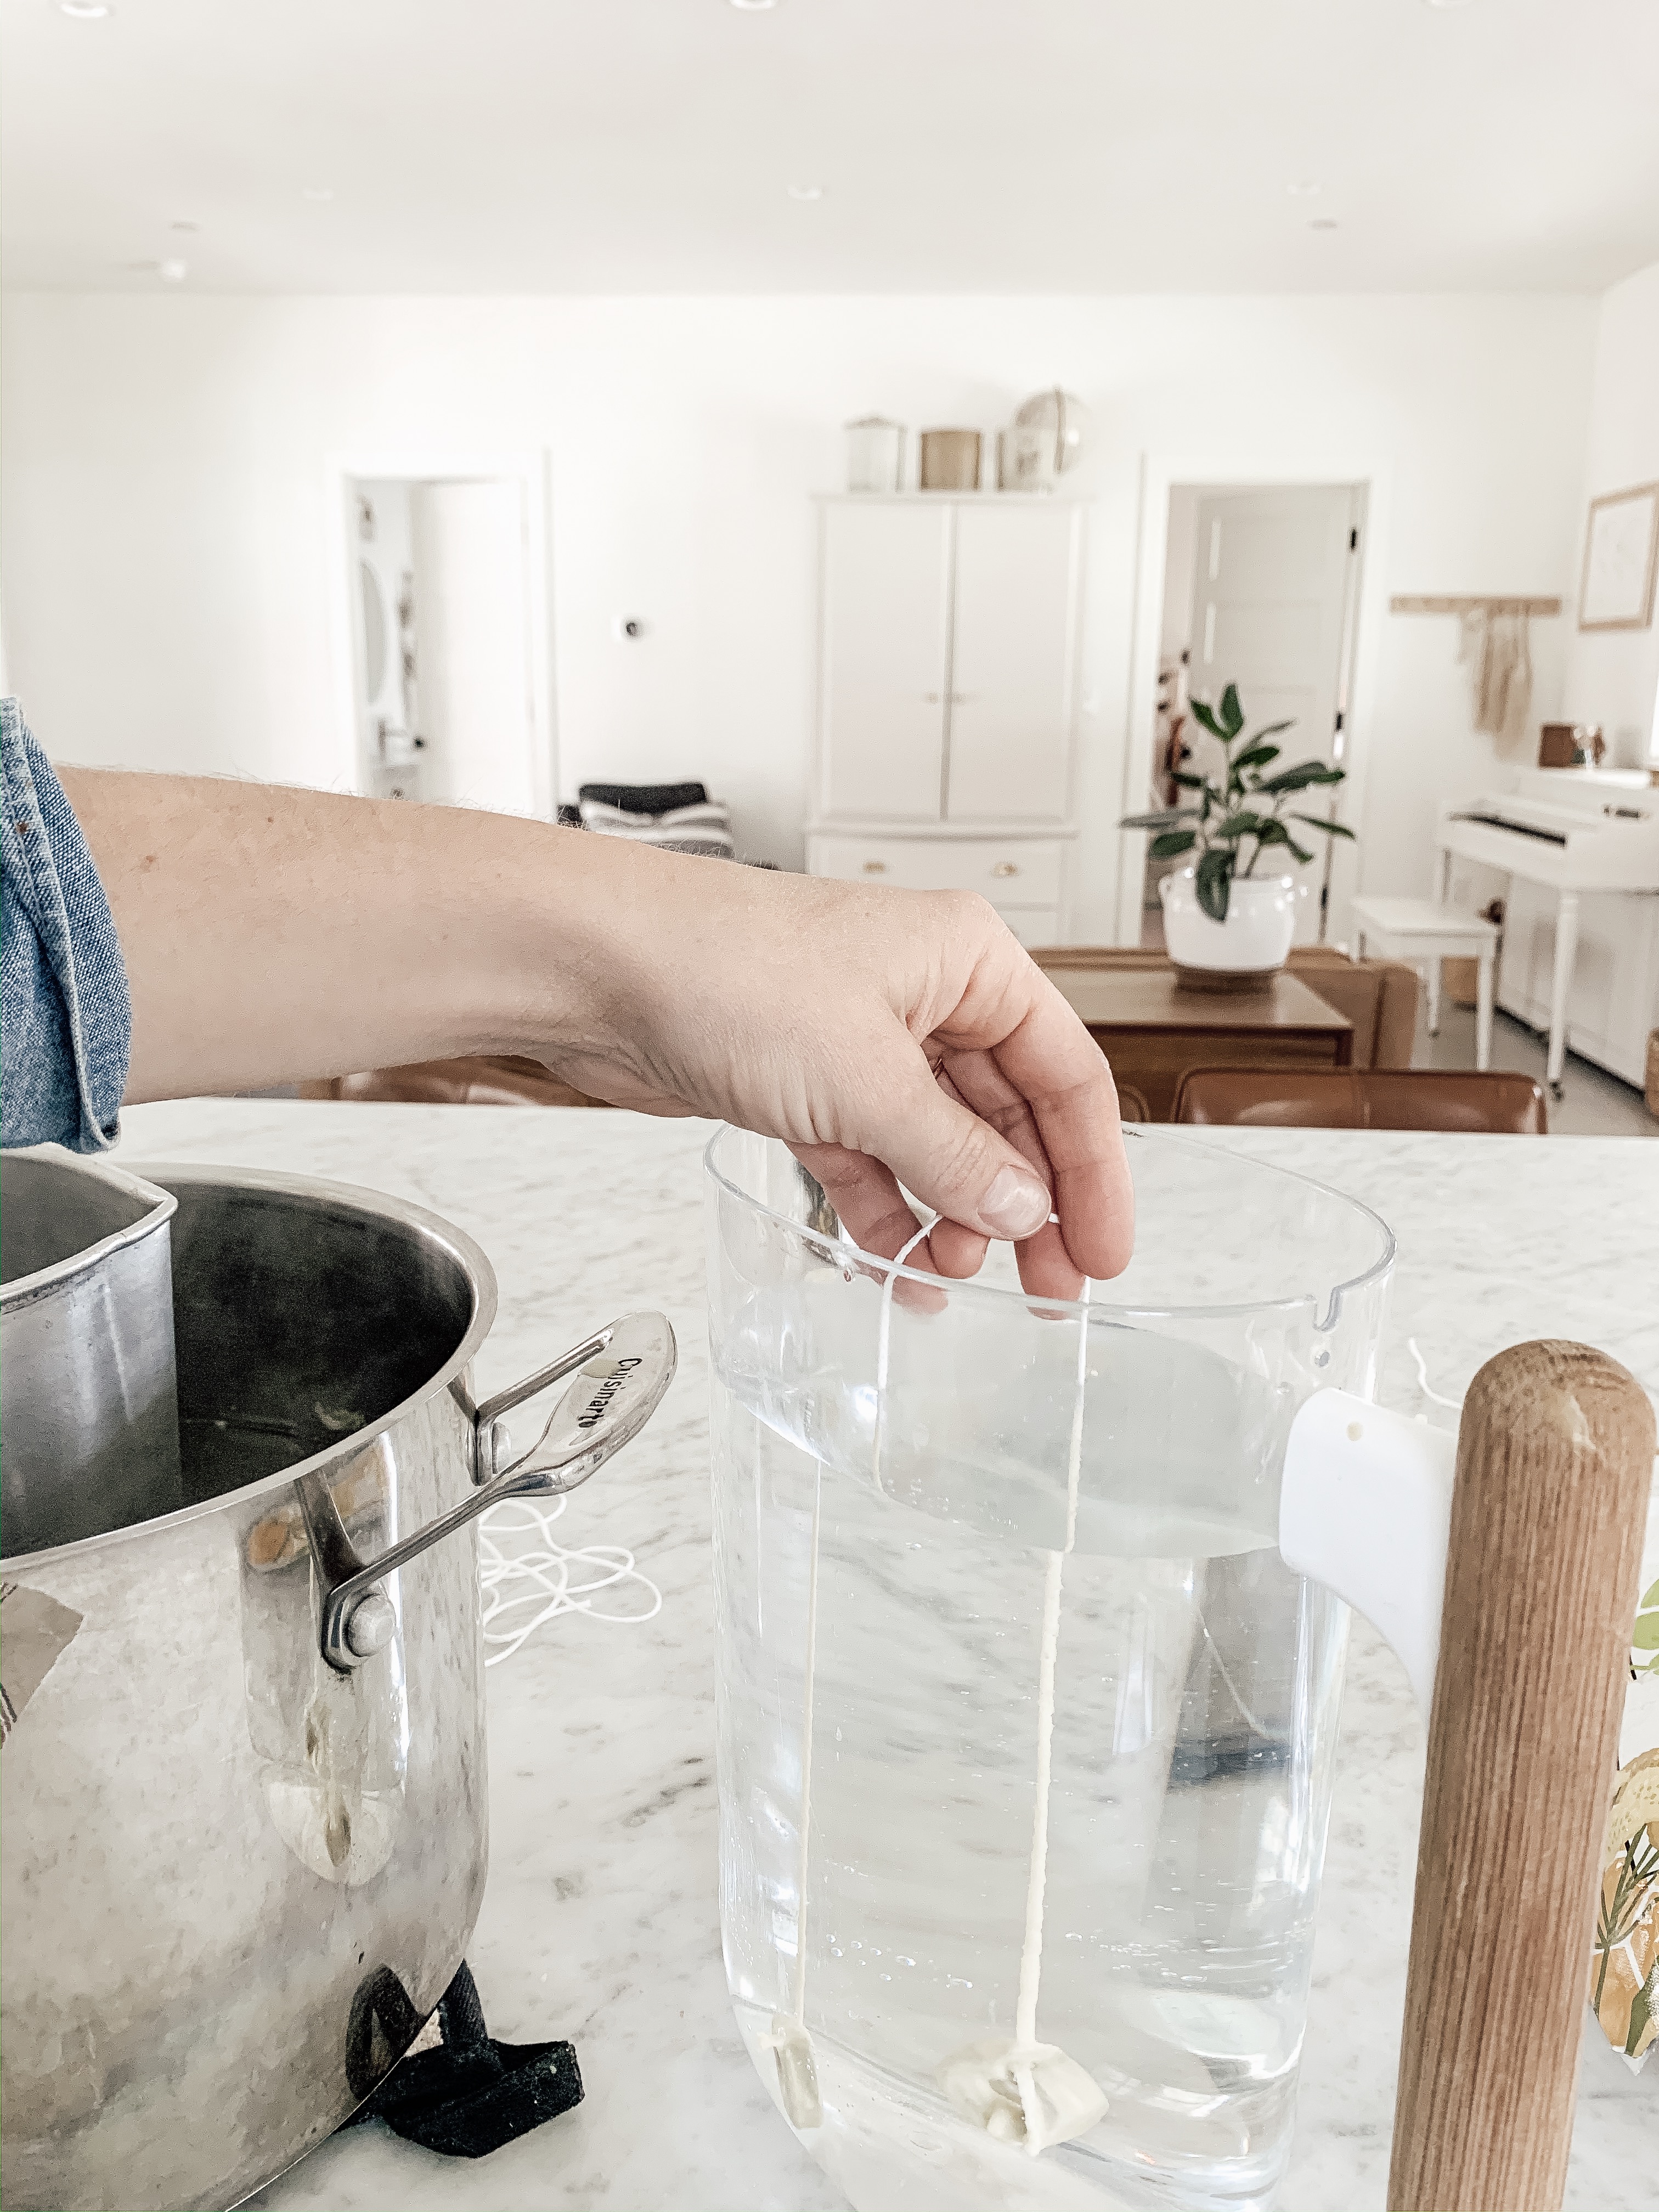
Continue to dip the wick into the hot wax and water alternately until the candles are the size (thickness) you want them to be.

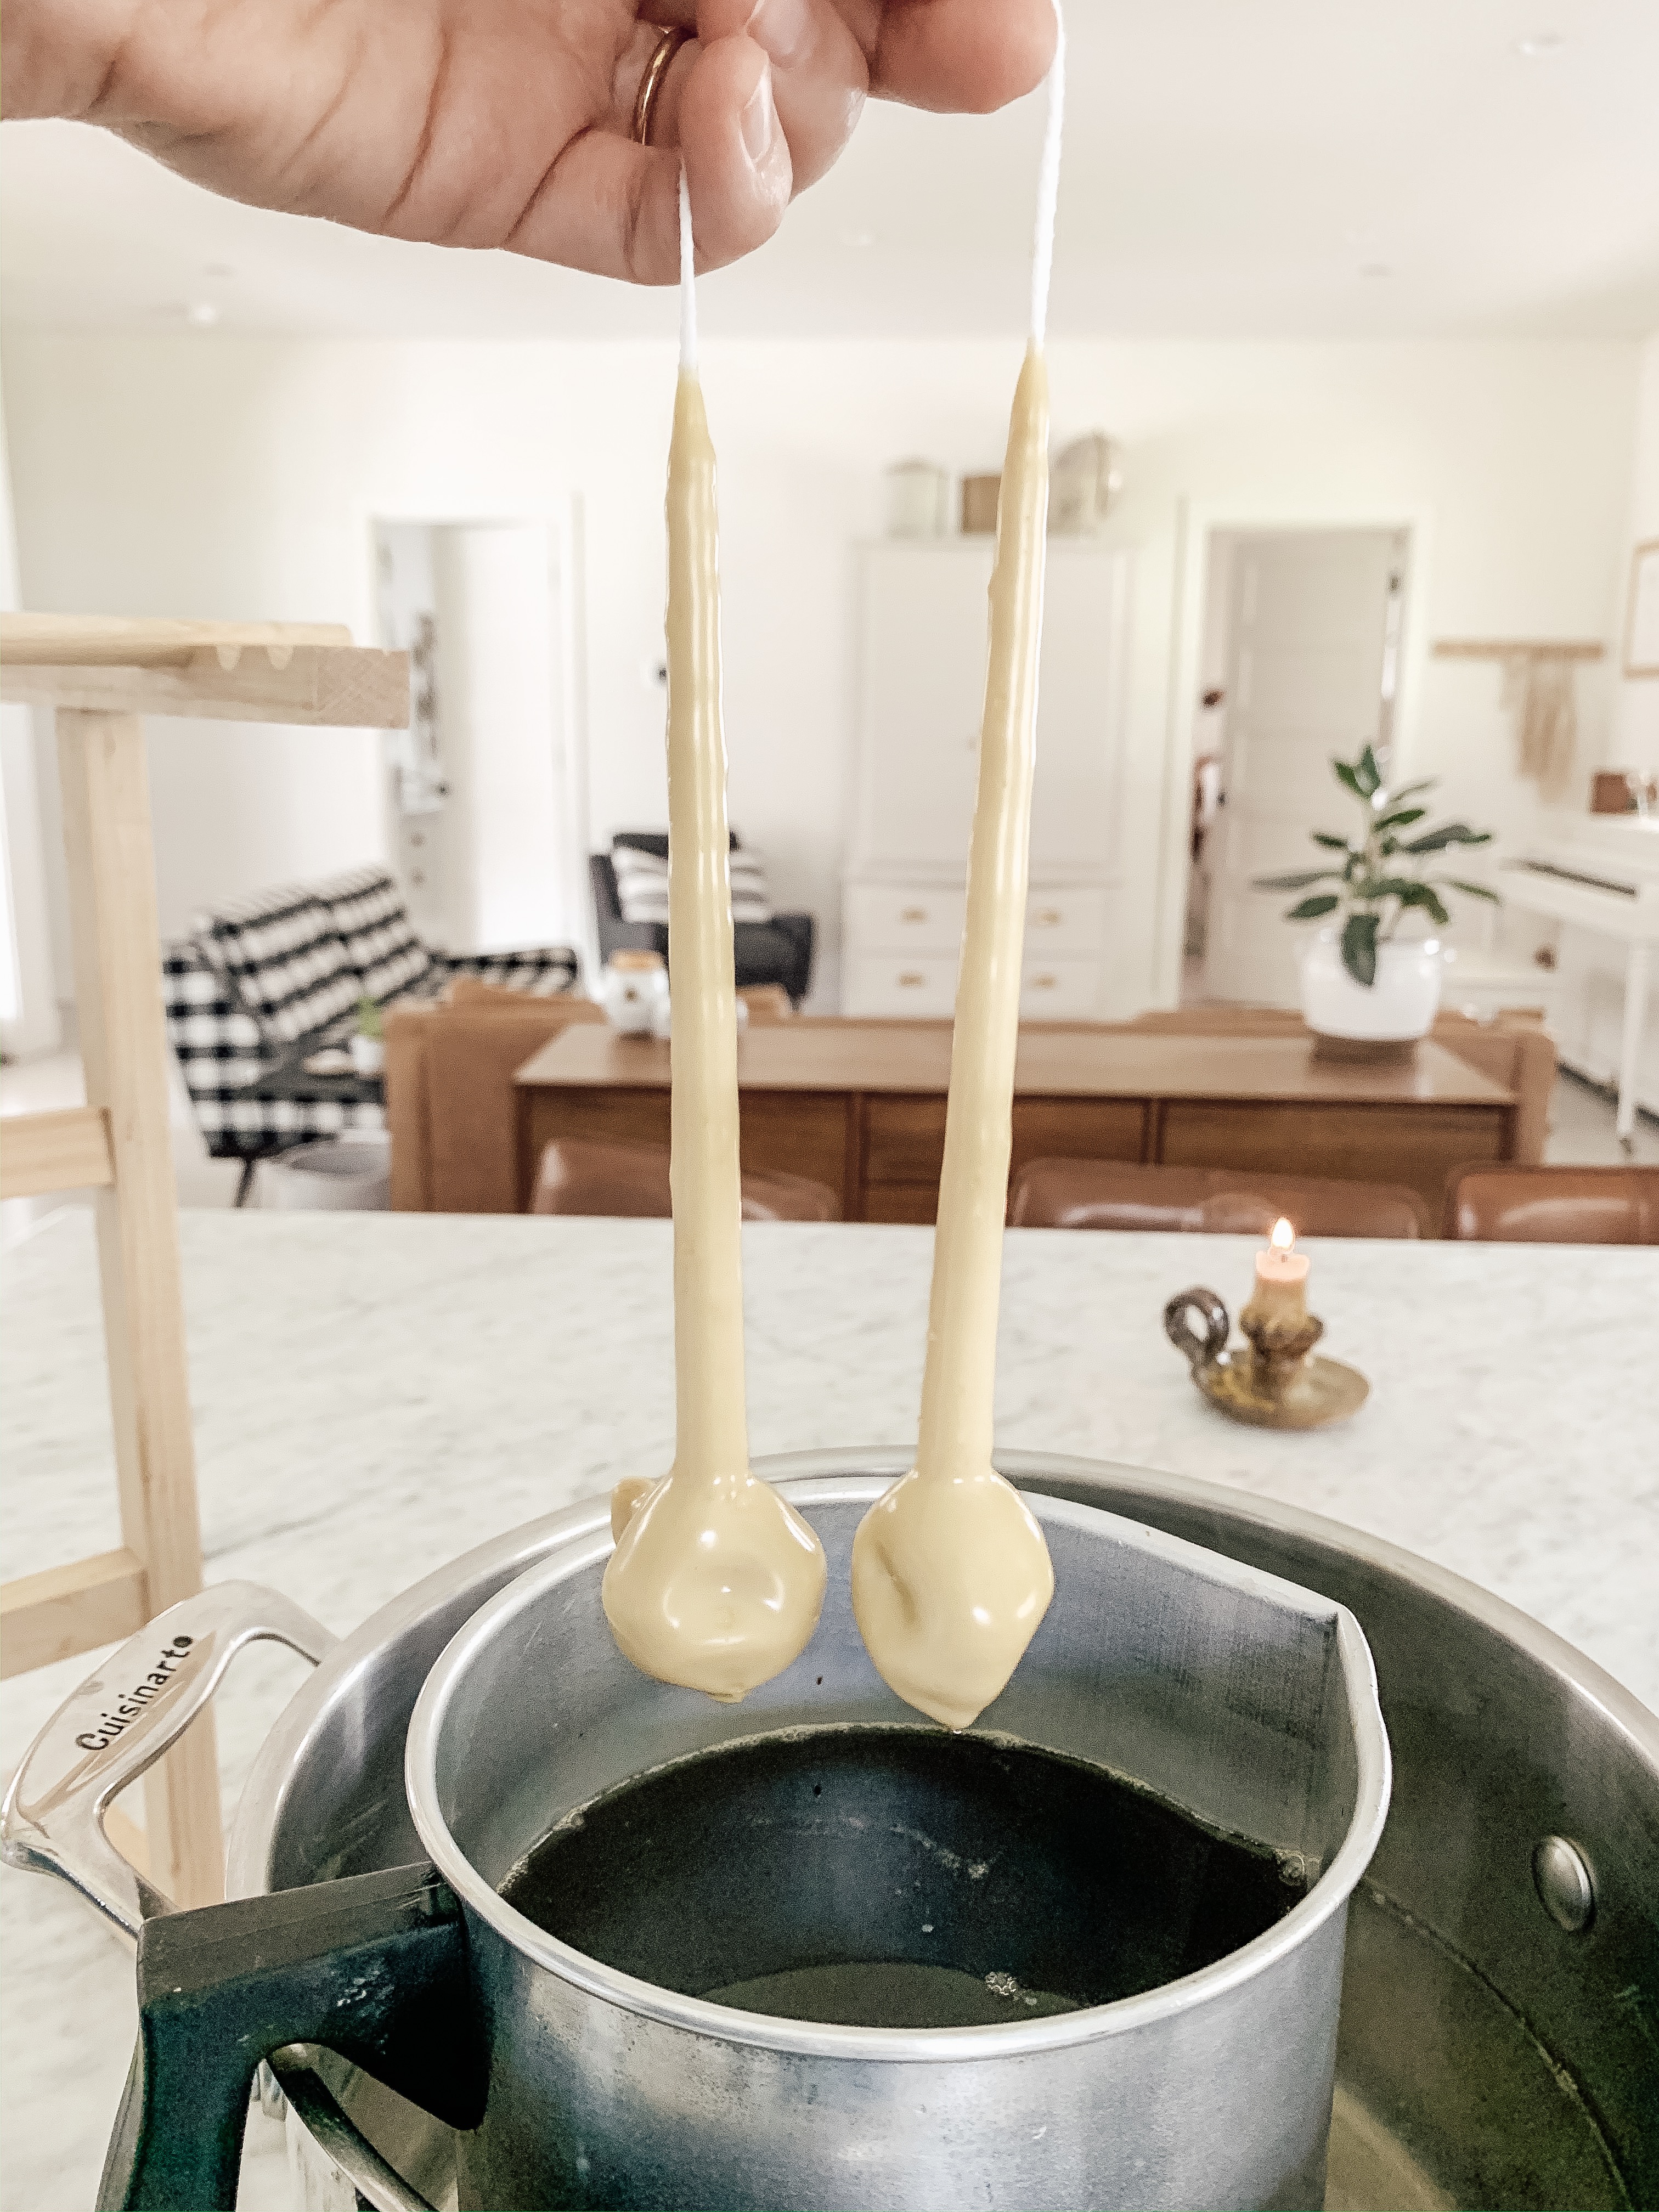
Because of the weights, you’ll notice when you dip them that they become too tall to go into the wax completely. At this time, you’ll want to let the candles go in diagonally so that each time you dip, they get covered with wax completely, all the way to the tip. Otherwise you’ll get a very funny shape!

Notice how these above won’t fit in completely. I had to tilt them to get them to cover all the way.

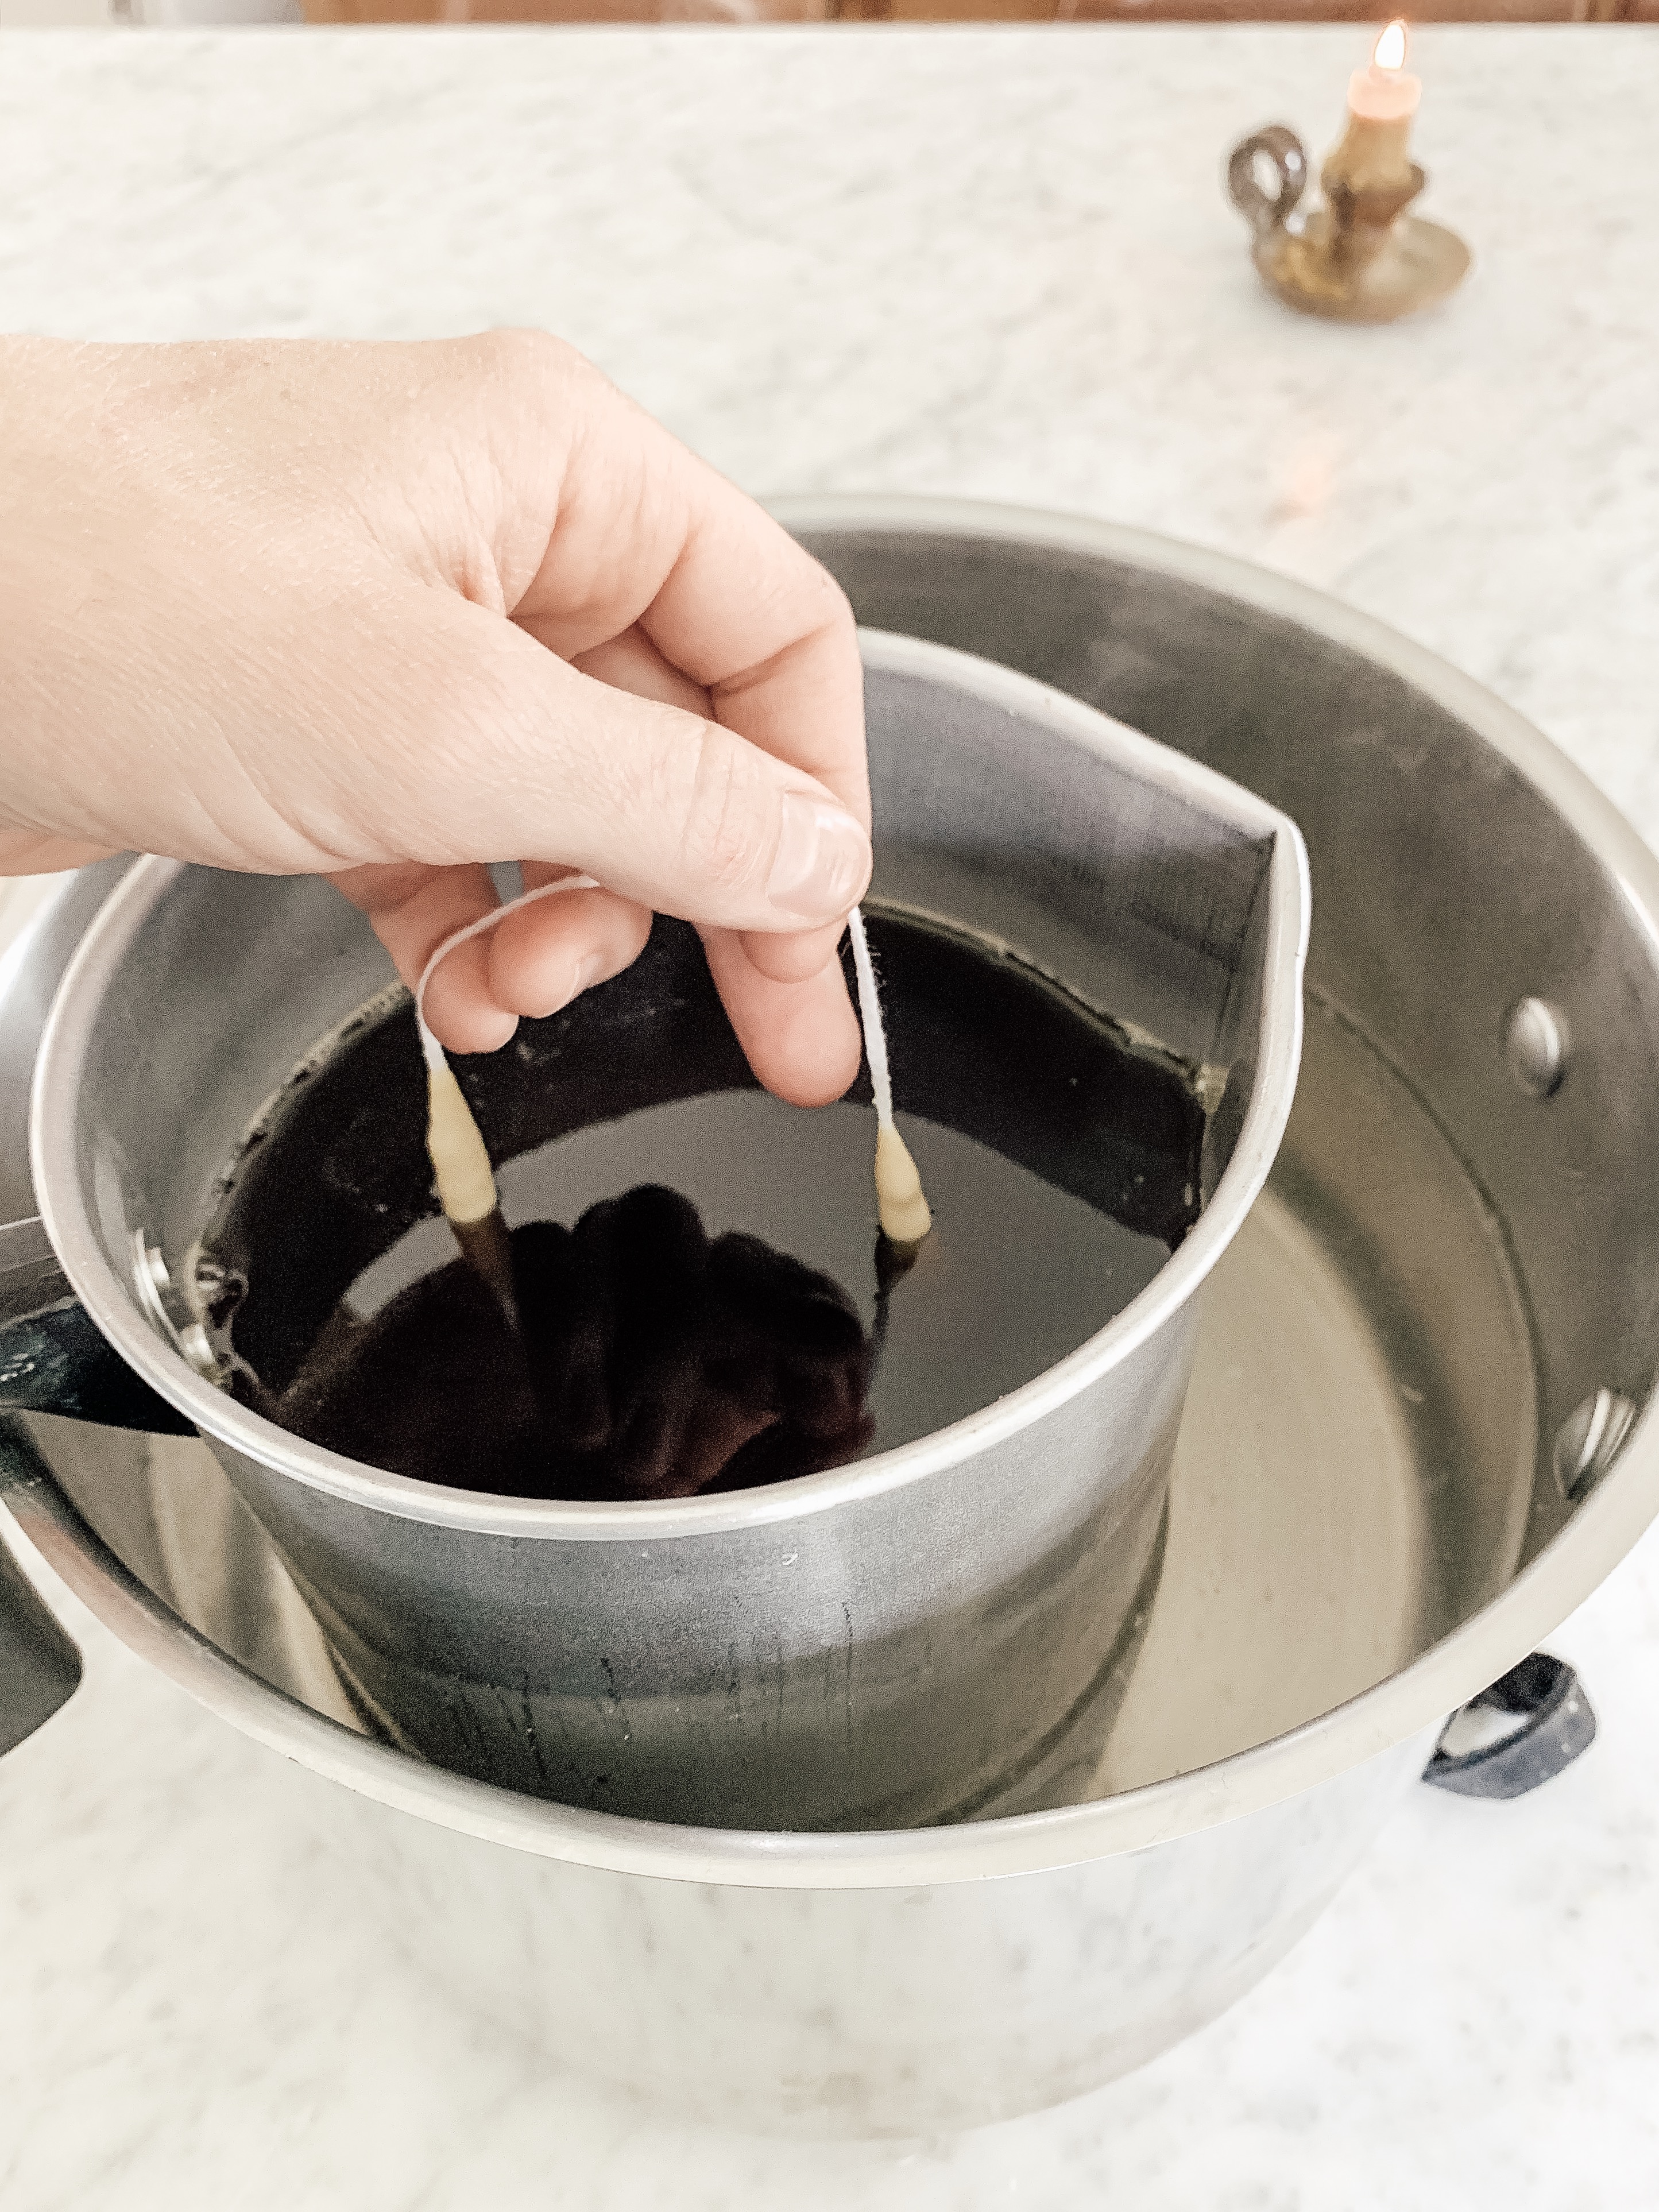
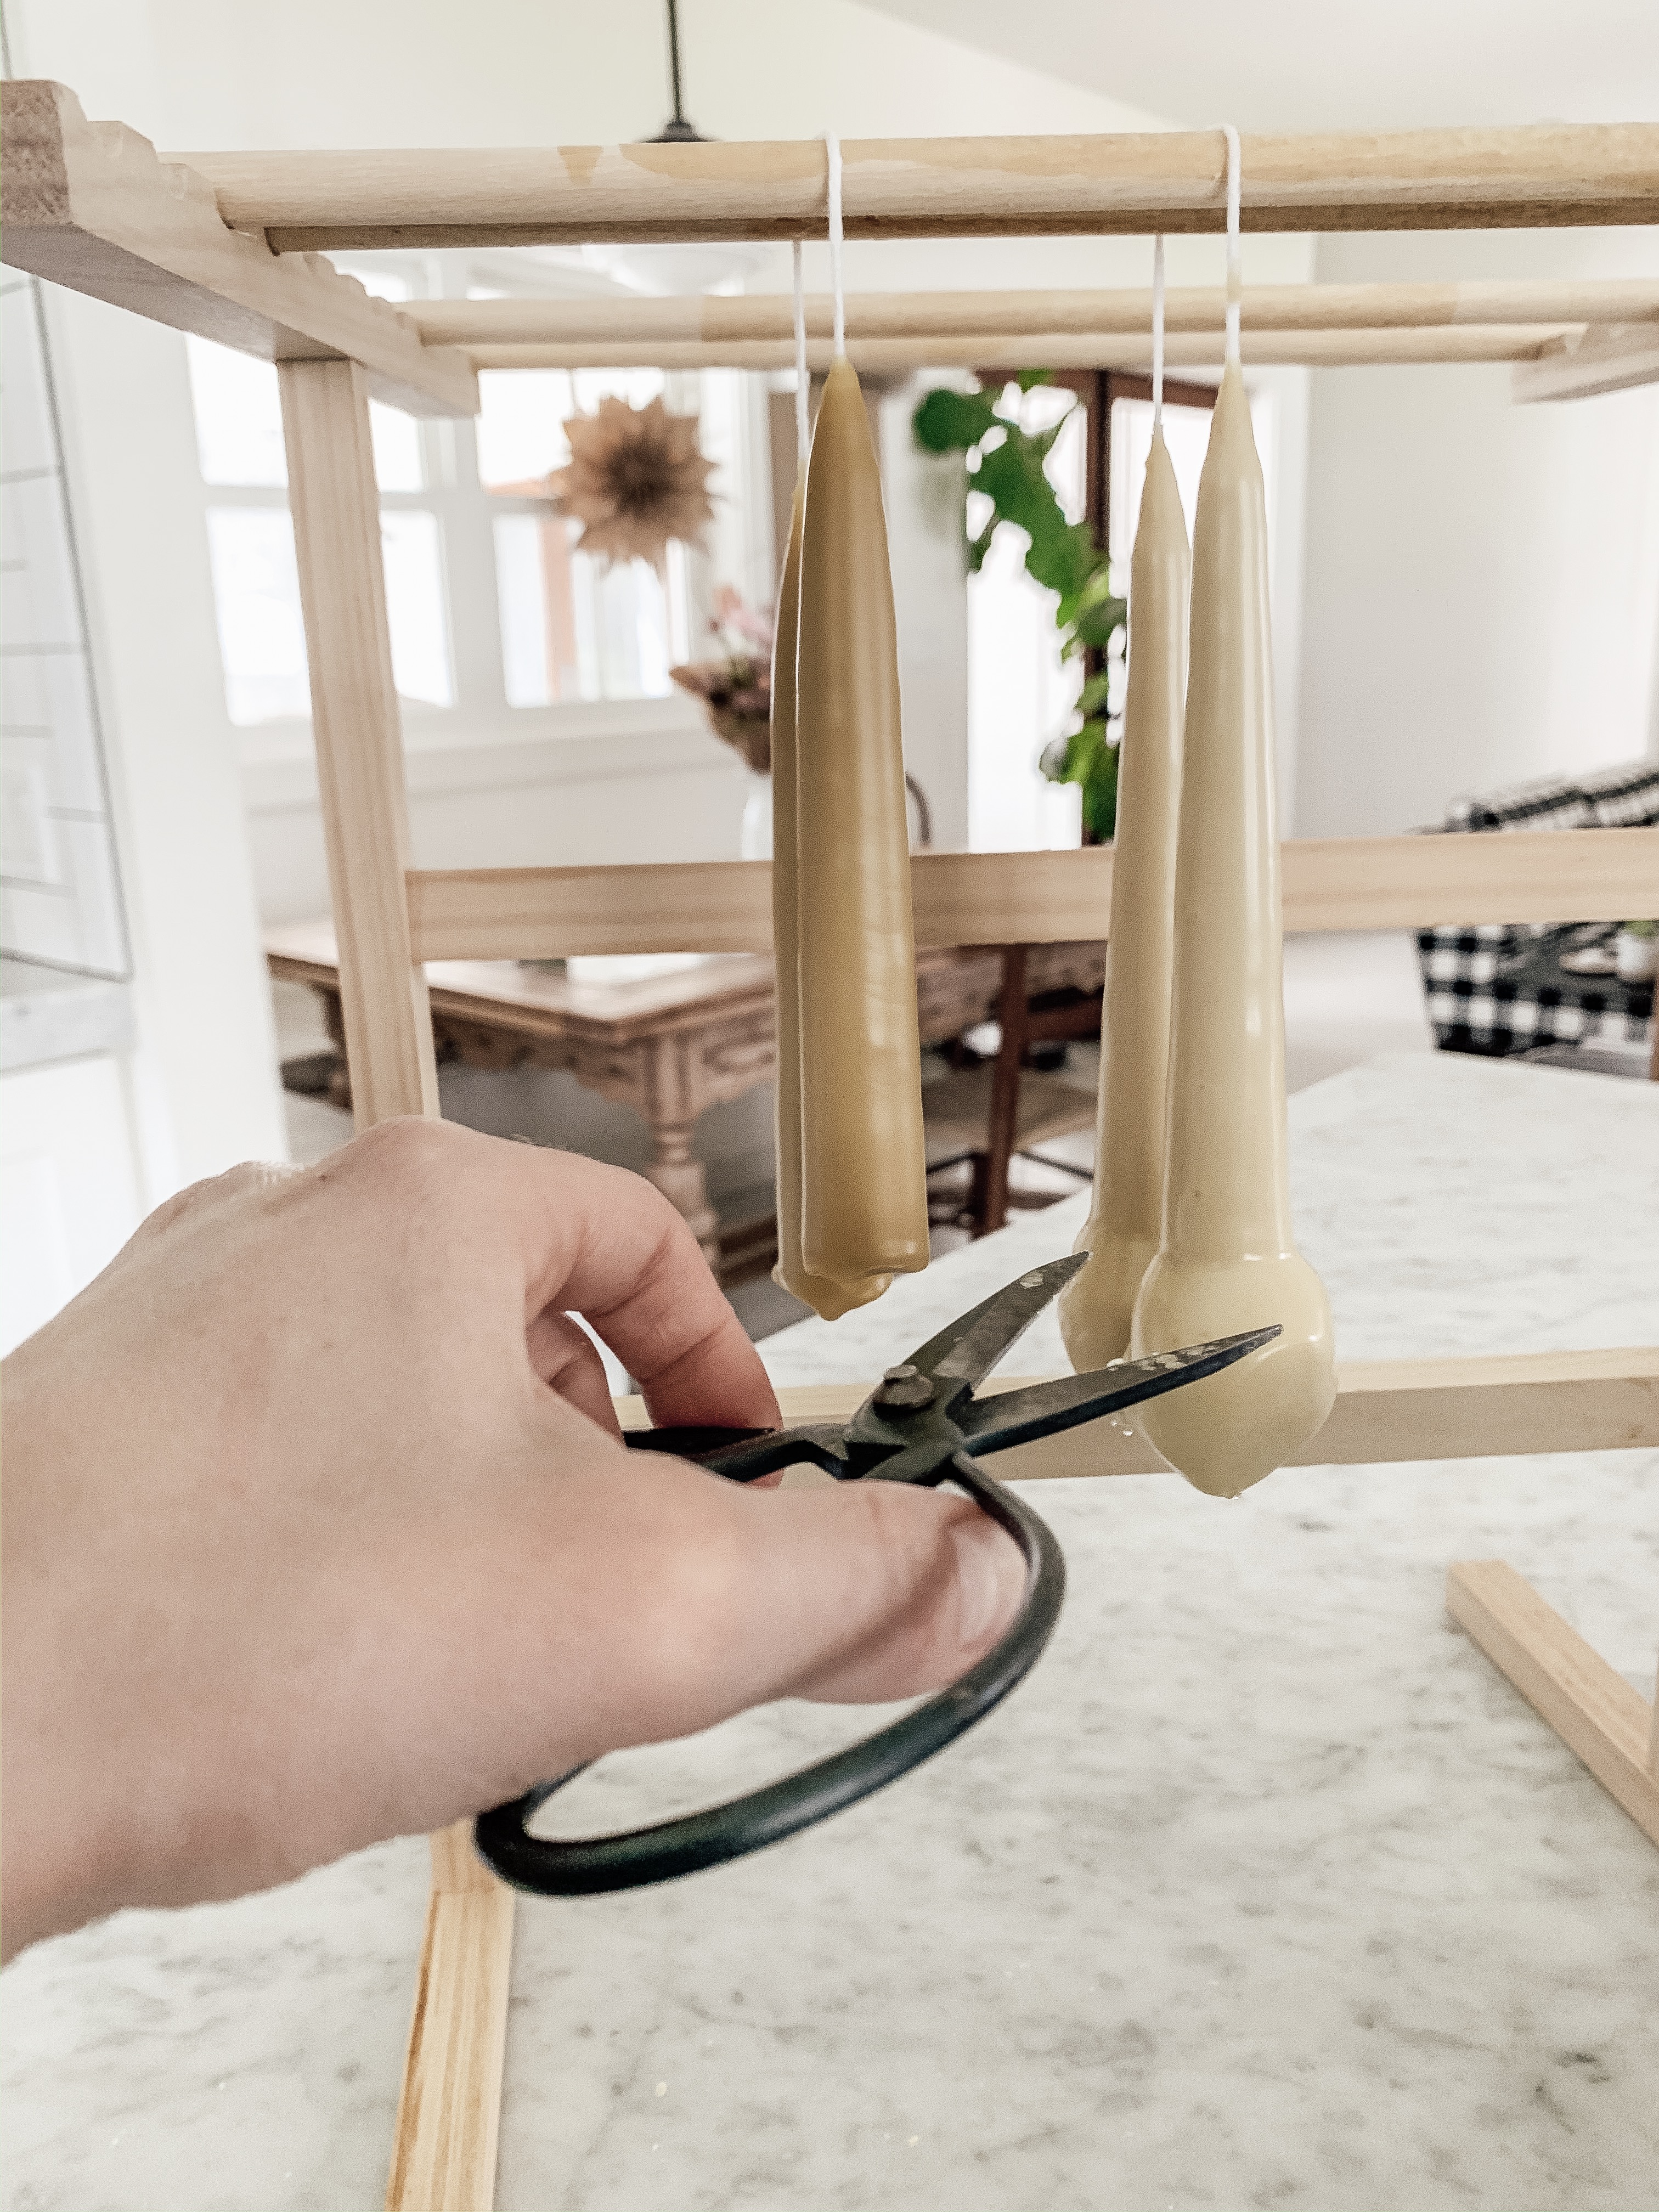
Once the candles are the size you like, hang them on the pasta dryer and carefully cut off the weights on the bottom.

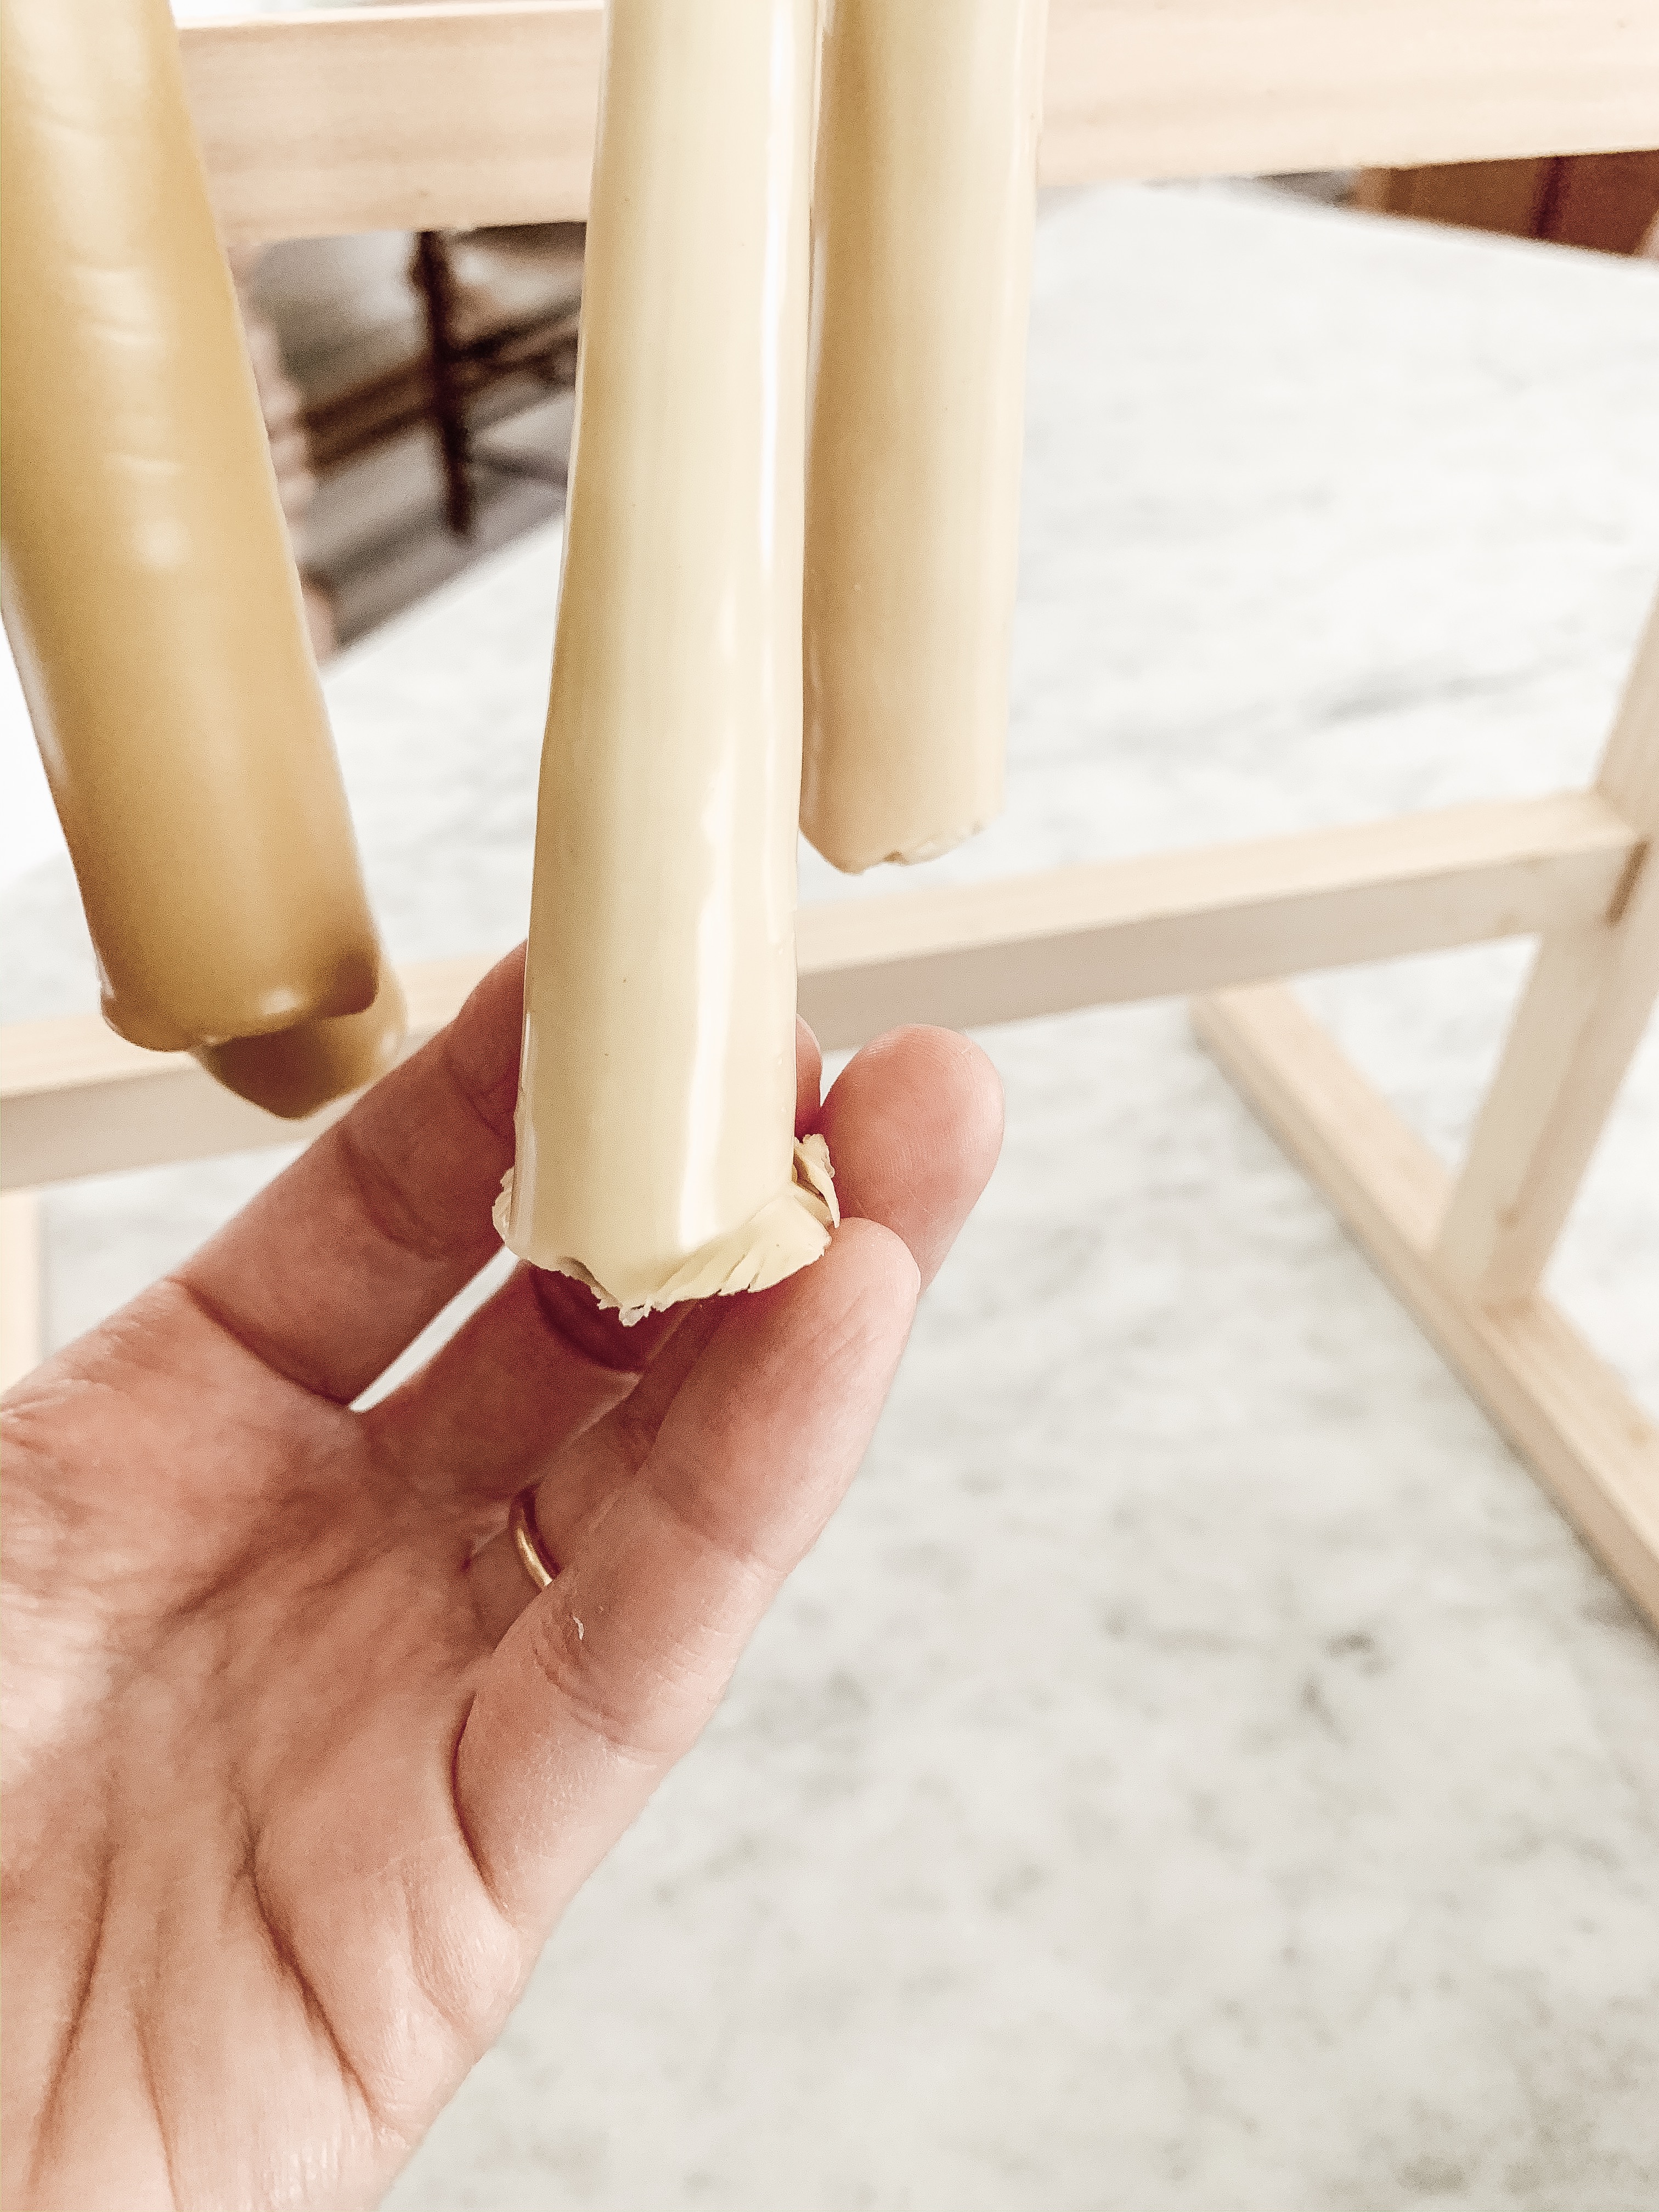
You’ll end up with a jagged edge like this. I just use my hands to take off any excess chunks and smooth it out a bit. Then dip once more in wax and water to give it a nice smooth finish. Hang them on your pasta dryer until completely hard.

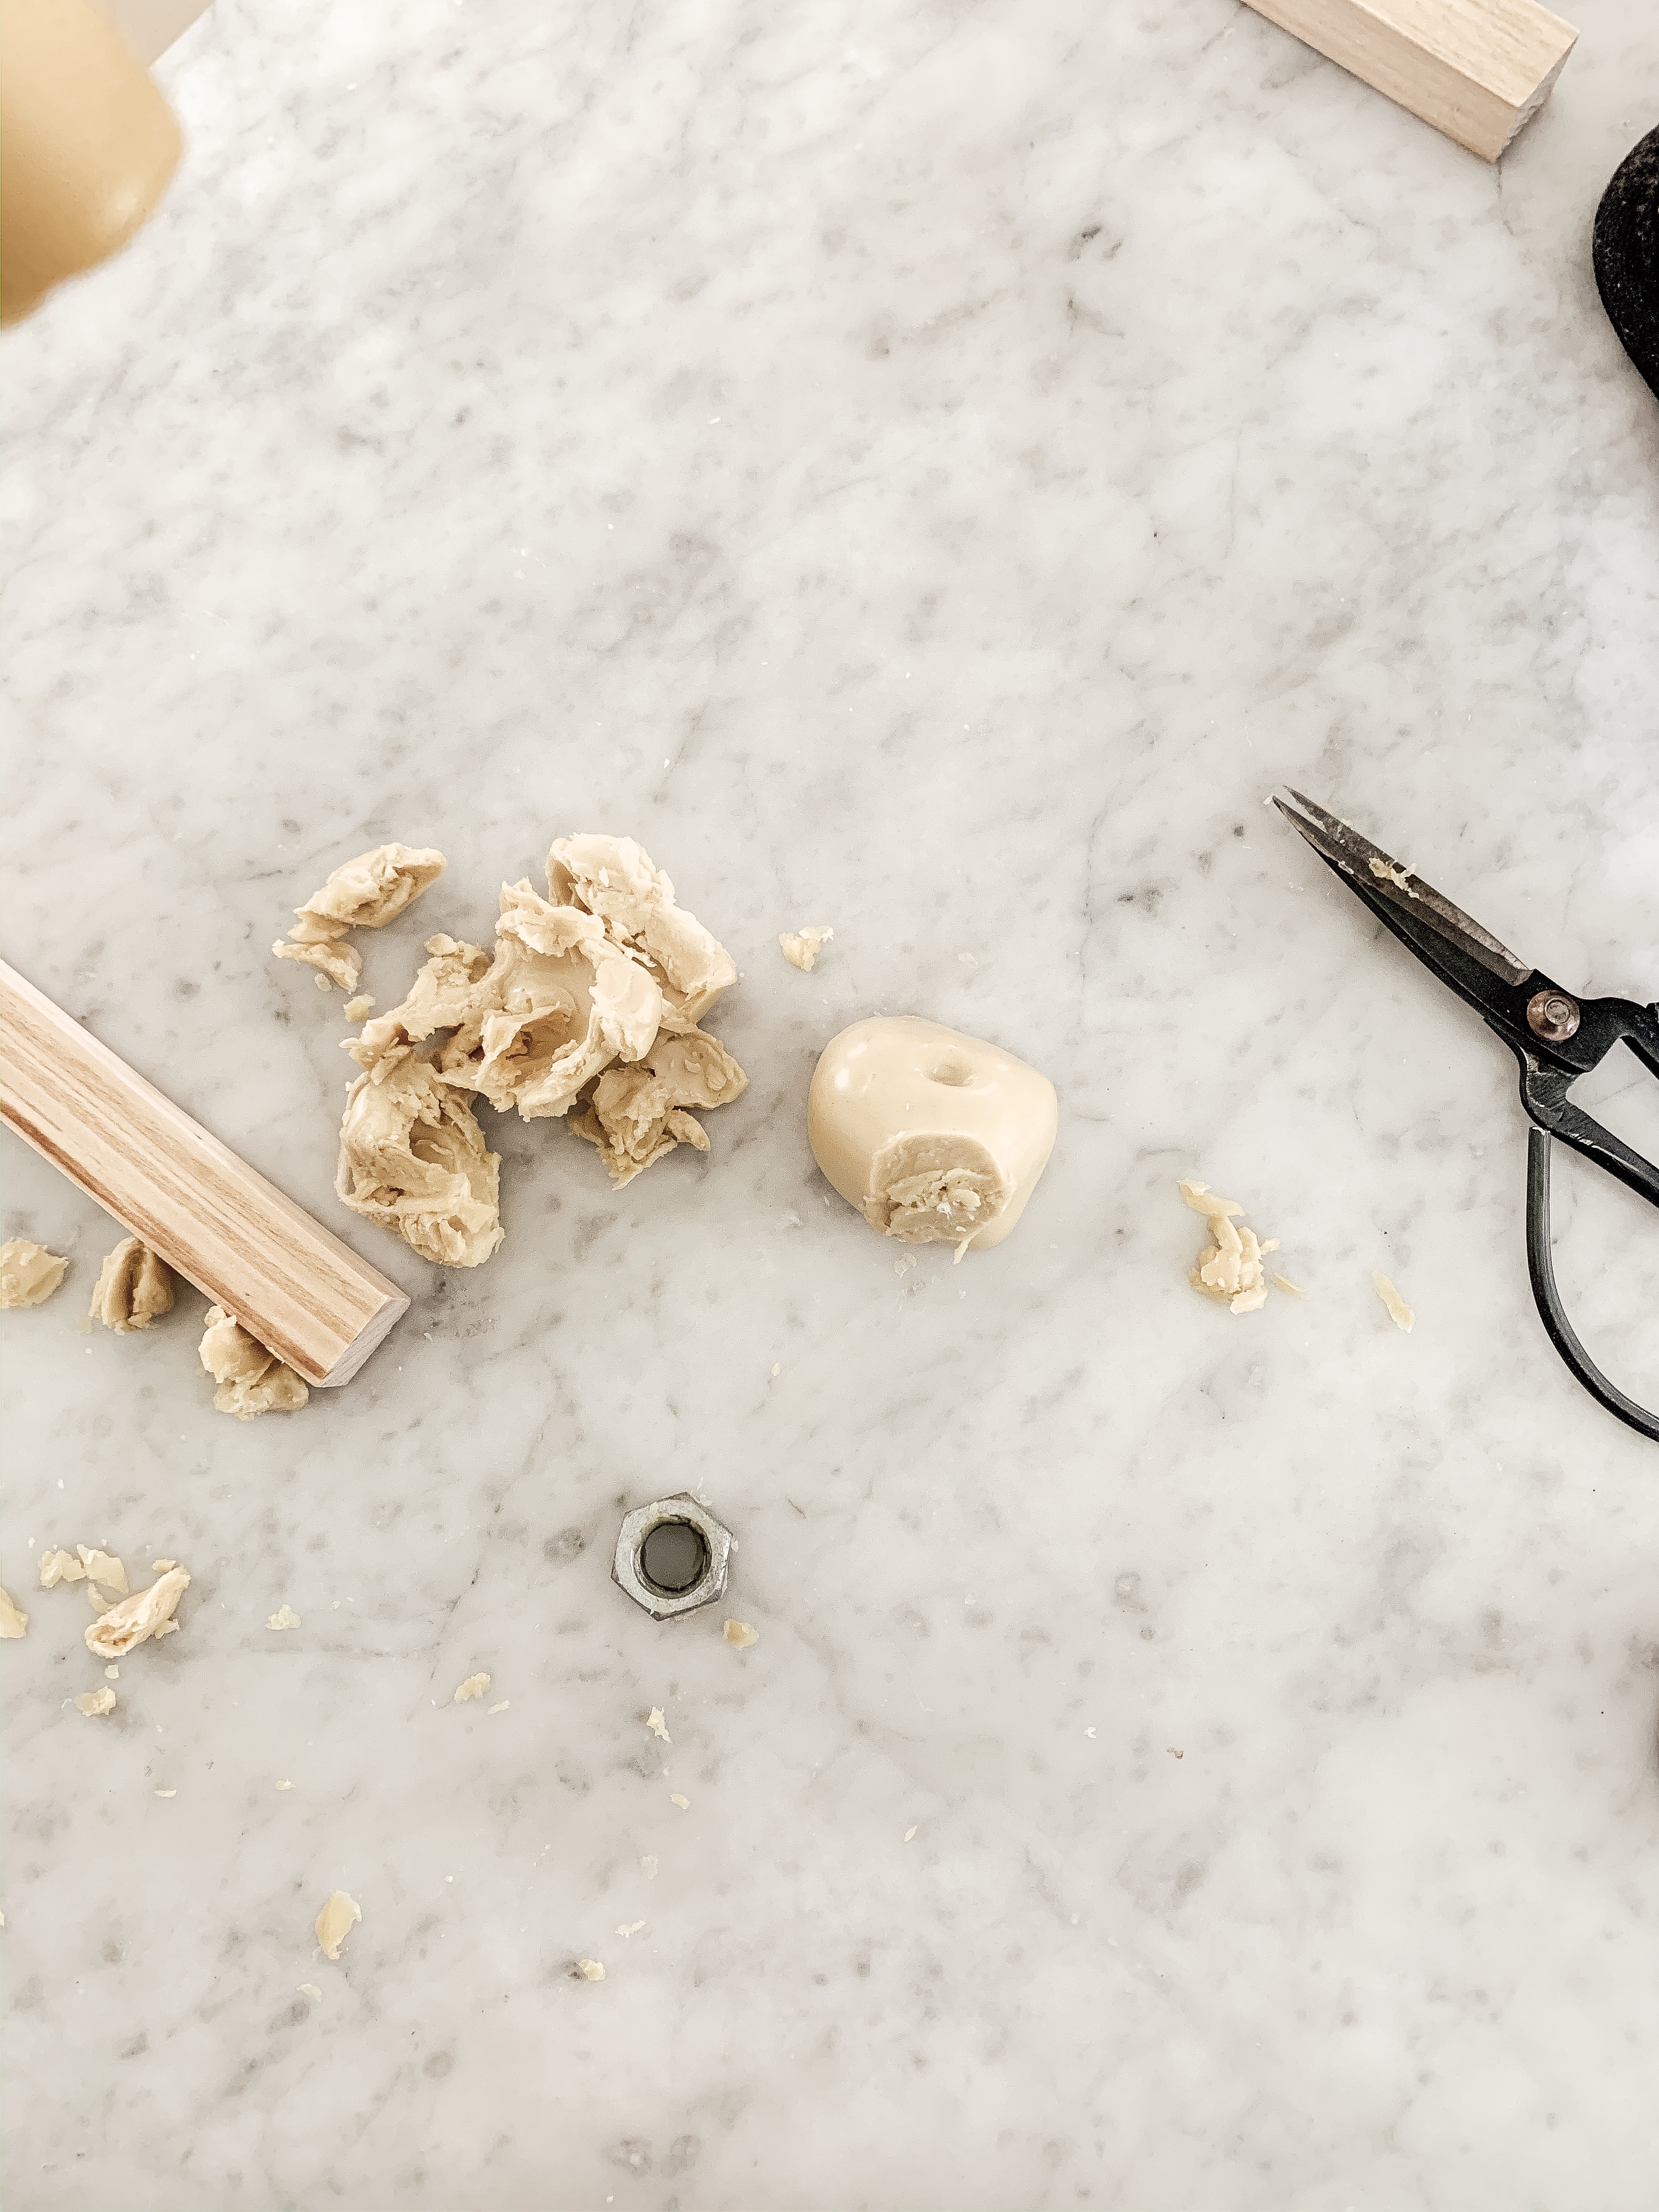
Make sure to free the weights of any wax right away while it’s soft. I make a little pile of all that wax that comes off my weights and save it to add to the wax next time I dip candles. Don’t put them into the wax right away until you are finished dipping for the day or unless you want to return the pot to the heat and melt all the scraps down. They will take time to melt.

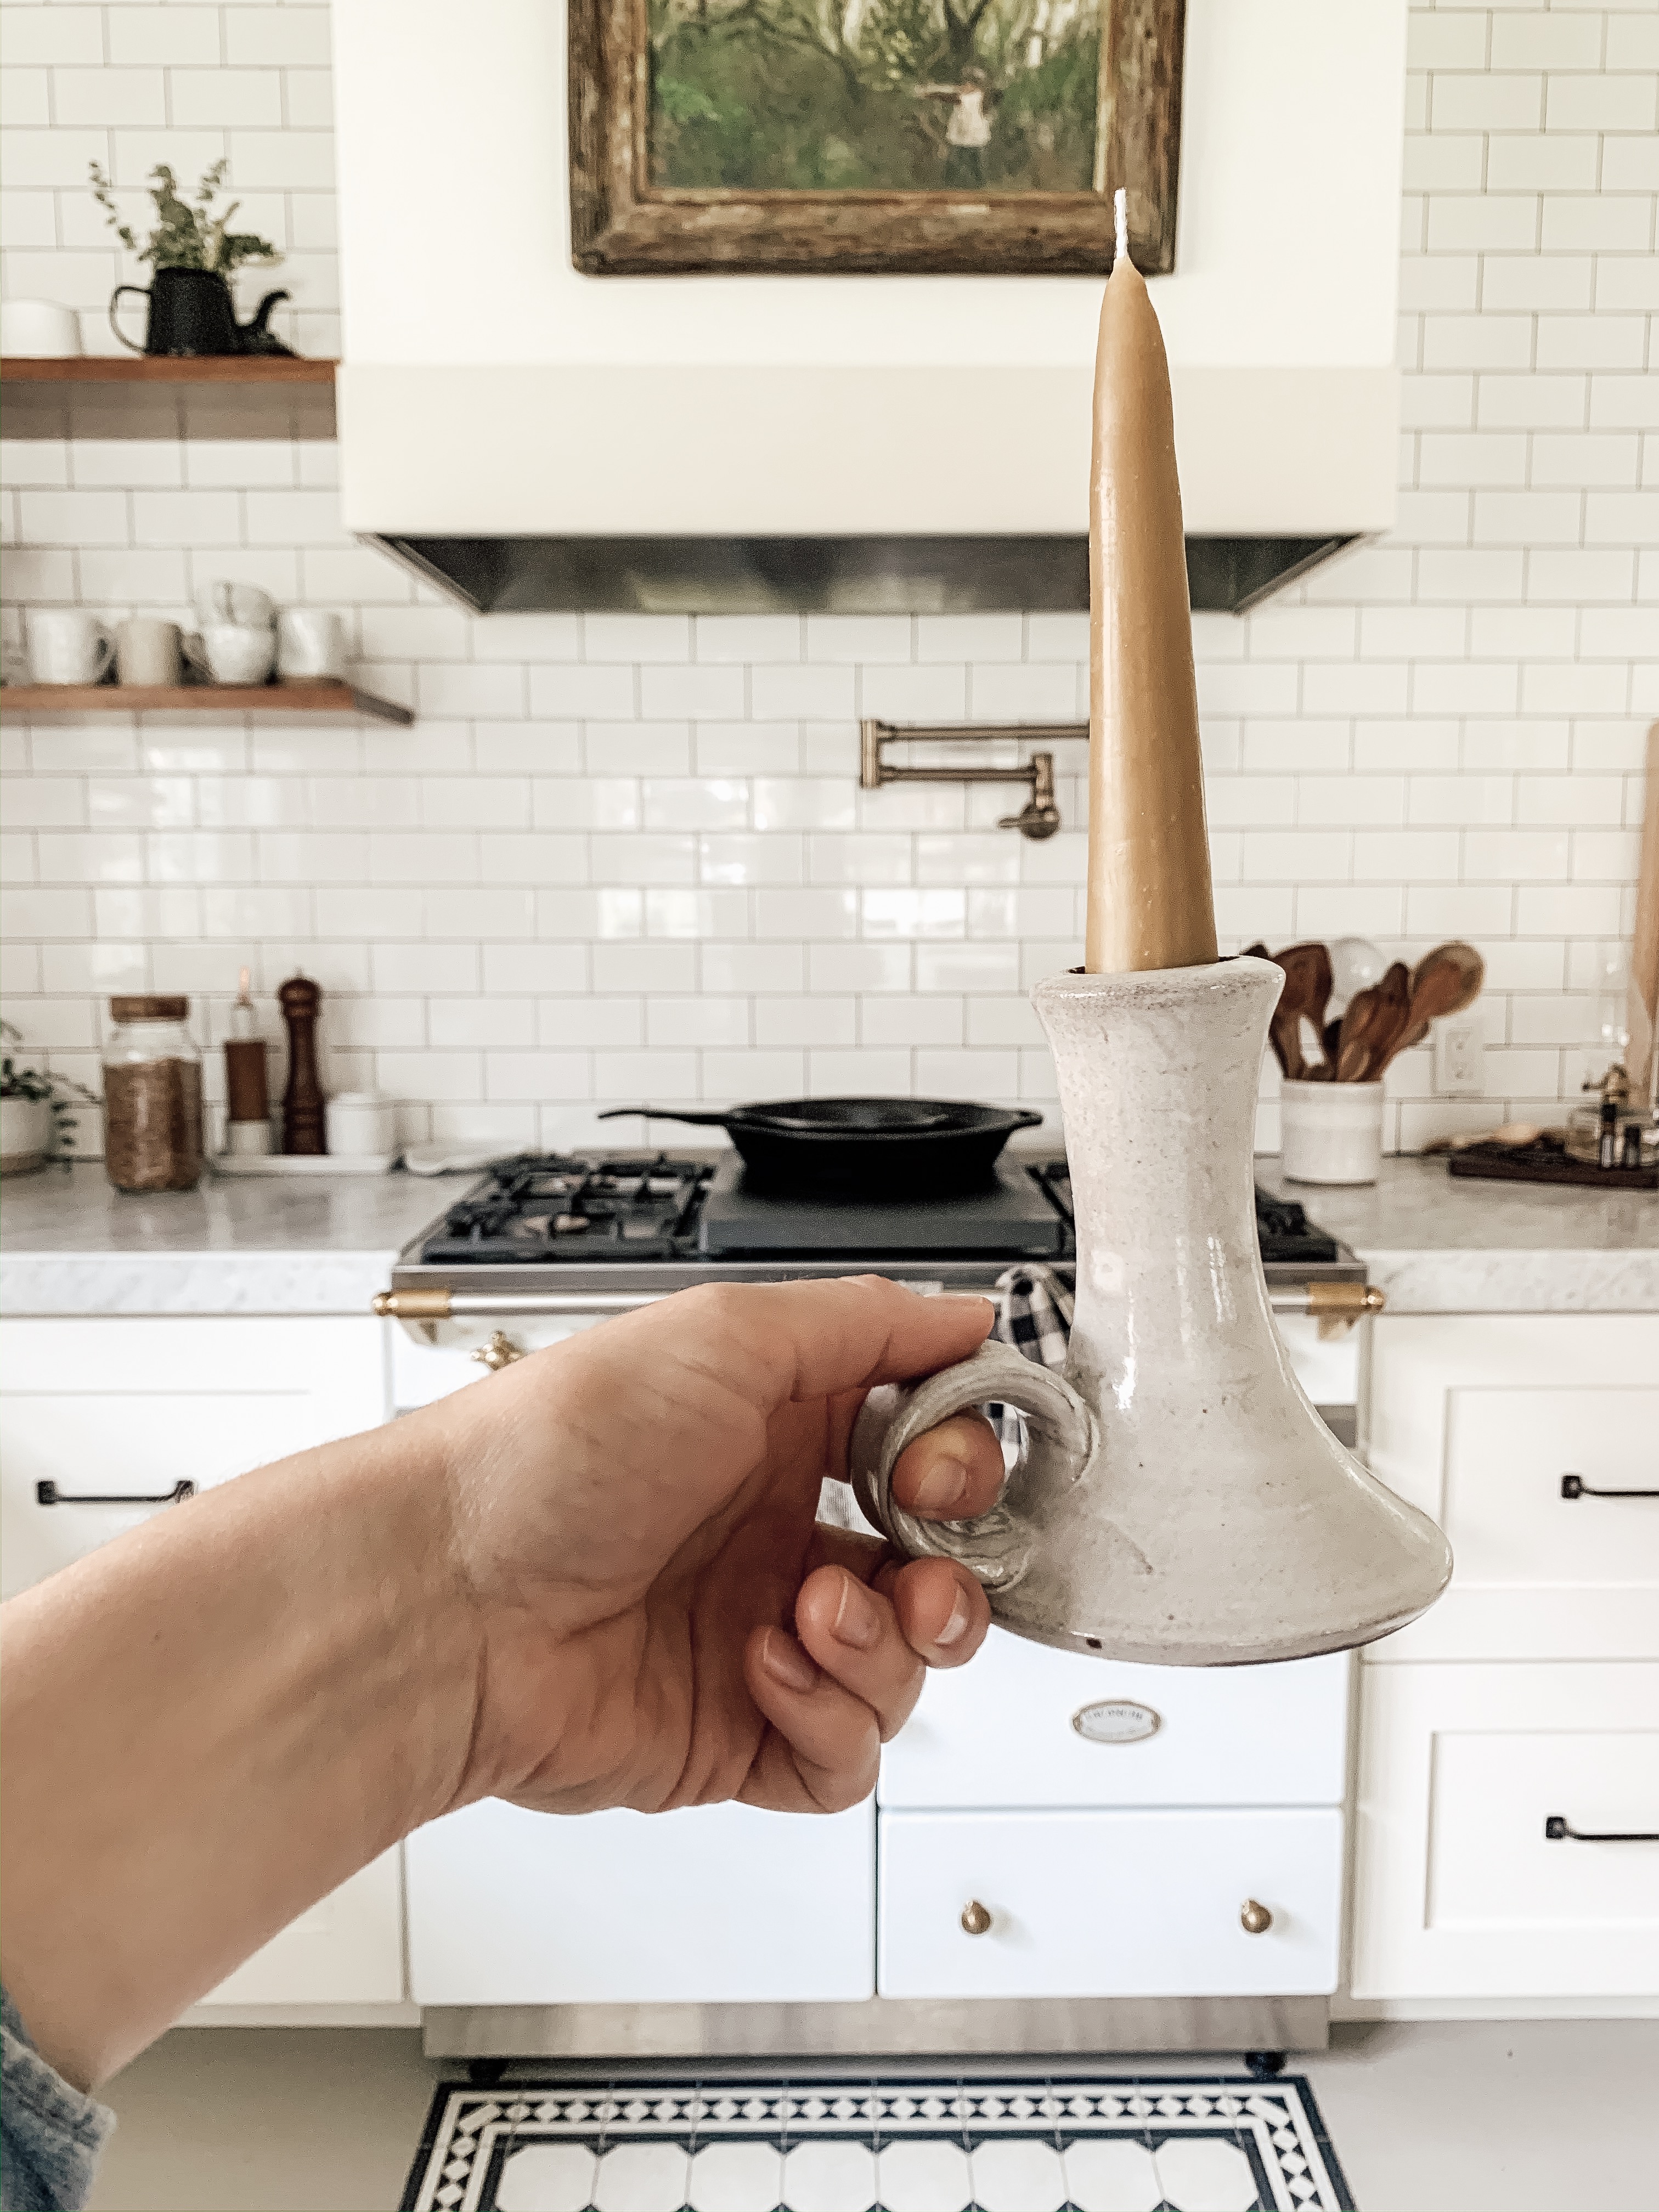
That’s it! Now you have beautiful homemade candles! I hope you make lots of them! If you do, make sure to tag @thehomegrownapple when you share on Instagram!

Share

Share
Tweet
Email
Pin
Comment
Previous
Next

Comments Cancel reply

Your email address will not be published. Required fields are marked *

Instagram Feed

This error message is only visible to WordPress admins

Error: API requests are being delayed for this account. New posts will not be retrieved.

There may be an issue with the Instagram access token that you are using. Your server might also be unable to connect to Instagram at this time.

thehomegrownapple

Homesteading, homemaking and homeschooling. Sharing all things home.

Aimee Kirk
I did research for a while last year to find out w I did research for a while last year to find out which chickens lay these beautiful chocolate brown eggs. I finally discovered that the Marans are the best breed to get. I have Black Marans but they come in a variety including Cuckoo, Silver Cuckoo, Gold Cuckoo, Black Copper, Blue Copper, Splash Copper, Wheaten, Black-Tailed Buff, White, Black, Blue, Splash, Birchen and Columbian.

If you’re thinking of getting chicks this spring and you want some beautiful chocolate brown eggs in the mix I highly recommend! They’re a joy sparker for sure!
I added a little gallery wall over the weekend. I’ve never actually had any wall space to do something like this before in our little house. We just either had doors or windows on all the little walls 😂 And can you see the baseboards! When your husband is doing things himself and already works two busy jobs things just go slower. But we’re saving money and it’s getting done little by little. 

I love the artwork I added from the big kids here. Scroll through to see them close up. Warren did the sketch of the fish and Amelia did the embroidered bicycle 🫶🏻
It’s a cold and story first day of February and It’s a cold and story first day of February and this morning the whole property was covered in a dense fog. A nice way to start off the cozy month of February if you ask me! 

I’ll just be over here lighting all of my favorite candles in every room. It’s making it smell so good in the house.
 
These are my favorite candles for ao many reasons!
Nontoxic, 80 hours of burn time, they burn all the way down (they don’t make that hollow cylinder like some candles make down the middle ya know?), lead free cotton wicks, 100% natural soy wax from domestically grown soy beans, premium fragrance oils that won’t give you a headache and aren’t too strong, paraben, paraffin, dye, phthalate and cruelty free. 

Just so many reasons to enjoy these candles in your home! 

Comment “candles” and I’ll send you a link to them with my discount code!
I found these pretty blue floral plates a while ba I found these pretty blue floral plates a while back and knew exactly where I wanted to hang them. I had never hung a plate before and wanted to do the least damage to my newly painted walls. When I found these hanging discs made in England I bought them right away. I was so excited to try them and they ended up being so easy! 

All you do is wet them which activates a glue on the back. Then, adhere them to the back of your plate and let them dry overnight. Once they dry they’re ready to be hung up! If you ever decide you don’t want them hung anymore, just wet the back again and the glue will get released as it softens. 

Comment “plate hangers” below and I’ll send you a link to these discs along with a pretty collection of blue plates!
I can’t believe this summer will be 4 years host I can’t believe this summer will be 4 years hosting guests at our barn loft Airbnb! Creating this little space into a retreat for people to come enjoy has been so rewarding. We’ve had over 240 smashing reviews by guests from all over the world and I’m so excited to continue sharing this special space. It’s been such a joy to meet so many of you too! Comment “airbnb” below if you’d like me to send you the link  to check it out. And don’t forget to DM me and ask about my insta friends discount!
Follow on Instagram

About Us

Hi, I'm Aimee! I am a wife, mother, kindergarten teacher and blogger. Here on my blog you will follow my family through our journey of homesteading our 6 acre apple orchard , every step of the way. From learning how to care for the orchard, planting new crops, building a house from the ground up, and our family lifestyle in between. Thanks for visiting!

Never Miss A Post

Recent Posts

  • Felted Soap August 13, 2021
  • Cloth Napkin Tutorial July 10, 2021
  • Pancake Recipe February 2, 2021

The Homegrown Apple | Site design handcrafted by Station Seven